Getting started with custom objects
Learn about custom objects, which allow you to store and associate multiple properties to a single "object." Custom objects enable you to map diverse, multi-relational data concepts into Klaviyo that can’t be stored using profile properties. You can then use custom objects in your messages, segments, and more.
How are custom objects different from profile properties?
Profile properties are a great way to store simple information. For instance, if you have a favorite color property, you can store each customer's favorite color.
But what if you want to need more data or multiple versions of that property? A great example is for pets. You can use profile properties to store things like name, age, breed, but those can only be used once per profile.
If someone has multiple pets, you can instead use custom objects. That way, Fluffy the Great Dane has his own digital ID card for his name, age, weight, etc., and Cheeks the hamster has the same information, but with (very) different answers.
Example use cases
Below are some examples that demonstrate how custom objects are flexible in the data you can store in Klaviyo.
Appointment
If you are a business where customers can schedule appointments, you can use an Appointment object to store appointment data for profiles.
Within each object record for the Appointment object, some examples of data you may want to include are:
- Appointment ID
- Appointment date
- Appointment person (e.g., specific doctor, instructor, etc.)
- Appointment location
- Appointment type
Profiles can have multiple object records if they have multiple appointments, and you can use this object data to create segments and send personalized messages and flows.
Subscription
If you are a business where customers can sign up for a subscription, you can use a Subscription object to store subscription data for profiles.
Within each object record for the Subscription object, some examples of data you may want include are:
- Subscription ID
- Subscription product
- Subscription price
- Subscription status
- Next billing date
Profiles can have multiple object records if they have multiple subscriptions, and you can use this object data to create segments and send personalized messages and flows.
Reservation
If you are a business where customers can book reservations, you can use a Reservation object to store reservation data for profiles.
Within each object record for the Reservation object, some examples of data you may want include are:
- Reservation ID
- Reservation date
- Reservation location
- Reservation occasion
- Reservation guest count
Profiles can have multiple object records if they have multiple reservations, and you can use this object data to create segments and send personalized messages and flows.
Pet
If you are a business that serves pet owners, you can use a Pet object to store data about profiles’ pets.
Within each object record for the Pet object, some examples of data you may want include are:
- Pet microchip ID
- Pet name
- Pet type (e.g., dog or cat)
- Pet breed
- Pet birthday
Profiles can have multiple object records if they have multiple pets, and you can use this object data to create segments and send personalized messages and flows.
Account limits
The object limits for your account depend on your account's profile limits and whether you have an Advanced KDP plan. At a minimum, access to this feature requires a paid email plan or an Advanced KDP trial, which you can request through your CSM. If you are operating within an account family, your limits will reflect those of an Advanced KDP plan. For more on billing, see how shared billing works in Klaviyo.
Custom objects have 3 sets of account limits:
- Object limit
Total number of objects that an account can have. - Object property limits
The number of properties an account can have per object. - Object record limits
The number of object records allowed for an account.
The number of available objects and object records are based on the total number of active profiles across all your accounts. Record limits are shared across all accounts, while object limits apply to each account separately.
For example, if you have an account family with 5 child accounts where each account has 100,000 active profiles, your total active profiles equal 500,000. As shown in the chart below, accounts with over 400,000 profiles have an object record multiplier of 10. As a result, these accounts can store a combined maximum of 5 million records (500,000 x 10). This means you could have 1 account with 3 million records so long as the remaining 4 accounts have fewer than 2 million object records combined. As for the number of objects per account, since the combined profile count is over 400,000, each account can have up to 5 objects.
If you are on an Advanced KDP plan, the object record multiplier will be based on the total number of profiles on your account. If you just have an email plan, this multiplier will be based on the active profile limit for your account.
Profiles | Advanced KDP plan | Number of objects | Number of object properties | Object record multiplier |
Free plan | none | 0 | 0 | N/A |
250 - 400,000 | none | 1 | 15 | 10x |
paid | 5 | 30 | 10x | |
Over 400,000 | none | 5 | 30 | 10x |
paid | 5 | 30 | 10x |
Additionally, all accounts have the following limits:
- Maximum of 500 records per profile per object.
- Every custom object must be no more than 8 KB.
- Every custom object record must be no more than 2 KB.
Create an object
To get started with creating an object in Klaviyo, navigate to Content > Objects. and click Create object.
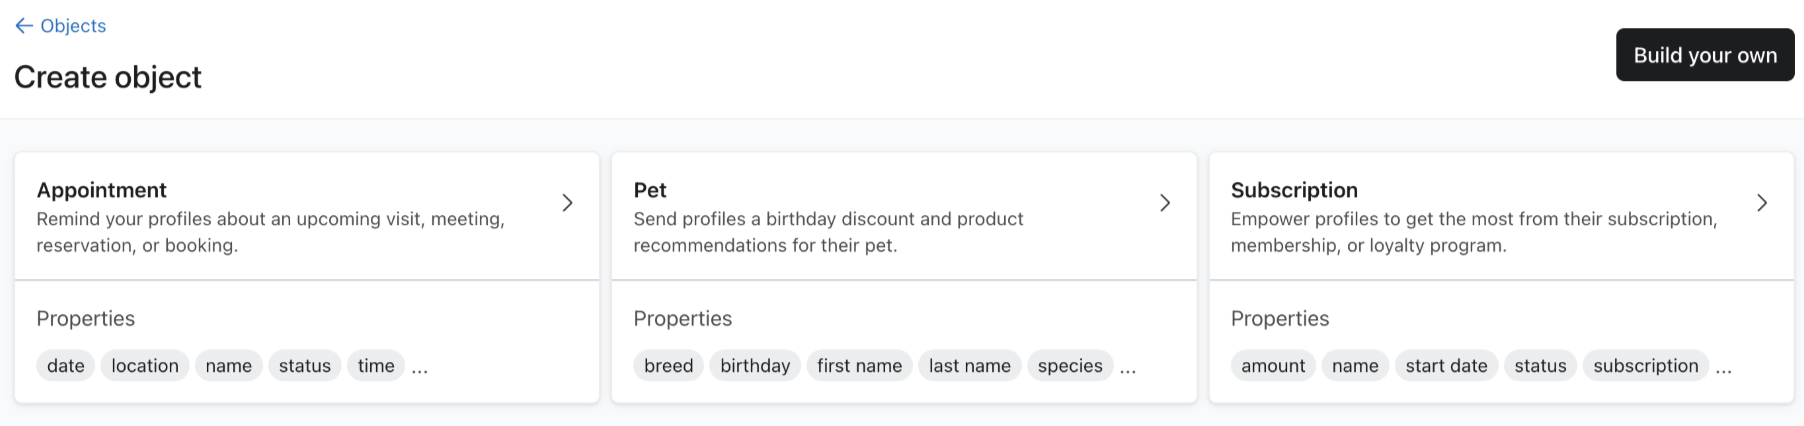
From here, you can either create an object from scratch or select a recommended object template. To create an object from scratch, select the Build your own button.
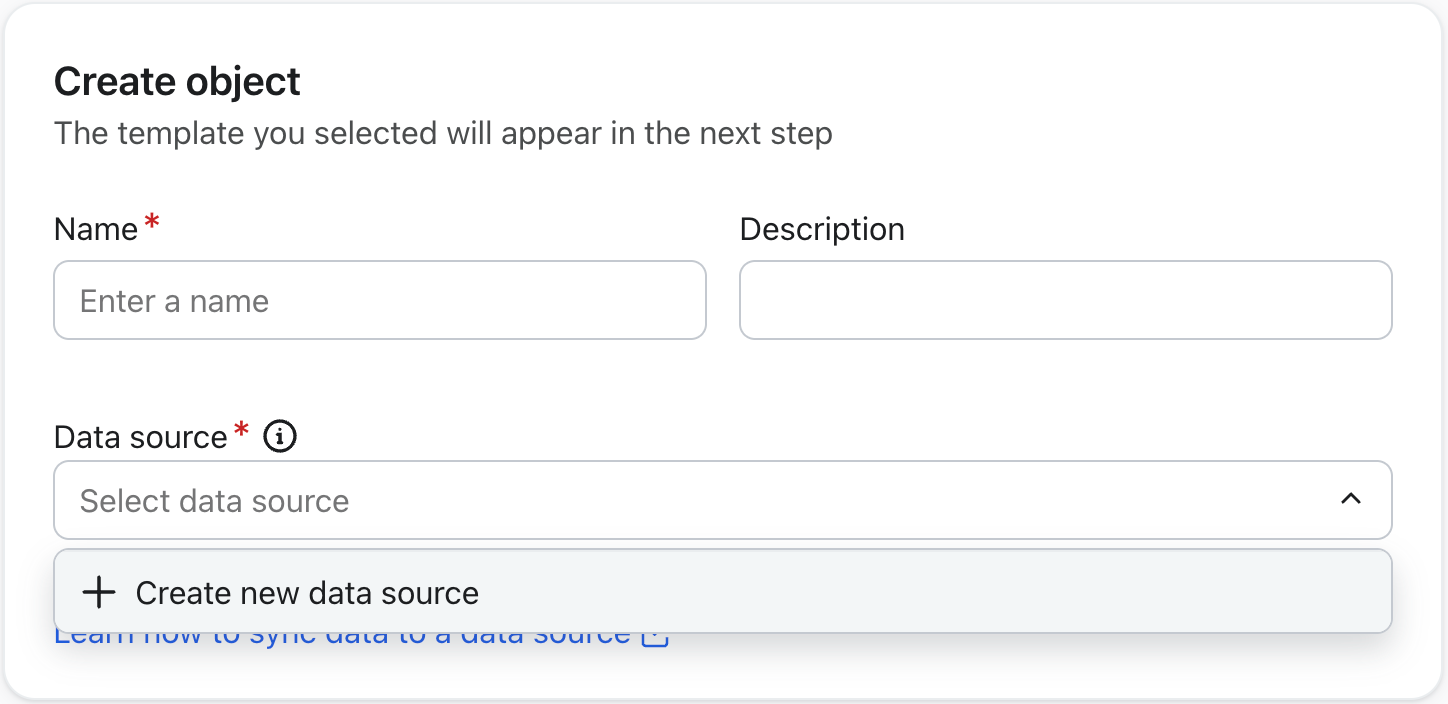
The first part of the object creation workflow requires to set the following information for your object:
- Name
A name to identify your object - Description (optional)
A description of the data your object represents - Data source
The data source where your object data lives.
To create a new data source, click the Select a data source drop down and then select Create a new data source.
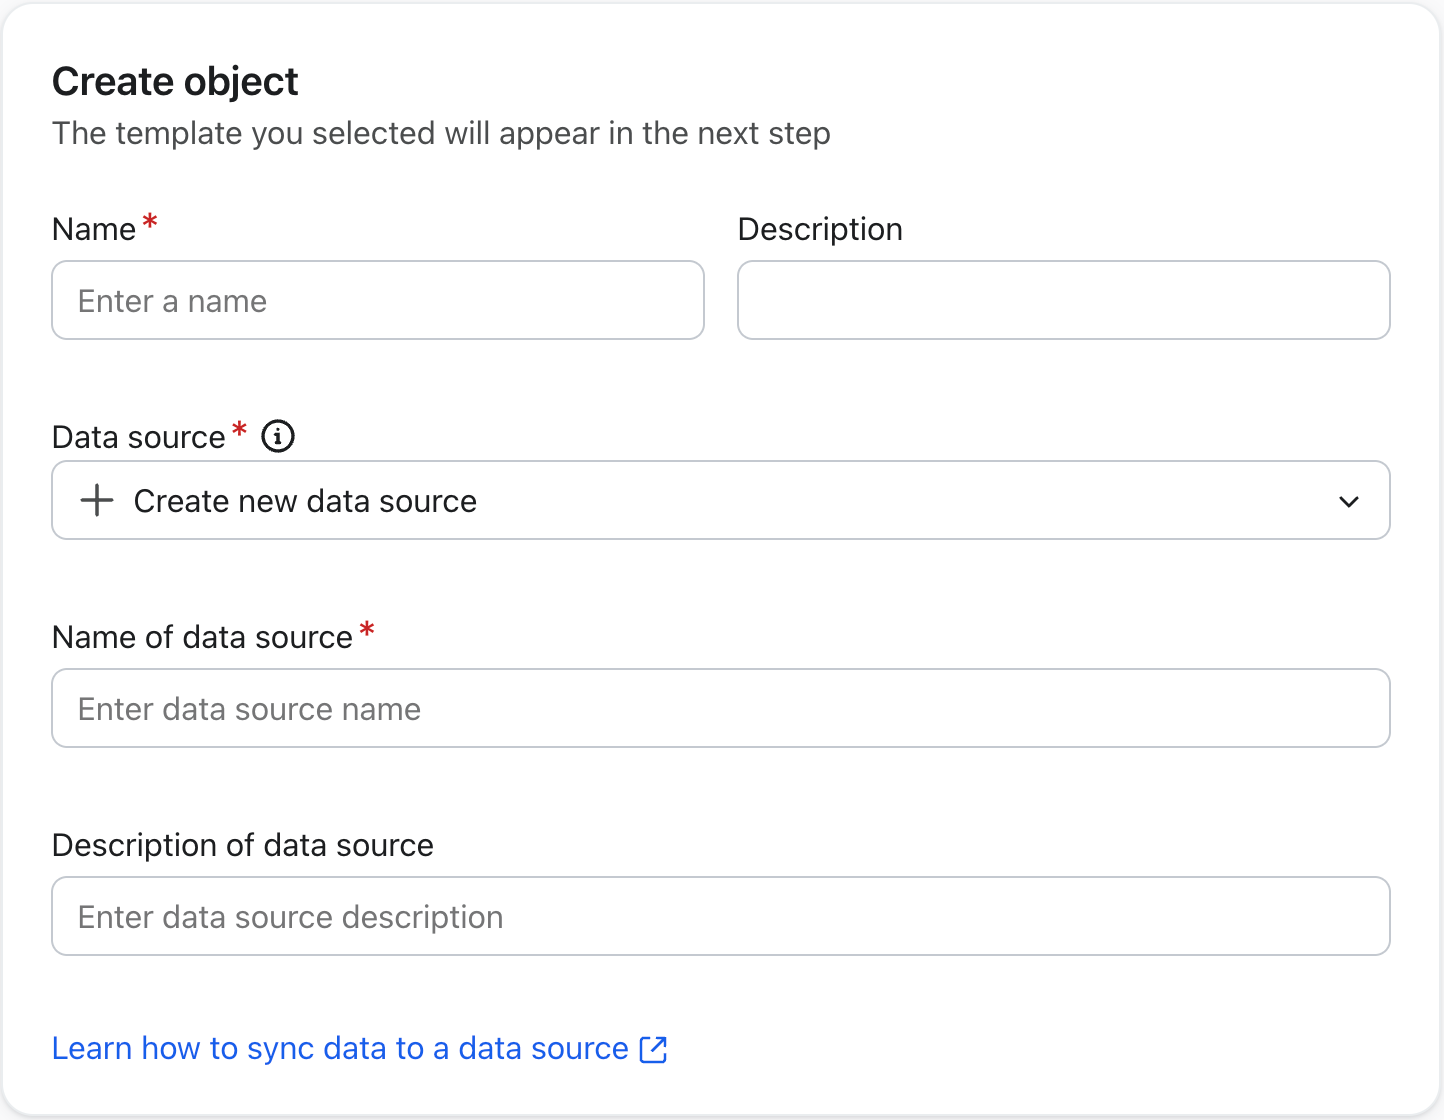
Creating a data source requires to set the following information:
- Name
A unique name to identify the source of your object data. - Description (optional)
A description of your data source.
Set the object ID
Once you set a name for your object and pick the data source, the next step is to set an object ID and map your desired object properties. During this step, you’ll be able to preview the data associated with the data source that was sent to Klaviyo through the custom object API.
Setting the object ID is necessary to distinguish object records from each other. You’ll need to specify a data source property to be used for the unique object ID.
The object ID should be a unique data source property that can be used to identify specific instances of an object record. For example, with a gift card object, you can use something like the unique discount code as the object ID. This is unique for each instance of the data source, and will exist for every object record.
Whenever Klaviyo receives data from your data source with the same object ID, the associated object record will be updated. For this reason, it is important the object ID is unique so the appropriate record is updated.
Send object data
When you update an existing object record, the entire record is replaced. Therefore, it is critical to send the entire object record, even if you only want to update 1 property.
For example, say you want to update just 1 out of 5 properties in a record. If you send updated data with the ID and just the 1 property you want to update, the other 4 properties will be set to null. If one of the newly null fields was used in your profile relationship (e.g. a profile identifier like an email address), then the object will no longer be related to that profile.
When sending phone numbers, they must be in E.164 format. When sending dates, they must be in one of our acceptable timestamp formats.
Map object properties
By mapping object properties, you can select which information within the data source will be available within an object in Klaviyo.
Only the data shown in the particular instance of the data source being previewed are available in the dropdown. You can cycle through instances of the data source using the New data sample button.
However, for this reason, we recommend sending object data through the object ingestion API in standardized date and timestamp formats. If the value for a specific property is not known, you can set a null value for it.
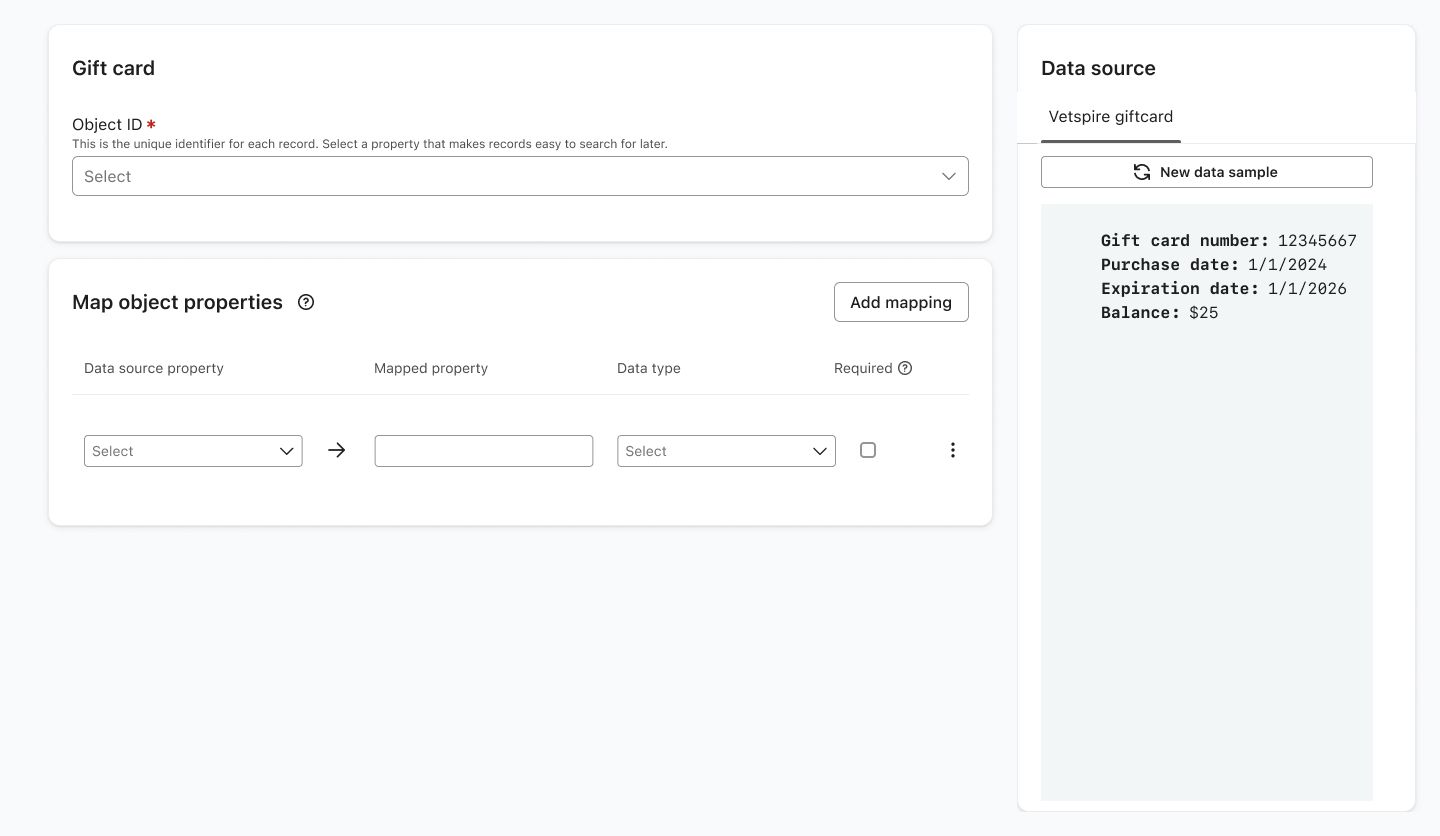
To map object properties:
- In the Data source property column select the data source property you’d like to include in your object.
- In the Mapped property column, enter the name you’d like the data source property to have in the object.
- In the Data type column, select the appropriate data type of your data source property.
- In the Required column, select the checkbox if you’d like this property to be required in the object.
- Select the Add mapping button if you need to map additional object properties.
If an object property is set to Required, it must exist in the data source and cannot have a null value set. If the required property is not present, the object record will not be created.
Nested data in mapping
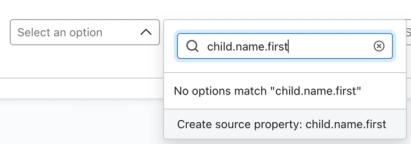
By default, the object manager interface supports 1 level of nesting. To access deeper data, you must manually enter in the path of your choice.
As an example, look at the data source below.
{
  "type": "data-source-record",
  "attributes": {
    "record": {
      "child": {
        "child_id": "d64b8458",
        "name": {
          "first": "Theodore",
          "last": "Customer"
        },
        "birth_date": "2022-04-12",
        "email": "jon.customer@klaviyo.com",
        "phone_numbers": [
              "+11234567899",
              "+13456789123"
        ]
      }
    }
  }
}
To access data about a child's first name, you can enter the following path, since the data is otherwise nested too far to access with the interface.
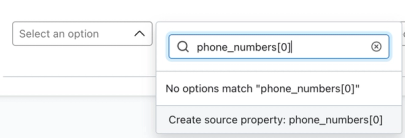
If you have an array in your source data, you can find properties to map by position. For example, you could pull the first phone number within the phone_numbers array by including [0] at the end of your path.
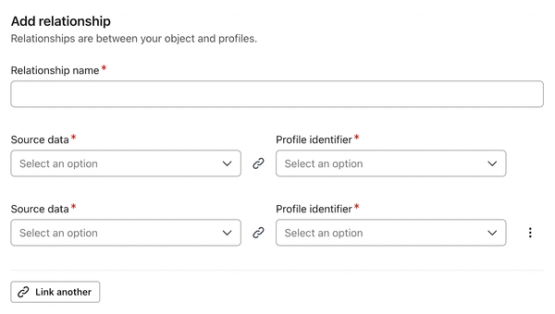
Add relationship
After setting an object ID and mapping your object properties, the next step is to add a relationship to your object.
Relationships connect your object to relevant profiles. Define the following information to set a relationship:
- Relationship name
Set a name for your relationship. For example, if you have a pet object, you may want to set the relationship name to be something like “Pet owner”. - Source data
Select the data source properties that you’d like to associate with a profile. - Profile identifier
Set the profile identifier (i.e., email, phone number, etc.). This needs to be included in the data source for an object to be associated with a profile. Use the Link another property button to add additional property and identifier pairs.
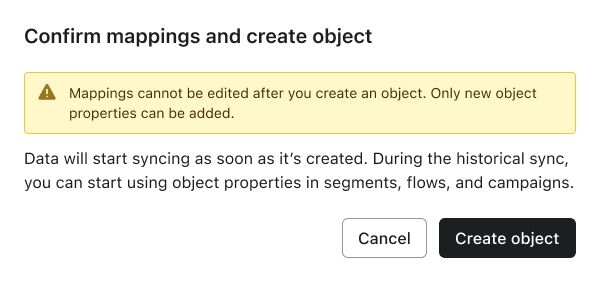
Confirm mappings and create object
Once you have finished mapping the object properties and setting the relationship, confirm the mappings on the confirmation modal and select the Create object button. Note that existing mappings cannot be edited once the object is created, and data will start syncing immediately.
You’ll see your object listed on the Objects page in Klaviyo, along with the following information:
- Object name
- Created date
- Last updated date
- Status
Custom object status states
There are three status states when publishing custom objects:
- Draft
The object is still editable and not published or active. - Publishing
The object is creating custom object records from the data you've sent to your data source. If you have sent a few thousands records from your data source, your object will publish instantly. If you have sent a few million records, it may take hours to publish. Once complete, the status will be changed to Active. - Active
The object is published and live. All custom object records have been created according to the data sent from your data source. Any new data sent in for this object will generate additional custom object records linked to your profiles.
Objects on profile pages
Relevant objects will also appear on a profile page so you can view the object records that pertain to a profile. To view the object records, navigate to the Objects tab on a profile page. You can switch between objects using the dropdown menu above the object cards.
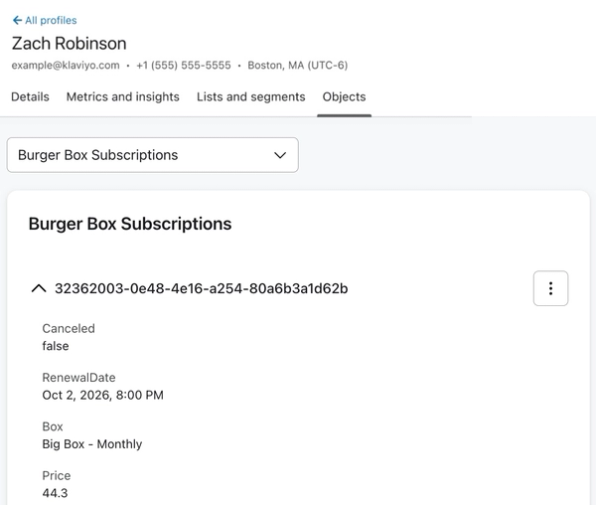
To view a full object record, select the 3 dot menu and click View. A side panel will appear that contains the full object record.
Update an object
Any changes you make to a custom object will result in a change to the active custom object.
If you want to start sending new data for an object, add the additional object properties to your data source, then edit your object mapping to include this new property. All previously created objects will return a null for this property since that data is not available, but going forward, objects will be created and updated with this property.
If you send new object properties that have not yet been mapped to an object, you can update your custom object to include it. All custom object records are then reprocessed to include this data.
To update an object:
- Click Content > Objects in the Klaviyo sidebar.
- Select the name of the object you want to edit.
- Click Next in the top right corner.
- From the Map object properties section, click Add mapping.
This option is only available if your object has additional properties that can be added.
- In the Data source property column select the data source property you’d like to include in your object.
- In the Mapped property column, enter the name you’d like the data source property to have in the object.
- In the Data type column, select the appropriate data type of your data source property.

Newly mapped properties cannot be marked as required.
- Click Next in the top right corner.
- Click Next in the top right corner. You will not have to make changes to your relationships.
- Click Publish changes.
Once you have completed this process, all records from your data source will be reprocessed and existing custom object records will be updated accordingly.
Delete an object
Once you delete an object, it cannot be retrieved or reversed. Any segments, flows, templates, or campaigns that used these custom objects will no longer work as intended.
To delete an object:
- Click Content > Objects in the Klaviyo sidebar.
- In the menu to the right of your object, click Delete.

- Click Delete again to confirm the object removal.
- The object and all associated custom object records are deleted.
If you create a new custom object using a previous object’s data source, new custom object records will be generated using the data you have already synced. Although it uses the same data, it is considered a new object with new records, so all segments, flows, templates, and campaigns must be updated to use this new object.
Additional resources
- How to use custom objects in templates
Learn how to use custom objects in templates, so you can use object data in flow and campaign sends.
- How to use custom objects in segments
Learn how to use custom objects in segments so you can create groups of customers based on object data.
- How to use custom objects in flows
Learn how to use custom objects in flows, so you can use object data to create date-triggered flows and set up conditional splits.