How to add a form to a flow
You will learn
Learn how to add a sign-up form to a flow, so it appears for only profiles that trigger the flow, instead of for everyone who visits your site or app.
Forms in flows is in Preview. The Form action appears in your flow builder only after Klaviyo adds your account to the Preview.
Before you begin
Confirm that sign-up form functionality is enabled on your website or in your mobile app.
- Web forms require Klaviyo's onsite JavaScript on your website. To check whether it is installed, see how to verify that sign-up forms are enabled.
- In-app forms require Klaviyo’s mobile SDK installed in your app. Additionally, you need to configure push notifications in your account to create in-app forms. Until you set them up, the In-app option stays disabled and reads Set up push notifications to create in-app forms.
Add a form to your flow
- Navigate to the Flows tab.
- Click the name of the flow to which you want to add a form.
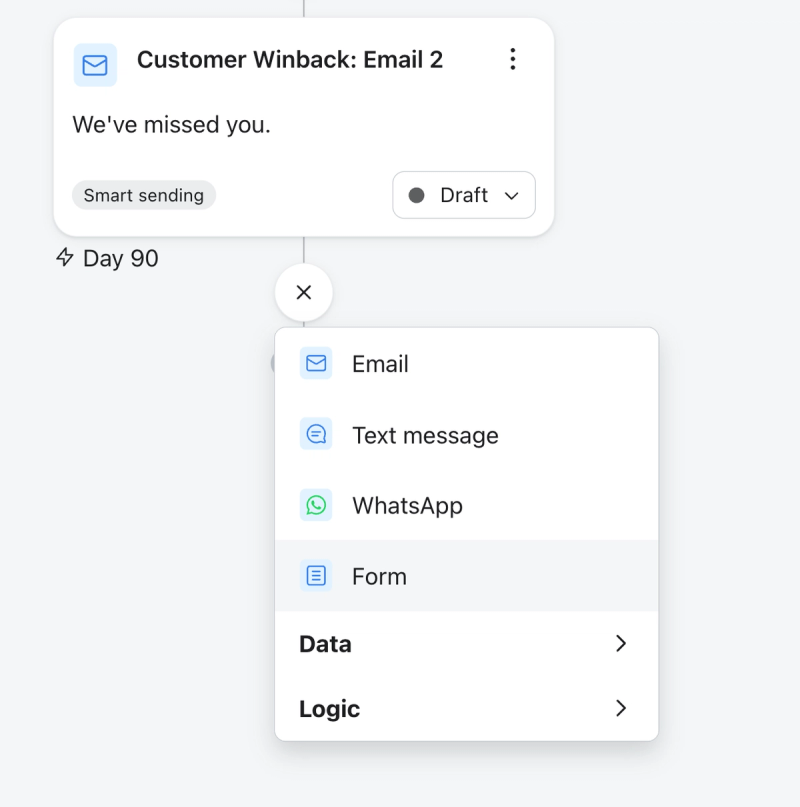
- Add a form to the desired point of your flow. You can either drag Form from the Action panel under Messages or click the plus icon on a connector and select Form.
- In Form details panel, enter a Form name.
- Under Choose a channel, select Web to display the form on a website or In-app to display it inside your mobile app.
- If you choose Web, pick an Email subscriber list and a Phone number list. The form will add profiles who submit the form to the respective list for each channel. You do not need to select lists for an in-app form.
- Click Create form.
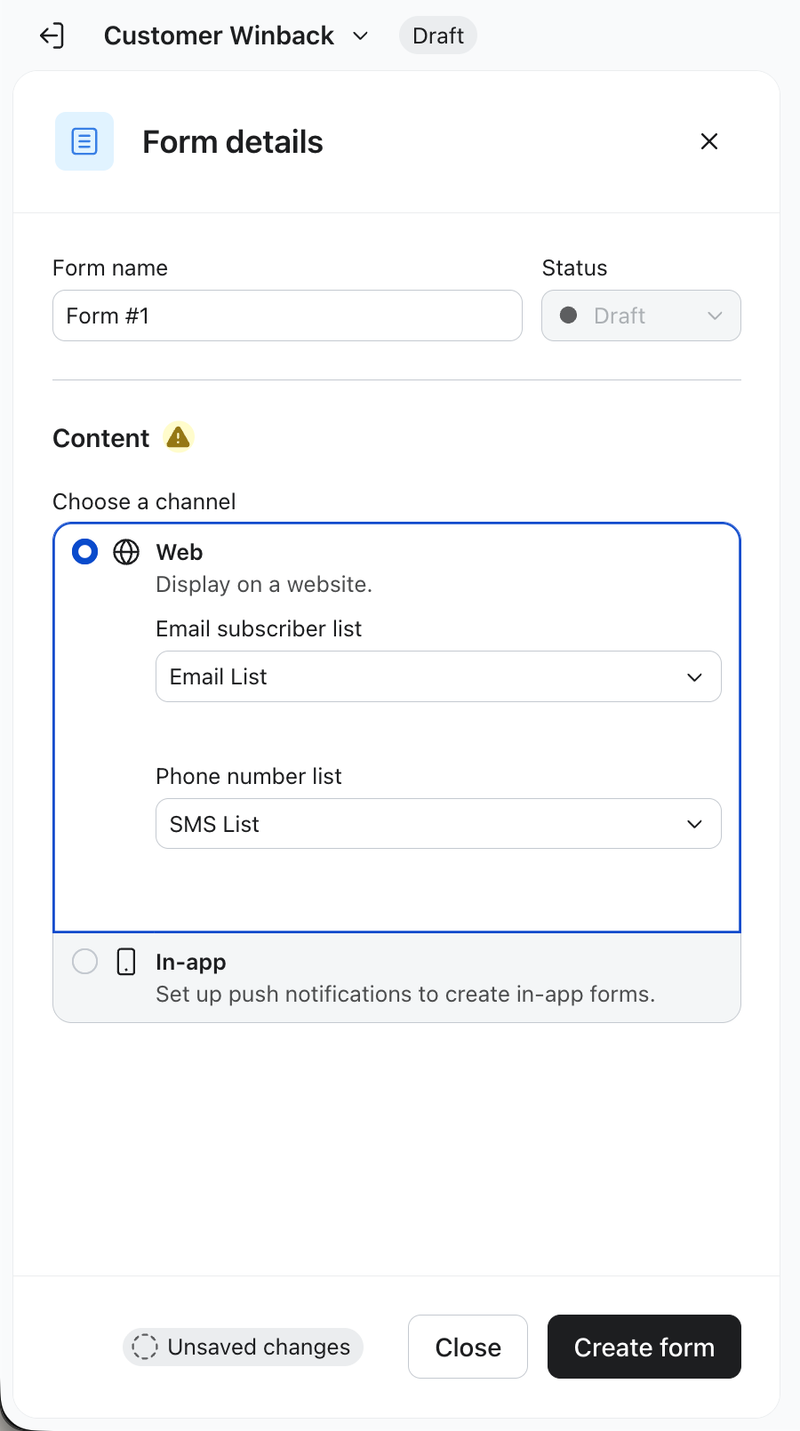
The Phone number list field defaults to your SMS Subscribers list before you choose anything. Confirm this list before saving to ensure phone number submissions go to the correct list.
- In Select template, pick a template, or click Create blank form and choose a type under Select form type.
- Design the form in the form editor. Then click Save & exit to return to your flow.
Define the expiration period
Forms are not sent like an email or text message. When a profile reaches the Form step in a flow, the profile becomes eligible to see the form. If the profile then starts a new session on your website or in your mobile app and meets the form’s targeting and display rules, the profile will view the form.
Expiration settings control how long a profile stays eligible to see the form. Once a form expires, it will not appear when the profile returns to your website or app.
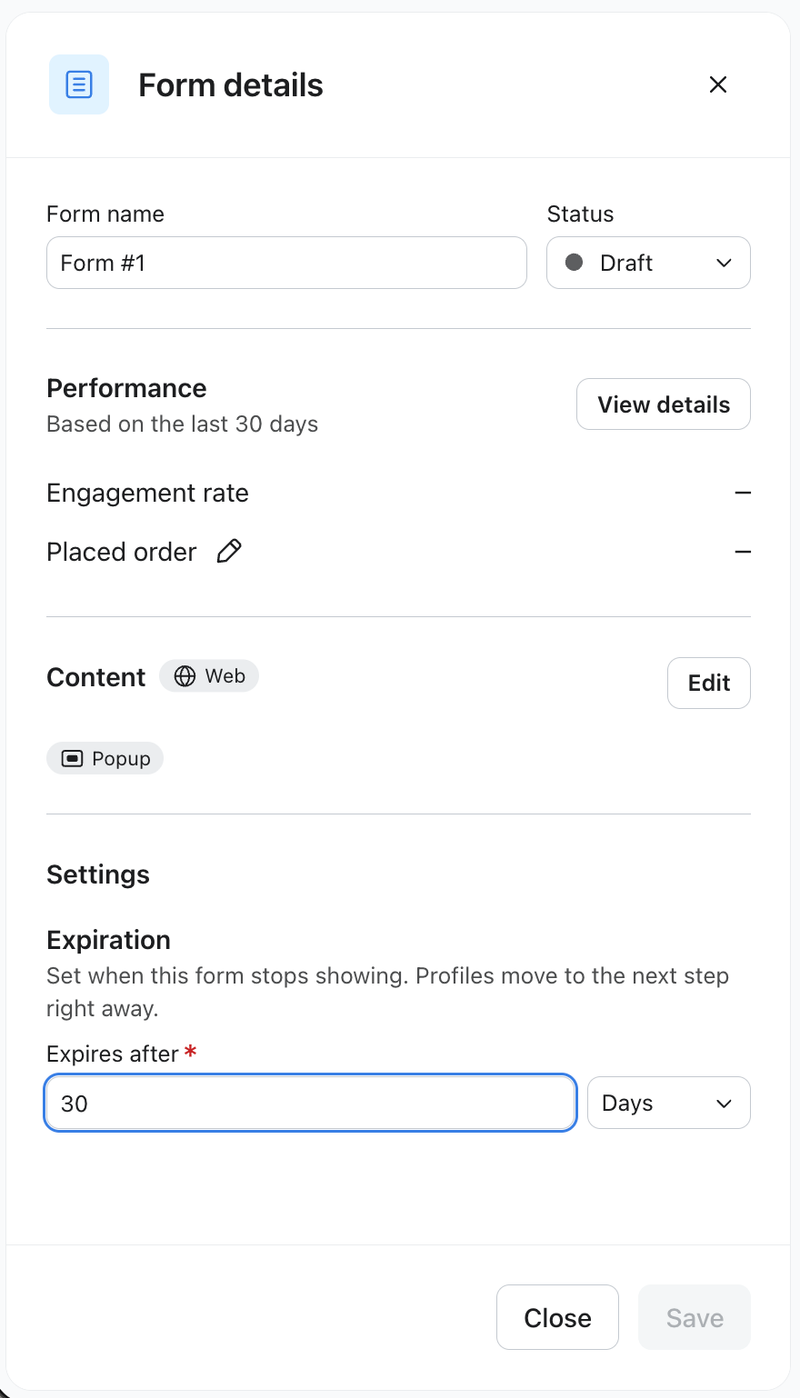
In Form details, under Settings, find the Expiration section, then:
- In Expires after, enter a whole number.
- Choose a time unit: Days, Hours, Minutes, or Seconds.
The default is 30 days. The lowest value you can set is 1, and the highest depends on the unit: 365 days, 168 hours, 1440 minutes, or 86,400 seconds.
The Form step on your canvas displays the setting you chose as a badge reading "Stop showing after" plus the duration.
The expiration period does affect how a profile advances through a Flow. Profiles do not wait for a Form to display. Instead, they advance to the next step immediately. If you would like for a profile to advance only after the expiration period, add a Time delay of equal length to the expiration period to the flow after the Form step.
Set your form live
A Form step has its own Status control in the Form details panel, separate from whether the flow itself is live. The control stays disabled until you have created the form.
When the form is ready, set Status to Live. Profiles who reach the step while it is still set to Draft do not see the form.
Saving the form from the form editor does not make the step live on its own. Editing a form and publishing it while the step is still a draft is expected, and the Status control on the Form step is what decides whether profiles see it.
When does a profile see the form?
Reaching the Form step does not display anything on its own. It adds the profile to the audience that is eligible for that form.
The form appears the next time that profile visits your website or opens your mobile app and meets the targeting and display rules for the form. Profiles stop being eligible once any of the following happens:
- They view the form.
- The form expires.
- You set the form step back to Draft.
Because display depends on a return visit, the time between a profile entering the flow and seeing the form varies from profile to profile.
If a profile triggers the same flow and reaches the form step multiple times between sessions, the profile will see the most recently triggered version of the form only.
Form priority
A profile can be eligible for more than one form at the same time, whether from different flows or standalone forms. In that scenario, Klaviyo shows the eligible forms in priority order.
You can set the display priority — Highest, High, Medium, or Low — for each individual form. If a profile is eligible for more than one form at the same priority level, the display order among those forms is random. See
Review your form performance
The Form details panel has a Performance card covering the last 30 days. It shows an engagement rate and your conversion metric rate. Click View details to open the full reporting page for that form, then Done to go back to your flow. The card appears only if your user role has access to flows reporting.
On the reporting page, the Recipient activity tab breaks profiles out by what they did. A web form shows Waiting, Needs Review, Viewed, Clicked, Submitted, and Completed.
An in-app form shows Waiting, Needs Review, Viewed, and Clicked only because in-app forms do not currently support input fields.
Klaviyo records four profile-level events you can use in segments, reporting, and other flows:
- Form viewed by profile fires when the form is displayed to a profile.
- Form clicked by profile fires when a profile clicks a button with a navigational action (e.g., go to URL, go to app screen) in the form.
- Form submitted by profile fires when an identified profile submits the form.
- Form completed by profile fires when an identified profile reaches the last step of the form.
Submitted and completed events require an identified profile, so a visitor Klaviyo cannot identify may register a view and a click without a submission.
Troubleshooting
- If Form does not appear under Messages in the Actions panel, your account has not been added to the Preview. Contact your Klaviyo account manager.
- If the In-app channel option is disabled, set up push notifications in your Klaviyo account.
- If profiles has become eligible to view a form but the form is not appearing:
- Confirm the Form step is set to Live;
- Check the expiration period. The form may have expired before the profile returned to your site or app;
- Start a new web or app session. If a profile becomes eligible in the middle of a session, the form will not appear until the next session.
- If a profile triggers the same flow and reaches the form step multiple times, the profile will see the most recently triggered version of the form only.
- If a form should have expired for a given profile but the profile is still seeing the form, check to see if the profile has merged with another profile. If the original profile has merged into another profile, the destination profile will become eligible for the form, resetting the expiration period.
Additional resources
- Getting started with sign-up forms
Learn how to create and customize sign-up forms in Klaviyo to publish on your website so you can engage shoppers, collect emails and phone numbers, and build long-lasting customer relationships.
- Getting started with flows
Learn how to use flows, also known as automations or drip campaigns, in Klaviyo for personalized and automated communications to your customers, and learn how to set your first flow live.
- Understanding in-app forms
Learn about in-app forms and how you can use them to share important messaging with your mobile app users.
- How to verify that sign-up forms are enabled
Learn how to verify that sign-up form functionality is enabled on your website. This makes sure that sign-up forms published in Klaviyo display as expected on your site and sync all necessary data to Klaviyo.