How to update a profile property when someone clicks a link
You will learn
Learn how to build email templates with buttons that tag subscribers with information based on the option they click. You can use this process to add profile properties when they click a link.
This process is not currently supported in SMS/MMS messages.
Use cases for collecting information via links
In Klaviyo, you can use links or buttons to collect information automatically from email recipients. For example:
- In your newsletter campaigns, add buttons that let users specify how many times a week they want to receive emails from you.
- In a thank you email to a new customer, prompt the recipient to update profile details such as gender.
- In a winback email, prompt a customer to choose the category of products they are most interested in learning more about.
Add buttons or links that update profile properties
Note that when you add a button or link that can update a profile property, recipients can only select one value. If they already have a value for the property set, their selection will overwrite the existing value. This includes properties with a list data type: the entire list will be overwritten, and it is not possible to simply append a list item to an existing list.
When using the code snippets provided below, make sure to use straight quotes (') rather than curly quotes (‘) to ensure the code renders correctly. This can be achieved by copying the code below and pasting it directly into your template using the "Paste as Plain Text" function (Ctrl+Shift+V or Cmd+Shift+V).
Buttons
- Head to the email template you want to use.
- Add a button to the email template.
- Click on the button where you want to add this feature.
- Enter the following into the URL field:
{% update_property_link 'profile_property' 'property_value' 'redirect_link' %}- Change each section of the code to reflect:
- 'profile_property': the profile property that you'd like to update or create; for example, favorite_color.
- 'property_value': the value that the particular button corresponds to; for example, blue.
- 'redirect_link': the URL that you want them to redirect them to after they click the button.
These fields do not support dynamic content or unicode characters. Only standard URLs (i.e., formatted as https://www.klaviyo.com) are supported. This code will work anywhere you'd normally add a link. The property value should be text or a number for best results. Note that if this property is already set for a particular recipient, it will be overwritten when they click the button.
Linked text
- Navigate to the email template you want to use.
- Highlight the text you'd like to link.
- Click the hyperlink icon in the text editor.
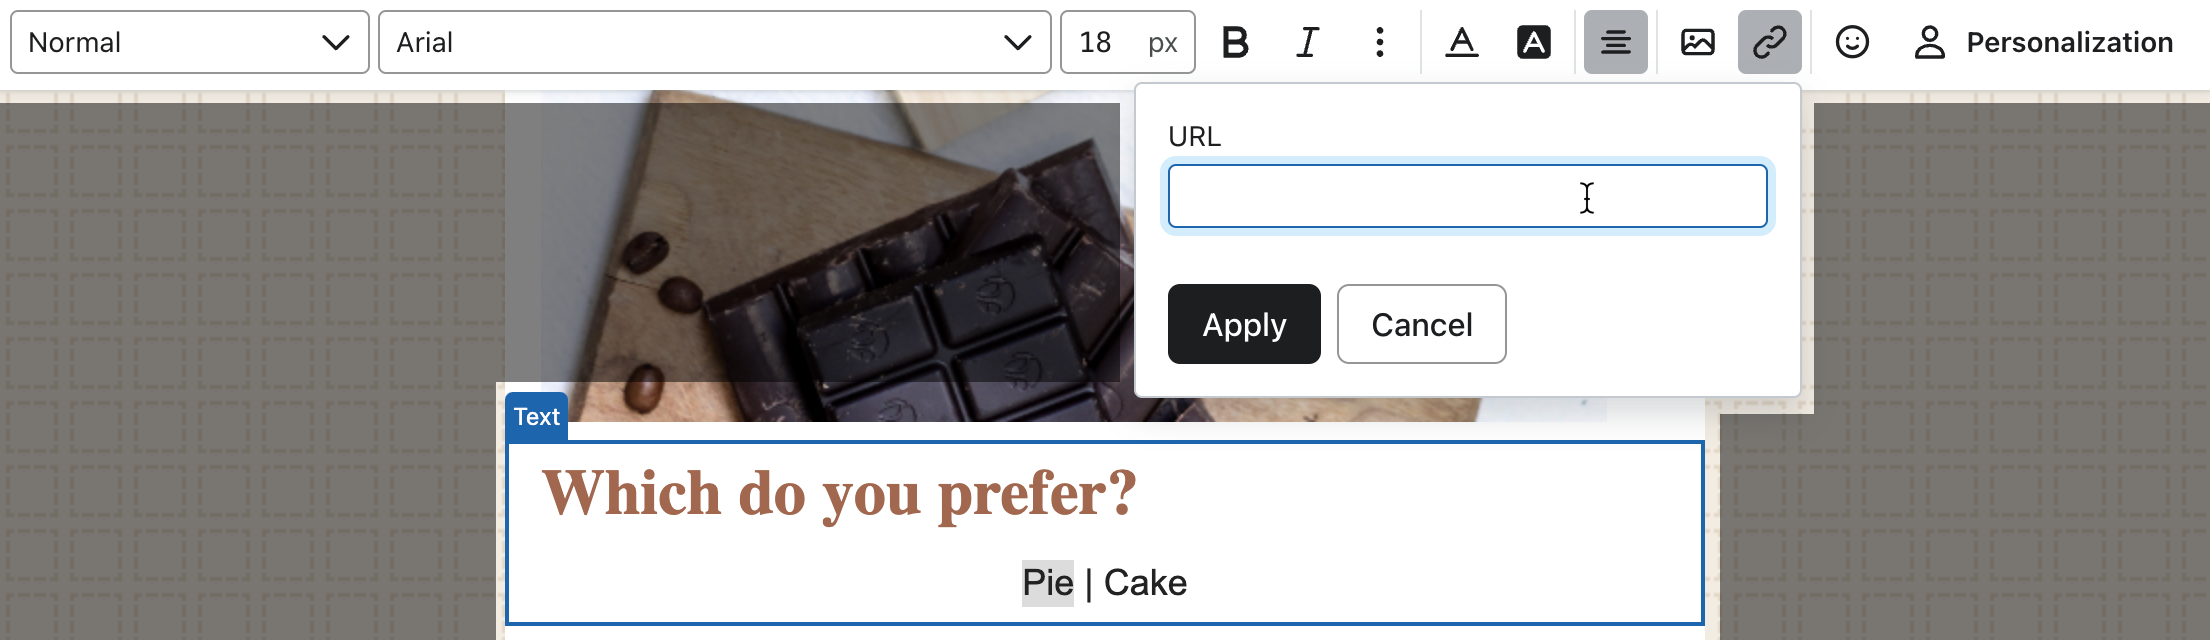
- Enter the following into the URL field.
{% update_property_link 'profile_property' 'property_value' 'redirect_link' %}- Change each section of the code to reflect:
- 'profile_property': the profile property that you'd like to update or create; for example, favorite_color.
- 'property_value': the value that the particular button corresponds to; for example, blue.
- 'redirect_link': the URL that you want them to redirect them to after they click the button.
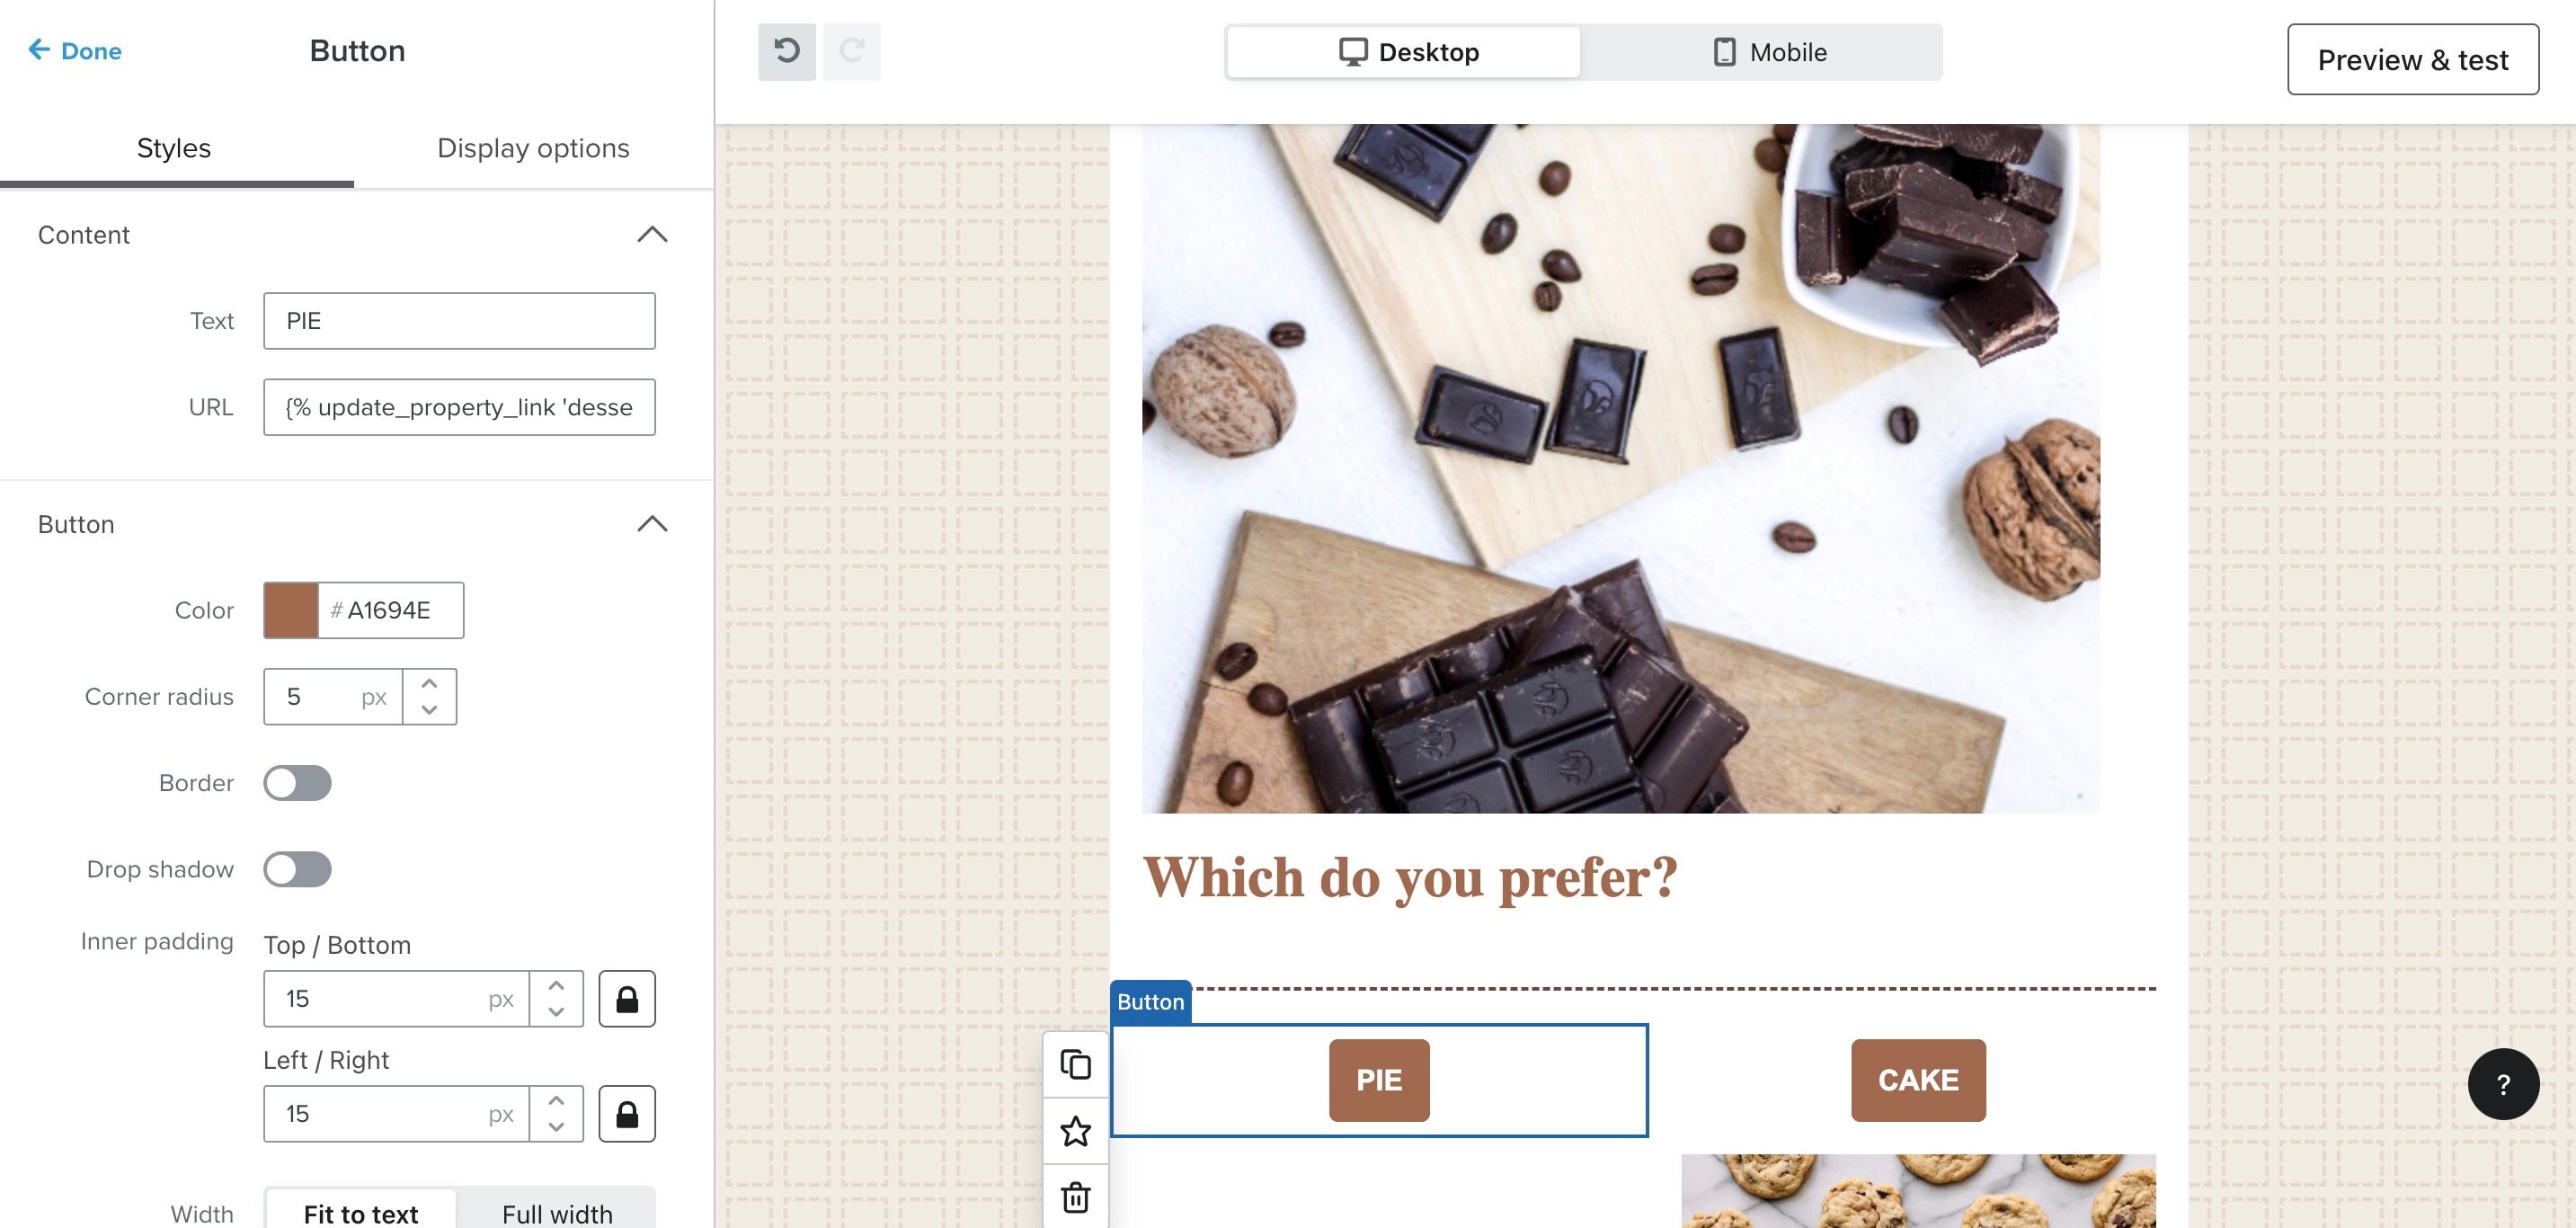
Example of using links to collect information
Let's say that we want to collect dessert preference information from our subscribers by asking them if they prefer cake or pie.
To create this survey:
- Set the 'profile_property' to dessertsurvey.
- Change the 'property_value' to pie.
- Make the link redirect to a thank you page.
In this case, our code would look like the following.
{% update_property_link 'dessertsurvey' 'pie' 'http://www.your-website.com/survey_response' %}Whenever someone clicks the 'pie' button, it will update the 'dessertsurvey' profile property to 'pie,' and then go to a thank you landing page you create.
Now that we've collected data from our customers, we can use it in emails. This data is stored just like a regular customer property, and can be used to create segments that use these properties as conditions in the definition, split flows by different properties, and personalize messages using this data.
Test and review your results
To test the functionality of your new button, save the message as a template and send it to yourself as a personal email. If you send a preview rather than a personal email, the button/link will direct to a placeholder page and will not update your profile.
Once someone clicks an update property link in a live email, their response is stored on their profile. You can navigate to a profile to see an individual’s response, or you can create a segment to identify everyone that clicked a specific option.
UTM parameters are not supported for {% update_property_link ... %} buttons or links. If you have UTM parameters enabled for this message, they will not be appended to the final dynamic link. As a workaround, you can manually include UTM parameters in the redirect_link field.
View individual results
To see which option someone selected on their profile:
- Search for a profile in Klaviyo using an email address or name.
- Click a profile from the results to view all details.
- Locate the Custom properties section of the profile.
- Find the profile property set in the update property link (“dessertsurvey” in the example above).
- Note the property’s value (e.g., “cake”).
Create a segment based on answers
To create a segment of all profiles who clicked an update profile property link or button:
- Navigate to the Lists & Segments page.
- Click Create List / Segment, then click Segment.
- In the Dimension field, select your profile property, and in the Dimension value field, add your property value.

- Finally, click Create Segment to generate a segment of everyone who clicked your update property link/button.
Additional resources
- Advanced segmentation reference
Learn effective advanced segmentation strategies that provide insights into your customer base and create highly personalized experiences for your subscribers.
- How to create customer persona segments based on activity
Learn how to use segmentation to create customer persona segments based on the actions they have taken. This allows you to send more relevant marketing communications so you can gain the most value from your audience.