How to add an additional filter to a single flow email
You will learn
Learn how to add additional filters to a specific email within a flow.
When building a flow, you may have a particular email that you would only like to go to specific recipients. To accomplish this, you can add an additional filter to a single email within a flow. After the appropriate recipients receive this email, they will continue on the same path as all other recipients who trigger the flow.
If you would instead like to create two or more distinct paths in your flow based on certain conditions, check out our guides on conditional and trigger splits.
Add an additional filter to a flow email
To add an additional filter to an email:
- Click on the email card in the flow builder for the email you'd like to update.
- Navigate to the Additional Filters area under Settings, in the details sidebar. When you click this option, you'll be brought to an area where you can edit the filters for a particular email.
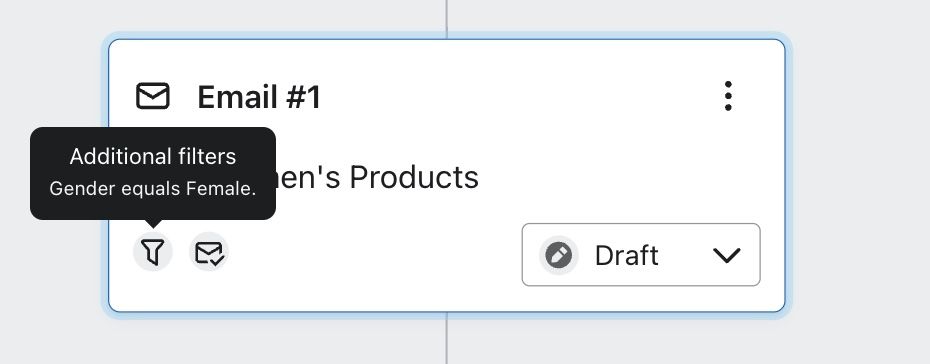
After you create and save additional filters on an email, you will notice the filter icon on the corresponding email card - this signals that additional filters have been applied. If you hover over this icon, you'll see a summary of the filters you've added.
How to use additional filters
Let's say you have a flow that sends to customers several weeks after their first purchase encouraging them to order again. Your first email might have the subject line, "We Missed You" and provide a discount code or some other incentive to convince your customer to come back.
As you add more emails to the flow, you may only want to send this message to those who haven't opened the previous one. This is something you can accomplish with additional filters. This is a great way to resend a great offer or partially recycle a great design until you grab the attention of your customers.
This additional filter will consist of one condition:
What someone has done (or not done) > has Opened Email zero times over all time
> where Subject equals ______
Additional resources
- Understanding flow triggers and filters
Learn more about Klaviyo filters which can be used to further narrow triggers or actions in flows. For example, if a flow triggers when someone places an order, a trigger filter could be added to limit this to specific product types. Trigger filters are evaluated alongside the trigger itself to only let certain people into a flow.
Learn more about different kinds of splits:
- How to add a conditional split to a flow
Learn how to add a conditional split to a flow that creates two distinct paths, branching based on defined characteristics of your recipients.
- How to add a trigger split to a flow
A trigger split is a component in the visual flow builder that creates two distinct paths in a flow, branching based on a filter applied to the flow trigger. It is only available for metric- and price drop-triggered flows.
Learn about other flow message settings:
- How to review a flow email’s settings
Learn how to view and configure the settings for a flow email which includes settings such as Smart Sending and UTM tracking.
- How to enable a flow to start sending
Learn how to enable specific flow steps or an entire flow so that the flow starts sending out messages to qualified recipients.
- How to add UTM tracking to campaigns and flows
Learn how to use UTM tracking in your Klaviyo email, text, WhatsApp and mobile push messages to develop insights and improve your Google Analytics conversion tracking.