How to change a flow trigger
You will learn
Learn how to create a version of a flow with a different trigger. You cannot switch an existing flow from one configured trigger to another. Instead, clone the flow to choose a different trigger of the same type, or create a new flow if you need a different trigger type. Review trigger filters, profile filters, additional email filters, and dynamic content before using the new flow; they may rely on data from the original trigger.
Cloning creates a separate flow. After you have reviewed and activated the replacement, you can keep the original for its analytics or delete it if you no longer need them.
Clone a flow to change the trigger
There are several types of changes you might like to make:
- Connect a list-triggered flow to another list
- Change an event-triggered flow from one event to another
- Change a list-triggered flow to an event-triggered flow
- Change an event-triggered flow to a list-triggered flow
Cloning a flow lets you handle the first 2 scenarios. It does not switch a flow from a list trigger to an event trigger or vice versa; for those changes, create a new flow as described below.
When you clone a flow, you can name the copy and choose its trigger. For a list- or segment-triggered flow, choose another available list or segment. For an event-triggered flow, choose another available metric. The clone keeps the original trigger type, and some specialized flows offer only their existing trigger as a choice. Review its filters and any email content that uses data from the original trigger.
To clone a flow:
- Navigate to the Flows tab and find the flow that you would like to change the trigger for.
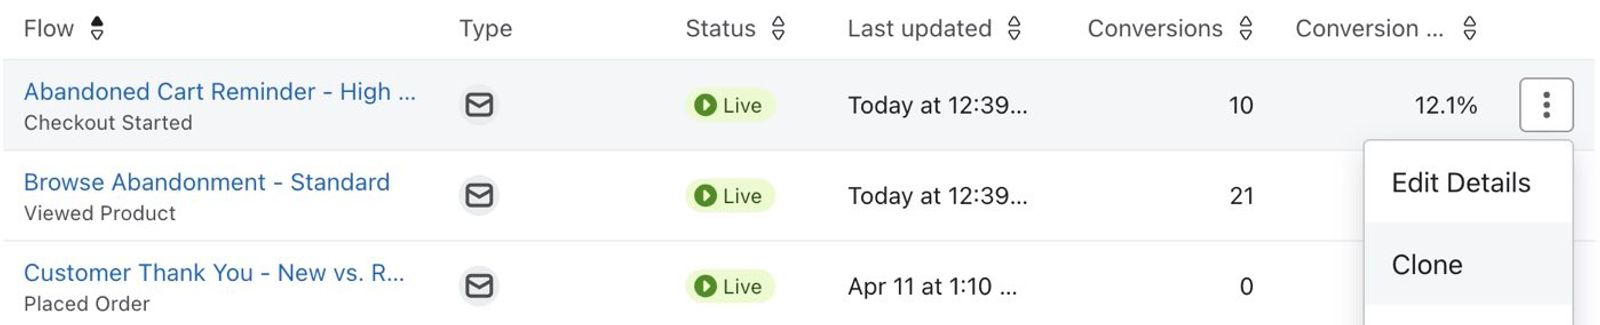
- On the right of the flow row, click the Actions menu (3 dots) and select Clone.
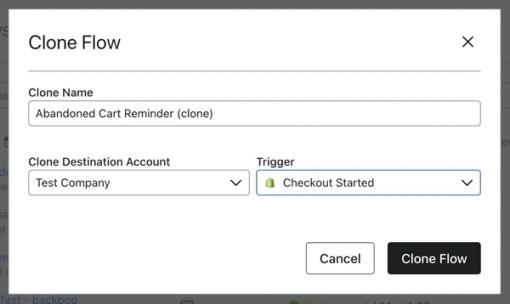
- In Clone flow, select Clone to this account, enter a name for the copy if you want to change it, and click Continue. In the next dialog, choose a trigger from Trigger and click Clone flow. Wait for the confirmation that the copy was created.
- Open the cloned flow and review its trigger, filters, timing, and emails. Its messages start in draft, so set the messages you want to send to manual or live before replacing the original flow. The cloned flow has its own analytics; if you need access to the original flow’s historical analytics, keep the original instead of deleting it.
- On the Flows tab, find your original flow.
- Click the Actions menu (3 dots), select Delete, and confirm by clicking Delete flow.
Change a list-triggered flow to an event-triggered flow (or vice versa)
To change a list-triggered flow to an event-triggered flow, or vice versa, you cannot simply clone the flow. Instead, you'll have to create a brand new flow. You can speed up this process, however, by first saving all the flow emails as templates so they can be added into your new flow with a few clicks.
In our example, we're going to change a list-triggered flow to an event-triggered flow. Here are the steps to follow:
- Open the flow builder for your list-triggered flow.
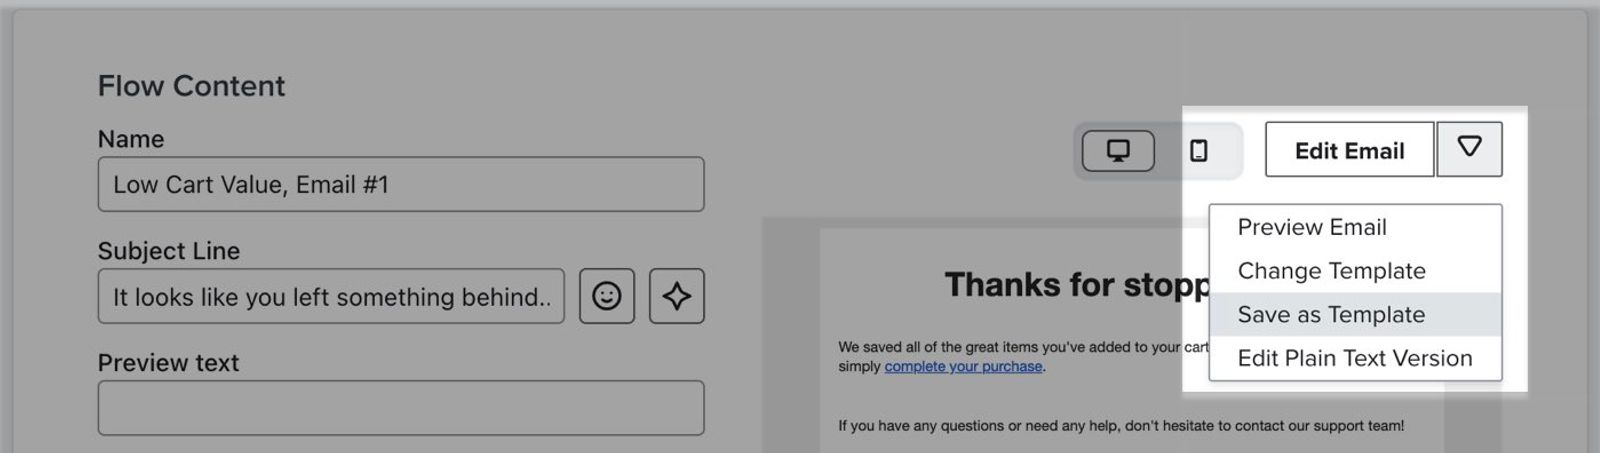
- For each email you want to reuse, click its card in the flow builder. In the email details sidebar, open the Actions menu (3 dots) beside its template and select Save as template. Give each template a clear name so you can find it in your new flow. For more detail, see how to save an email as a template.
- Return to Flows, click Create flow, select Build your own, name the flow, and click Create flow. In the flow builder, choose the new trigger type and configure the list, segment, or metric that should start the flow.
- Add an email action to the new flow for each email you want to recreate. Click each email card, click Select template, then choose Email: saved to find the templates you saved from the original flow. Review each email’s settings and any trigger-specific content after selecting its template.
- Recreate any delays, splits, filters, and other actions you need from the original flow, then review the new flow and set the messages you want to send to manual or live. Only after the replacement is ready should you delete the original flow; keep it if you need its historical analytics.
Additional resources
- Understanding flow triggers and filters
Learn more about Klaviyo filters which can be used to further narrow triggers or actions in flows. For example, if a flow triggers when someone places an order, a trigger filter could be added to limit this to specific product types. Trigger filters are evaluated alongside the trigger itself to only let certain people into a flow.
- How to preview a flow trigger setup
Learn how to use the flow trigger setup preview tool to ensure your flow is set up as you intended. This will help you understand how your flow is going to behave based on the trigger and profile filters you've added.