How to use a social links block in an email
You will learn
Learn how to use the social links block to feature your social media accounts in emails.
Configure your social links
To reuse your social links in new email blocks, configure them in your brand library and email defaults. You can also add or edit links directly in a Social links block, as described below.
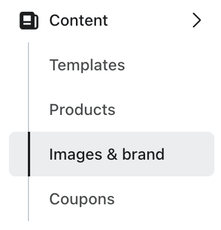
- Navigate to Content > Media & brand.
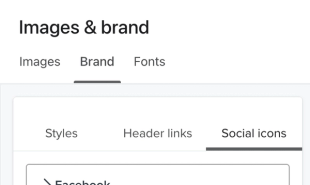
- Select Brand.
- Select the Social links tab.
- Click Add links to create your first group, or Add group to create another. To edit an existing group, open its More options menu and select Edit group.
- For a new group, enter a unique Social group name.
- For each link, select a Platform, then enter your social media profile URL in Link address (e.g., your brand’s Facebook, Instagram, X, or Pinterest profile).
- If you don’t have a profile for a platform that’s shown, click the trash icon to delete it. Keep at least 1 link in the group.
- Click the Add link button to add additional profiles.
- Click Save.
- Select the Defaults tab. If Email and Form options appear, select Email.
- Click Edit on Email defaults, then select Footer.
- If you have more than 1 group, choose the group you want under Social links group. Click Save.
Updating your social links here will not change any existing social links blocks (i.e., those that have already been added to a template, campaign, or flow email). New Social links blocks use the group selected in your email defaults.
Add a social links block to an email
To add a social links block to an email template:
- Navigate to the editor for any email.
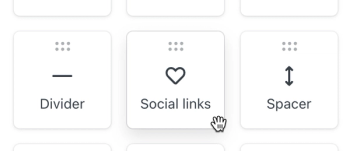
- Drag and drop a Social links block into the canvas wherever you’d like to place it (e.g., in the footer).
- Click the block to open its settings. Expand each icon under Content and check its Link address. If you configured email defaults, the block starts with that group’s icons and links.
- Use Add icon to add another social profile. Expand the new entry, select the platform from the Icon menu, and enter your profile URL in Link address.
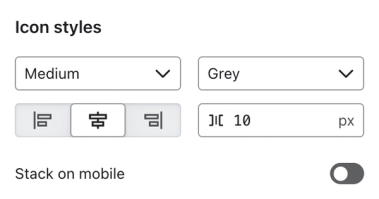
- To choose a different icon style or size, adjust the selections under Icon styles.
- Optionally, save the block as universal content to use it in other emails.
Use custom icons for social links
Klaviyo offers several versions and sizes of icons you can use for social links. However, if you’d like to use your own designs, you can use the Custom option to upload your own social media icons.
- In the email editor, select your Social links block. Expand the icon you want to replace under Content, then select Custom from its Icon menu.
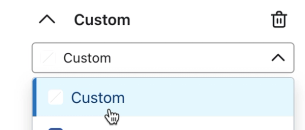
- Under Custom image, upload your icon or select an image from your library.
- Enter your social profile URL in Link address. If needed, turn on Custom size and enter the icon size in pixels.
If you use a custom icon for one social profile, we recommend using custom icons for all of them. This allows you full control over the size and shape of the icons. If you mix your own icons with Klaviyo’s, you may notice visual alignment issues, since the icons might not be exactly the same size.
Additional resources
- How to insert your company name and address to an email footer
Learn how to use company-specific organization tags to add your company's name and address to the footer of your emails. If you ever update your company name or address in your account settings, those updates will be reflected in any messages using these tags. Including a physical mailing address in your emails is important in order to comply with certain regulations, like CAN-SPAM.
- How to create a base template
Learn how to create a base email template in Klaviyo. Once you create a base template, you can use it across your campaigns and flows to speed up your building process and ensure your branding is consistent across messages.