About email images best practices
Learn about best practices when using images in Klaviyo emails, including size recommendations and how to add images.
Best practices for using images in emails
Consider the following when creating images for use in emails:
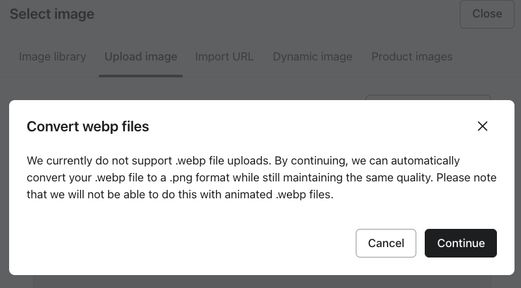
- Klaviyo supports JPEG, PNG, and GIF image files. You can also upload a WebP file and opt to have Klaviyo automatically convert it to a PNG file for you. In general, PNG files will display best across devices, particularly for images that contain text.
- The maximum image file size supported by Klaviyo is 10MB. However, we recommend using images that are 1MB or smaller, as larger images can load slowly, leading to a poor recipient experience. Klaviyo's built-in image compression tool can help with reducing file sizes for uploaded images without significantly harming quality.
- Across the web, using 72dpi resolution is best practice. Try to keep your images between 600 and 1000 px in width and less than 2000px in height for full-width images, in order to balance image quality and loading speeds. Images that are less than the full width of the email can be smaller than 600px.
- Note that a full-width image at 72dpi will often be larger than 1MB, and reducing the size of the image may result in an image that is visibly blurry or low quality. When choosing images to use in your messages, consider the tradeoff between image quality and load time: large images may not appear immediately when someone opens your email, especially if they have a slow internet connection.
- Always add alt text to your images. Certain inboxes, including Outlook and Apple Mail, will not display images until a recipient opts in to see them. Including alt text helps recipients using these inboxes to understand what an image is meant to convey, and also supports accessibility.
Insert an image block
To add an image into a template:
- Drag an image block into the preview canvas and then choose which image to include.

- Once you place the image block, you'll be prompted to add your image by:
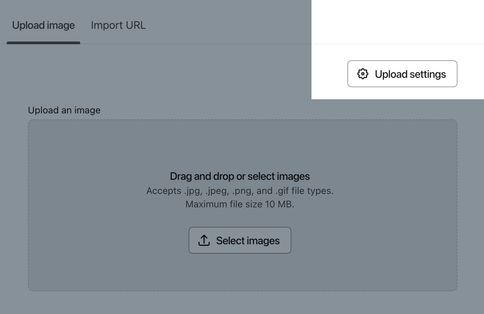
- Dropping one or more images into the block for instant upload
- Browsing your computer to find and upload one or more images
- Importing from a URL
- Choosing an image from your image library
- Choosing an image from your product catalog (if you are integrated with an ecommerce platform or have synced a custom catalog)
- Inserting a placeholder URL or variable sequence if you want an image to dynamically populate (for flows only)
If you are uploading an image, the maximum image size you can upload is 10 MB.
Automatic image file compression
Klaviyo includes an automatic image compression tool as part of the image upload process to help you balance image clarity with fast load times. Note that this feature isn't supported for gifs.
When you upload an image, a Review step displays your original file and a compressed version for comparison. Each preview shows the file size, along with the percentage difference between them. The toggle above the images lets you select which version to upload, and Klaviyo adds a Recommended badge on its suggested choice. However, you can override this if you notice a loss of clarity in the compressed version, which can happen with smaller original files.
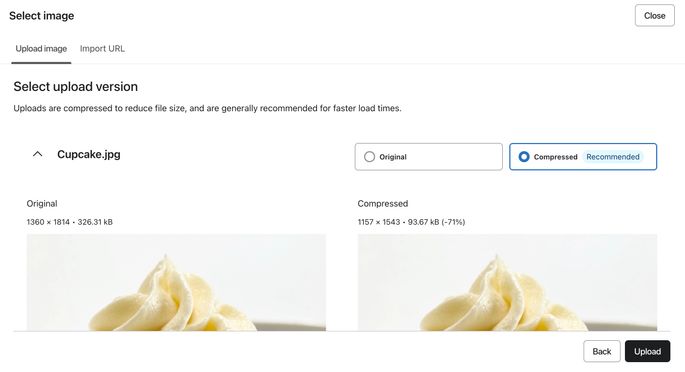
Note that if the original image is recommended, the image comparison panel is closed by default. If you uploaded multiple images at once, be sure to review and choose your preferred option for each image individually.
Upload settings
If you want to skip the review step when uploading images, adjust your Upload settings. When you upload an image, you'll see an Upload settings button.
Your choice here saves for future uploads. You can select:
- Compare (default): Review and choose between original and compressed versions.
- Use originals: Always upload your original files; no review step.
- Use compressed: Always upload Klaviyo's auto-compressed version; no review step.
Crop an image
Images in image blocks, split blocks, and table blocks can easily be cropped.
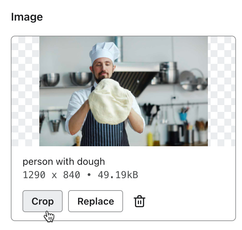
- Click the image block.
- Click Crop underneath the image icon on the left.
You can choose to crop an image into a circle, a square, or a rectangle with a custom width and height. When you crop an image within the editor, the full image is preserved, meaning you can adjust or remove the cropping at any time.
- When you finish cropping, click the back arrow to apply your changes.

Resize an image
To resize an image, use the resize sliders in the canvas.
Images in uploaded HTML templates
For HTML templates you copy into Klaviyo (with the exception of MailChimp templates), you'll upload a zip file containing your images during the import process.
For MailChimp templates specifically, if you upload a template that contains images already loaded in MailChimp, Klaviyo will automatically copy over all of these images.
Once you've uploaded an image, you can use the Insert Image button to upload new images for that template:
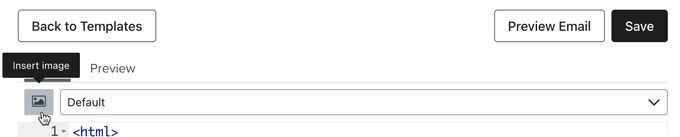
Image quality
If you are concerned that your images are not rendering as cleanly or crisply in your templates as you'd like, you can take steps to improve image quality.
One of the prevailing standards for improving the crispness of a rendered image in an email is to insert an image 2x the desired size and then reduce the image size in your template. There are two ways to approach this:
- Insert a large, crisp version of your image into your template, then click Edit and resize to your preferred dimensions
- Insert a natively larger image (i.e. 600px wide) and display at a smaller size (i.e. 300px width) using CSS; to take this approach, you'll need to insert your image into a text block and adjust the CSS source code
Image types
Klaviyo supports the following image types: JPEG, PNG, and GIF.
You can upload WebP files, and use Klaviyo's built-in converter to convert them to PNG files. However, conversion is not supported for animated WebP files.
If you have other file formates like PSD or SVG, you will need to convert them to a supported image type before uploading.
Learn more about which image types are the best for your email.
The image library
Images you upload to Klaviyo are stored under Content > Images & brand > Images. Deleting an image from your image library will not remove the image from any templates where it is currently used.
Additional resources
- How to add a background image to an email template or section
Learn how to layer text, images, and other email content over background images. You can add a background image to a full email, or to a single section. By using these feature, you can layer one image on top of another, or add a button or text on top of an image.
- Why is my email being clipped?
Learn how clipping works and what you can do to avoid it.
- Guide to email file size and load times