How to set up a back in stock form
Learn how to set up and customize a back in stock sign-up form for your online store. Using Klaviyo’s form editor, you can customize both the “Notify me” button that appears when a product on your site is out of stock, and the form your customers use to sign up for back in stock notifications via email, text messaging and WhatsApp.
Before you begin
Back in stock forms are only available for Shopify and BigCommerce. If you’re using a different platform, refer to our back in stock flow installation guide instead.
In this article, you’ll learn how to:
- Remove any existing Klaviyo back in stock code from your Shopify or BigCommerce store (if applicable)
- Enable and customize your back in stock button and sign-up form
How the back in stock form works on your storefront
After you publish a back in stock form, Klaviyo automatically displays a customizable “Notify me” button on any product page where inventory is out of stock. You can customize this button in the form editor, alongside the form itself. The button appears and disappears automatically based on your product inventory.
When a shopper clicks the “Notify me” button, your form appears, allowing them to choose how they want to be notified when the product is available again, depending on how you’ve configured your form:
- Email: If you include an email field, shoppers can enter their email address to receive a restock alert by email. You can also add an optional checkbox for shoppers to opt in to receive promotional marketing emails.
- Text messaging and WhatsApp: If you include a phone number field, shoppers can enter their phone number to receive a restock alert by text message. In order to receive these text alerts, shoppers must provide explicit consent to receive promotional text messages. This consent is required and cannot be made optional, and your disclosure language must be present.
After a shopper submits the form, Klaviyo logs a Subscribed to Back In Stock event on their profile. This event is used to trigger your back in stock flow. Shoppers who subscribe will automatically enter the flow and will receive a notification when the product is restocked.
Note that A/B testing and non-traditional SMS and WhatsApp opt-in methods (e.g., smart opt-in and tap-to-text) are not supported for back in stock forms.
Remove existing back in stock code snippet
If you previously installed Klaviyo’s back in stock code snippet, you must first remove it to prevent duplicate buttons or forms.
Click one of the arrows below to expand the section below for instructions on removing the code from your store platform. If you’re unsure about which script or code to remove, contact your developer or refer to your original installation notes.
If you haven’t added any back in stock code before, skip ahead to the next section on creating your back in stock form.
Remove back in stock code from a Shopify site
- In your Shopify Admin, go to Online Store > Themes.
- Next to your published theme, click the additional options menu (3 dots), then select Edit Code.
- Open the theme.liquid file.
- Use the find shortcut (Command+F on Mac or Control+F on Windows) to search the word “backinstock” within the file.
- Find and delete the following code snippet:
<script src="https://a.klaviyo.com/media/js/onsite/onsite.js"></script>
<script>
    var klaviyo = klaviyo || [];
    klaviyo.init({
      account: "PUBLIC_API_KEY",
      platform: "shopify"
    });
    klaviyo.enable("backinstock",{
    trigger: {
      product_page_text: "Notify Me When Available",
      product_page_class: "button",
      product_page_text_align: "center",
      product_page_margin: "0px",
      replace_anchor: false
    },
    modal: {
     headline: "{product_name}",
     body_content: "Register to receive a notification when this item comes back in stock.",
     email_field_label: "Email",
     button_label: "Notify me when available",
     subscription_success_label: "You're in! We'll let you know when it's back.",
     footer_content: '',
     additional_styles: "@import url('https://fonts.googleapis.com/css?family=Helvetica+Neue');",
     drop_background_color: "#000",
     background_color: "#fff",
     text_color: "#222",
     button_text_color: "#fff",
     button_background_color: "#439fdb",
     close_button_color: "#ccc",
     error_background_color: "#fcd6d7",
     error_text_color: "#C72E2F",
     success_background_color: "#d3efcd",
     success_text_color: "#1B9500"
    }
  });
</script>- Click Save.
- Return to your website and refresh a product page for an out-of-stock item. Verify that the "Notify me" button is no longer visible.
Remove back in stock code from a BigCommerce site
- In your BigCommerce admin, go to Storefront > Script Manager.
- Look for any scripts related to Klaviyo’s back in stock feature. These scripts may have a name like “Klaviyo Back in Stock” or be labeled according to your previous installation.
- Next to the script, click the additional options (3 dots) menu, and choose Delete to remove the script.
If you originally pasted the Klaviyo back in stock code directly into a theme file (e.g., in footer.html), you must manually remove the code from there. To do this, go to Storefront > Themes > Edit Theme Files, find the file containing the script, and delete the code snippet.
- Save your changes.
- Return to your website and refresh a product page for an out-of-stock item. Verify that the "Notify me" button is no longer visible.
Create a back in stock form
You can only have one back in stock form in your account at a time, whether it is published or in draft mode. If a back in stock form already exists, you must delete it before creating a new one.
- In Klaviyo’s main navigation, select the Sign-up forms tab.
- Click Create form.
- In the search bar, type “back in stock” and select a pre-built Back in Stock template to customize.
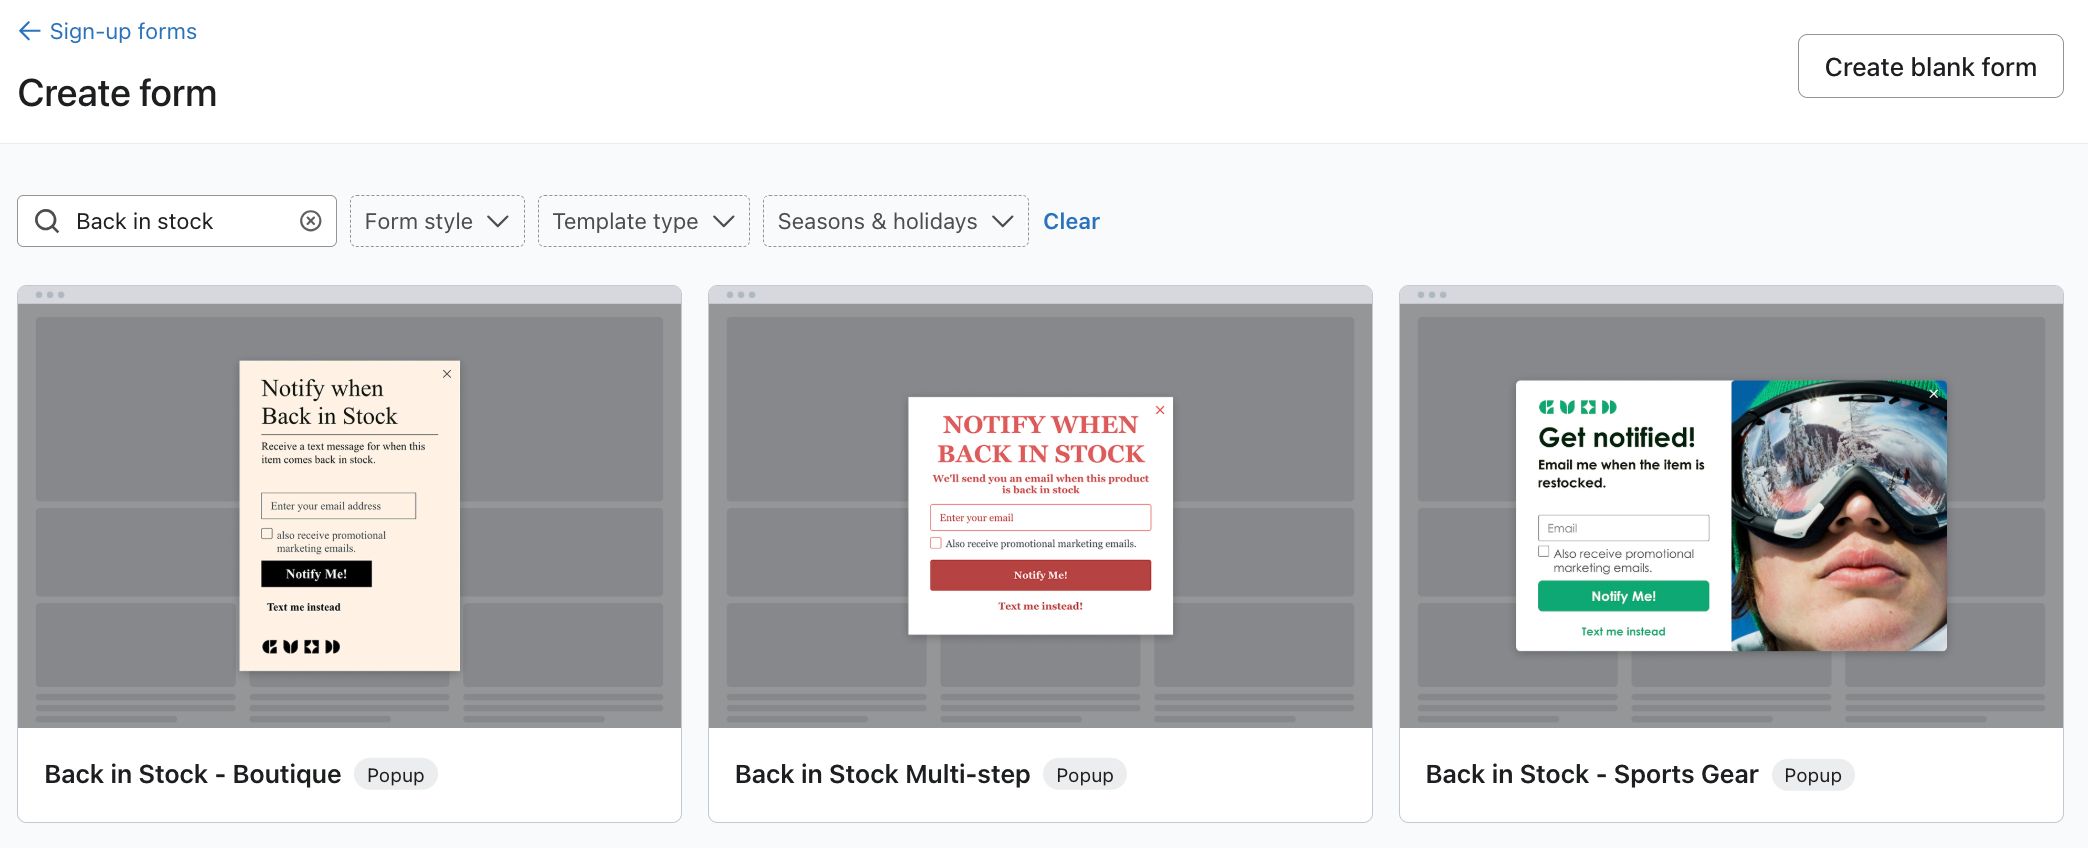
- If you would prefer to start from a blank form, click Build a blank form and then choose Back in stock as the form type.
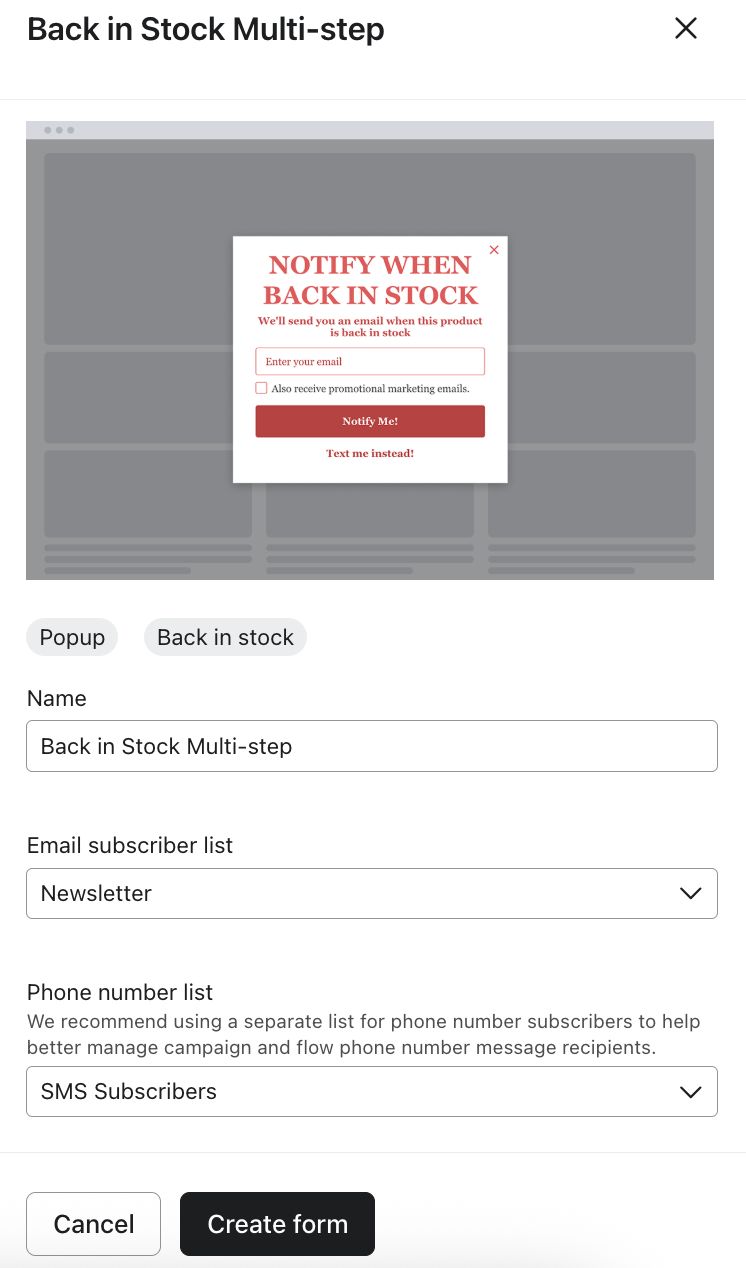
- Choose what list(s) you want to collect email, SMS and WhatsApp sign-ups to.
- Click Create form.
- Select the Product display button step in the menu bar. Note that this must always be the first step of the form, and cannot be deleted.
- In the editing menu on the left, choose where the button should appear on your product pages:
- Replace add to cart button: The "Notify me" button will replace the "Add to Cart" button for items that are out of stock.
- Stacked: The "Notify me" button will appear beneath the "Add to Cart" button (when it’s displayed as "Sold Out").

If you want to place the "Notify me" button in a different location, see the section below on using the klaviyo-bis-trigger for custom button placement.
- Use the options for Text, Button style, Border, and Drop shadow to update the label and styling of the "Notify me" button.
- Switch to the Email opt-in step and use the Styles menu to adjust colors, fonts, and layout so your form matches your brand.
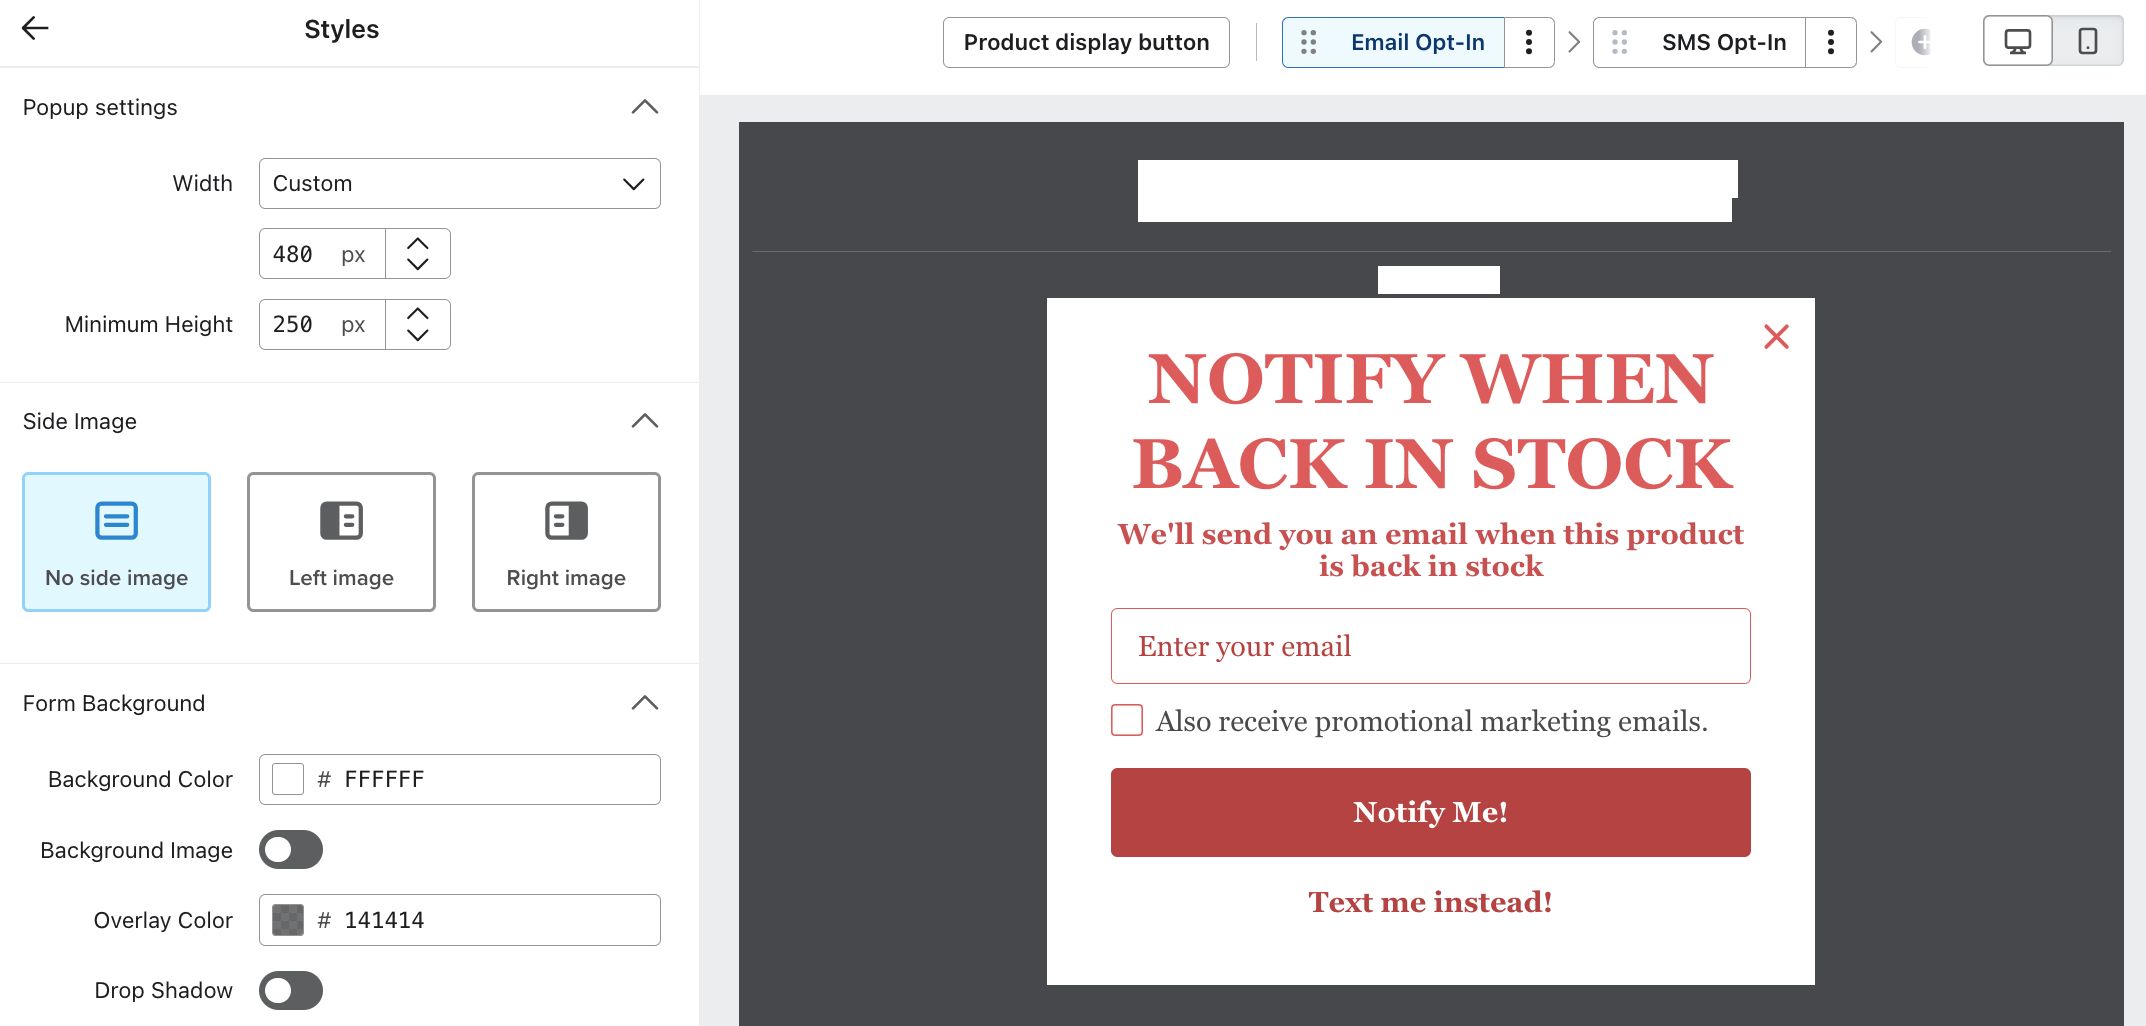
- Apply the styling to each subsequent step in your form, such as SMS opt-in or Success steps, by clicking each step in the menu bar and repeating step 9.
Every input step must include at least 1 email or phone number input field. If a step has both, you can remove 1. If a step has only 1 of the 2 inputs, it cannot be deleted from that step. You can, however, delete the entire step if you only want to collect 1 channel. Email marketing consent is optional and can be removed.
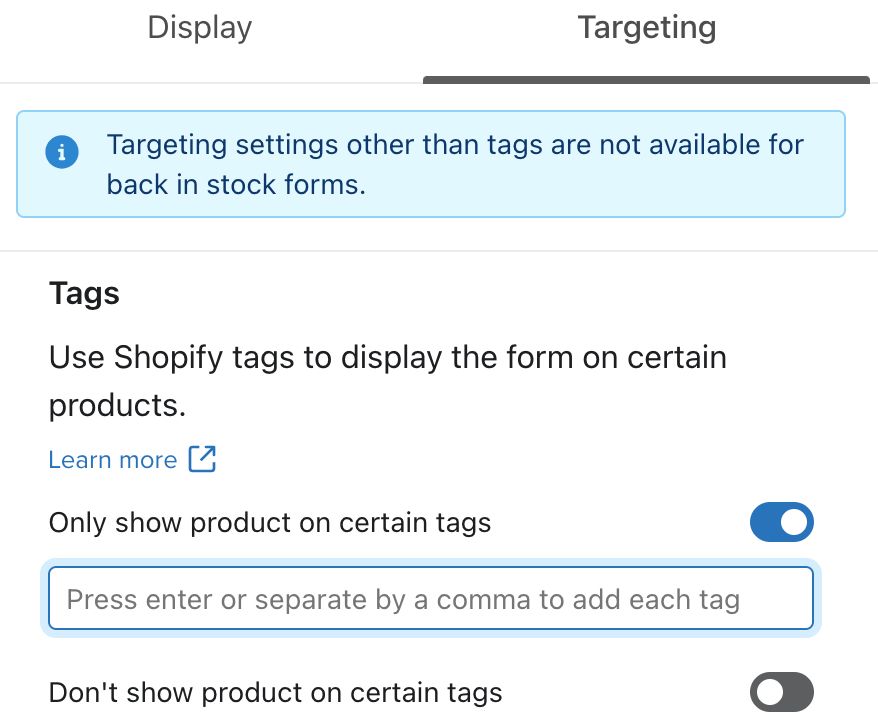
- Shopify only (optional): To control where the "Notify me" button appears, go to Targeting and behavior > Targeting, and use Shopify tags to include or exclude specific products for which the button should appear.
- When you’re satisfied with your form, click Publish to set it live. Once your form is live, your product display button will automatically appear when an item on your site goes out of stock.
- After publishing, you’ll see a prompt in the publish confirmation modal to set up your back in stock flow.
- If you already have a back in stock flow set up with the Subscribed to Back in Stock metric as the trigger, it will begin working with your new back in stock form automatically. You do not need to create another one; click Dismiss.
- If not, click Exit and create flow, then head to our guide on How to set up a back in stock flow.

Analytics for back in stock forms
You can monitor metrics for your back in stock form on its analytics page, including Back in stock submits and Marketing opt-ins. Note that the Submit rate is calculated based on the number of back in stock subscriptions, not marketing consent.
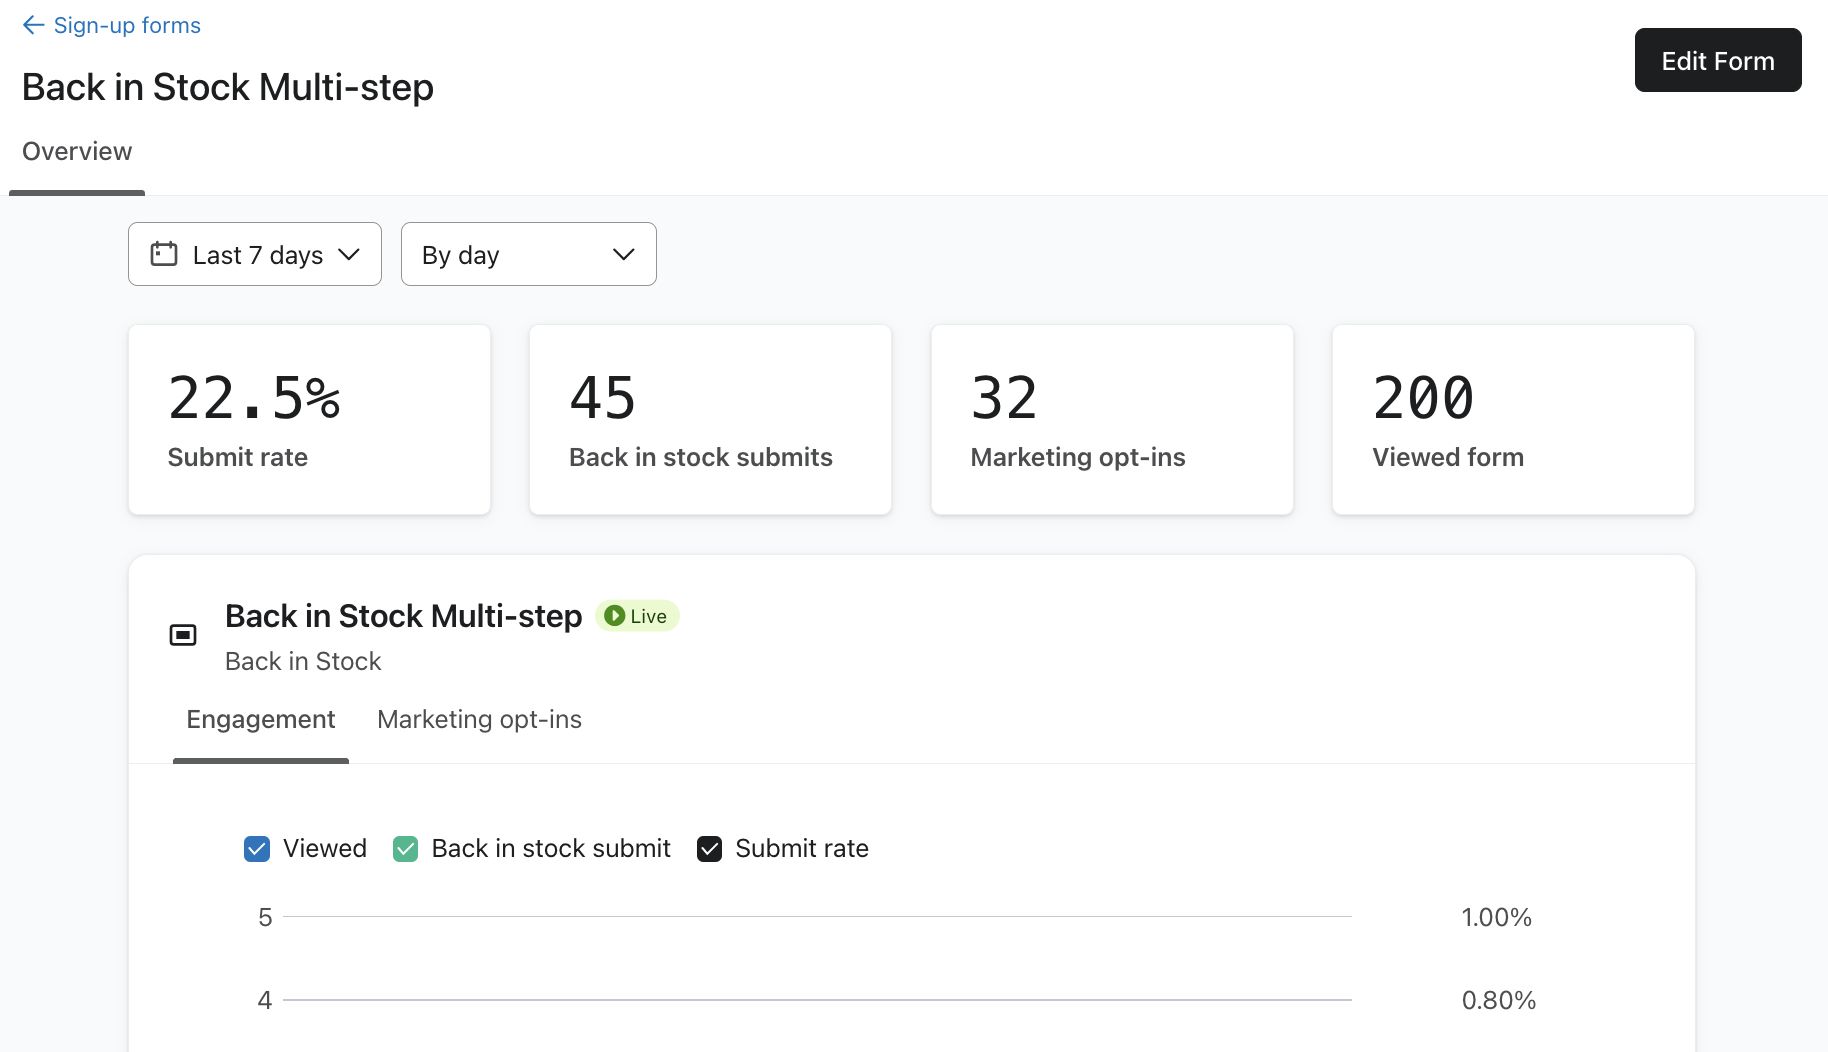
This page also includes graphs of the form’s data by step and by data collection type:
- Engagement: This refers to back in stock subscriptions (e.g., when a shopper signs up for email restock alerts).
- Marketing opt-ins: This refers to when shoppers provide consent to receive promotional messages, either by checking the marketing email opt-in box or by submitting a phone number, since text alerts always require promotional SMS consent.
Troubleshooting back in stock
If your back in stock experience isn’t working as expected, review the following common issues.
The "Notify me" button isn't appearing or is not in the right location
If the "Notify me" button is missing from your product page or you want to configure it to appear in a different, custom location, you can manually control its placement using the klaviyo-bis-trigger HTML attribute.
<a class="klaviyo-bis-trigger" href="#">Notify Me When Available</a>Add this attribute to the specific HTML element where you want the "Notify me" button to be rendered, and Klaviyo will then display the button at that location instead of the default location. This solution can be helpful if you're using a custom or non-standard theme; however it will not always resolve a missing button issue. If you're having trouble configuring a custom button location, consult your developer.
Compatibility with Shopify’s “Continue selling when out of stock” setting
Klaviyo’s back in stock feature does not work with Shopify’s “Continue selling when out of stock” setting. If this setting is enabled, the product always appears available, even with zero inventory. As a result:
- The “Notify Me” button and back in stock form will not appear.
- No back in stock emails will be sent, since Klaviyo cannot detect when inventory is restocked to trigger the flow.
To use Klaviyo’s back in stock feature, make sure “Continue selling when out of stock” is disabled for those products.
Are you using a Retina theme?
The Retina theme (from Out of the Sandbox) comes with a "Notify Me" form built into the product page. You will need to disable the default button that comes with your theme in order for the Klaviyo code to function.
Are you using a theme that hides a product if all variants are sold out?
If your Shopify theme hides a product when all the variants are sold out, you'll need to identify this area of the code in your product.liquid file and edit it to display all products, regardless of stock level.
Additional resources
- How to build a back in stock flow
Learn how to build a Klaviyo back in stock flow to alert customers about inventory if you are using the Shopify, BigCommerce, Magento 2, PrestaShop, SFCC, or Shopware platforms, or if you have an inventory-aware catalog synced via custom catalog feed or API.
- Understanding how back in stock flows work
Learn about how back in stock flows work, how contacts move through them, and how they appear different from most other metric-triggered flows. For instance, they have the back in stock delay component, which is unique to this type of flow.
- How to use SMS in your back in stock flows
Learn how to use SMS in your back in stock flows with Klaviyo.