How to create and manage header blocks
You will learn
Learn how to use header blocks to easily create a navigation bar for reuse in all of your email templates. You have full control over how your headers will look on both desktop and mobile devices.
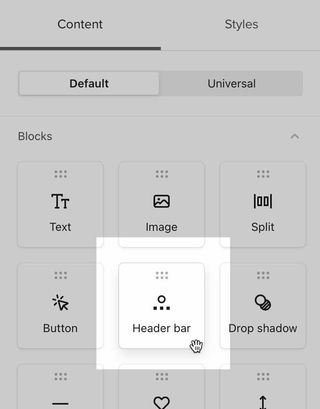
Add a header block and select a layout
- Drag a Header bar block into your template
- Complete all fields in the Layout and Content sections.
- Click Add Link to add additional links, or click the trash can icon next to an existing link to remove it. Open each link menu to add your URL.
- Click Add Link to add additional links, or click the trash can icon next to an existing link to remove it. Open each link menu to add your URL.

- Once you're satisfied with the appearance and content of your block, hover over the block and click the star icon to save it for future use.
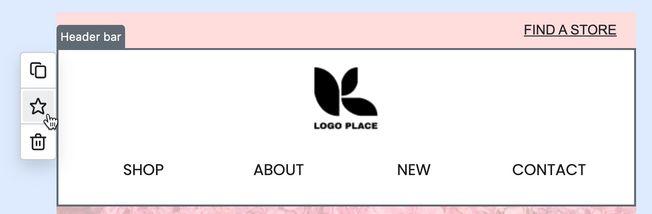
- Give your block a descriptive title like "Main Header Block," then click Create.
When you add this block to other templates (by clicking Universal and dragging the block into a new template), changes made to the block in one template will apply to any other templates containing that block as well.
Additional resources
- How to create and manage universal and saved content
Learn how to create, edit, and use universal or saved content to reuse specific blocks or sections within a template and avoid duplicative work. For example, if you have a header or a footer that you use in all your email templates, you can save it to avoid recreating it from scratch in every new email.
- How to create a base template
Learn how to create a base email template in Klaviyo. Once you create a base template, you can use it across your campaigns and flows to speed up your building process and ensure your branding is consistent across messages.