How to add action buttons to a push notification
You will learn
Learn how to add action buttons to your push notifications so that recipients can take action without having to open your mobile app. Action buttons reduce friction in the engagement process and can increase conversion rates for campaigns and flows.
Your mobile app must use one of the following versions of the Klaviyo mobile SDKs to use push action buttons.
iOS SDK | v5.3.0 or later |
Android SDK | v4.4.0 or later |
React Native SDK | v2.4.0 or later |
Flutter SDK | v0.2.0 or later |
Before you begin
Before adding action buttons to a push notification, make sure you have:
- Integrated the Klaviyo SDK into your mobile app.
- Configured iOS or Android push notifications in your Klaviyo account.
About push action buttons
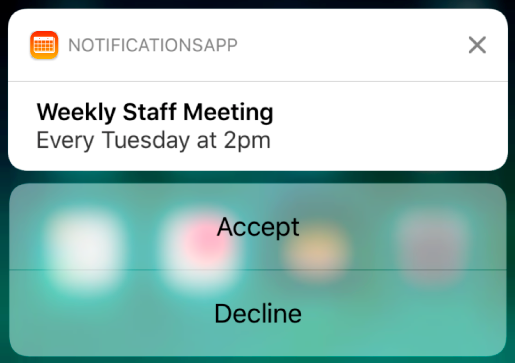
Push action buttons are interactive buttons that appear below a push notification’s main content. They enable recipients to perform tasks related to the notification from the device’s lock screen or notification center, increasing engagement and conversions.
On iOS, action buttons appear in a vertical stack below the notification.
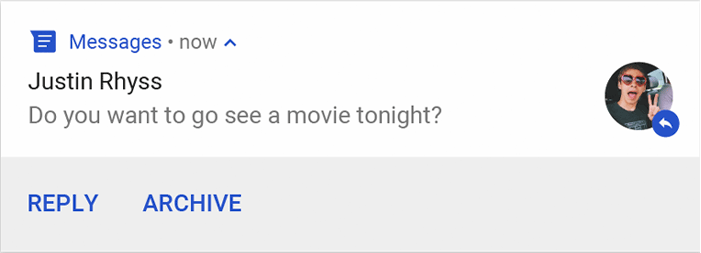
On Android, action buttons appear side-by-side in a horizontal row.
Button settings
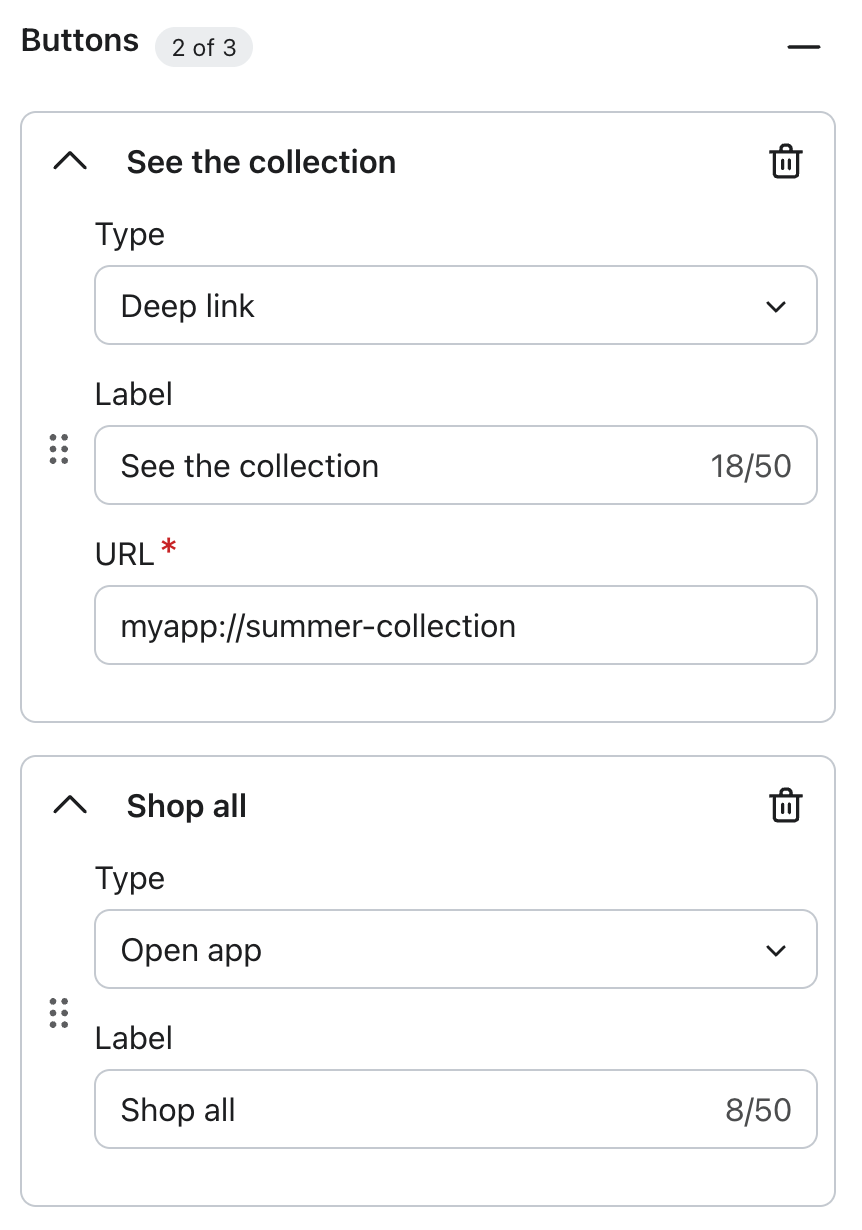
Each button requires a label and an action type. Some action types also require a URL.
Label
The label is the text that appears on the button. Labels are limited to 40 characters.
Action type
The action type determines what happens when a recipient taps the button. The following action types are available:
- Open app — opens the app to the home screen. No additional settings are required.
- Deep link — opens a specific screen in your app. You must provide a custom URI (e.g., myapp://products) or a universal link (e.g., https://www.myapp.com/products). The same link is used for both iOS and Android.
Add action buttons to a push notification
- In Klaviyo, navigate to the campaign or flow message where you want to add action buttons.
- Go into the push notification editor.
- Enter in your push notification content, such as the title and body.
- In the left-hand panel under Content, click the + icon next to Buttons.
- Select an action type from the dropdown. The default is Open App.
- Enter a label for the button.
- If you selected Deep link or Open website, enter the URL in the field that appears.
- To add another button, click Add button. You can add up to 3 buttons total.
- Click Next to save the message with the action button(s) and proceed with sending your message.
How button taps are tracked
When a recipient taps an action button, Klaviyo records an Opened Push event. This event includes the following button-specific attributes:
- Button Label — the label text you entered for the button.
- Button Action — the action type (for example, Open App or Deep link).
- Button Link — the URL associated with the button (for deep link and open website actions only).
You can use these attributes to build segments or reports based on button tap behavior.
Best practices
- Keep labels short and action-oriented. Labels like Shop now or View deal are easy to scan and set clear expectations for what the button does.
- Limit buttons to one or two per notification. Too many choices can reduce tap rates. Use buttons for the most important actions that you want the recipient to take.
- Test buttons on both iOS and Android. Button layout differs by platform, so confirm that buttons display correctly before sending.
Use deep links to send recipients directly to the right screen. Avoid linking to the app home screen when a more specific destination is available.