How to create a custom viewed page metric
You will learn
Learn how to create a custom Viewed Page metric and understand when your customers visit non-product pages on your site.
Before you begin
Before continuing with this article, make sure you've integrated your ecommerce platform (such as Shopify) with Klaviyo.
It's important to add the following JavaScript code snippet to each page of your site that you want to track a Viewed Page metric for. This snippet will work for both landing pages and any other site pages.
Installing the snippet
- Copy and paste the complete snippet below into your page files.
- Then save and publish your website files with the updated code.
<script type="text/javascript">
//Script to initialize Klaviyo object on page load
!function(){if(!window.klaviyo){window._klOnsite=window._klOnsite||[];try{window.klaviyo=new Proxy({},{get:function(n,i){return"push"===i?function(){var n;(n=window._klOnsite).push.apply(n,arguments)}:function(){for(var n=arguments.length,o=new Array(n),w=0;w<n;w++)o[w]=arguments[w];var t="function"==typeof o[o.length-1]?o.pop():void 0,e=new Promise((function(n){window._klOnsite.push([i].concat(o,[function(i){t&&t(i),n(i)}]))}));return e}}})}catch(n){window.klaviyo=window.klaviyo||[],window.klaviyo.push=function(){var n;(n=window._klOnsite).push.apply(n,arguments)}}}}(); </script>
<script type="text/javascript">
//Script to track viewed page
klaviyo.track("Viewed Page", {
   PageName: "About Us"
});
</script>
Once the snippet has been added to your site, it will record a custom Viewed Page metric in which the property name PageName equals the value "About Us".
Changing the PageName value
You can change the default value above to represent another page name on your site.
- Remove the default "About Us?? value.
- Add your desired text contained within the quotation marks. For example, if you want to track visits to your brand stories page, you could instead use "Customer Stories" as the value.
Changing the Viewed Page value
You can change the Viewed Page value to represent another value (e.g., Visited Page, Tracked Page, etc.).
- Remove the default Viewed Page value.
- Add your desired text contained within the quotation marks.
Track Viewed Page by URL
If you would like to track Viewed Page by URL instead of by page title, you can use the alternate snippet below. Note that page you wish to track should include the quotations and be the URL of the page you want to track.
<script type="text/javascript">
//Script to initialize Klaviyo object on page load
!function(){if(!window.klaviyo){window._klOnsite=window._klOnsite||[];try{window.klaviyo=new Proxy({},{get:function(n,i){return"push"===i?function(){var n;(n=window._klOnsite).push.apply(n,arguments)}:function(){for(var n=arguments.length,o=new Array(n),w=0;w<n;w++)o[w]=arguments[w];var t="function"==typeof o[o.length-1]?o.pop():void 0,e=new Promise((function(n){window._klOnsite.push([i].concat(o,[function(i){t&&t(i),n(i)}]))}));return e}}})}catch(n){window.klaviyo=window.klaviyo||[],window.klaviyo.push=function(){var n;(n=window._klOnsite).push.apply(n,arguments)}}}}(); </script>
<script type="text/javascript">
//Script to track viewed page
klaviyo.track("Viewed Page", {
      url: window.location.href
});
</script>
Test your viewed page tracking
To test if your Viewed Page tracking is working, make sure that your page has been published and that you’ve amended "?utm_email=youremail@example.com" to your page’s URL to cookie yourself and track your activity.
- After visiting your page, go into your Klaviyo account.
- Navigate to Analytics > Metrics.
- Search for Viewed Page (or, whatever alternative name you use for this metric) in the field above.

4. Click into your Viewed Page metric (or whatever metric you are using).
5. Select the Activity feed tab. You can then review that your metric is tracking, as shown in the example below.
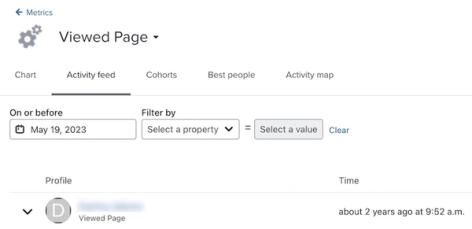
If you can view your activity, that means the metric is tracking successfully. If you don’t see your activity, try reloading the page in Klaviyo.
For Shopify stores, based on your Customer Privacy settings in Shopify, Klaviyo may not track onsite events for visitors to your Shopify store in the EU, EEA, UK and Switzerland, unless they have provided consent.
Additional resources
- Understanding cookies in Klaviyo
Learn more about how Klaviyo uses cookies as a part of our web tracking to gather information and help improve conversion rates and email performance. This article explains the specific cookie we use and its purposes so that you understand how customers are tracked. This information helps you understand how Klaviyo gathers data, and how this may impact customer privacy and compliance laws.
- Getting started with Klaviyo onsite tracking
Learn about the different ways that Klaviyo can support onsite tracking on your ecommerce site. There are 2 key types of onsite tracking:
- Setting Up API-based Website Activity Events