Understanding time delays in date property flows
You will learn
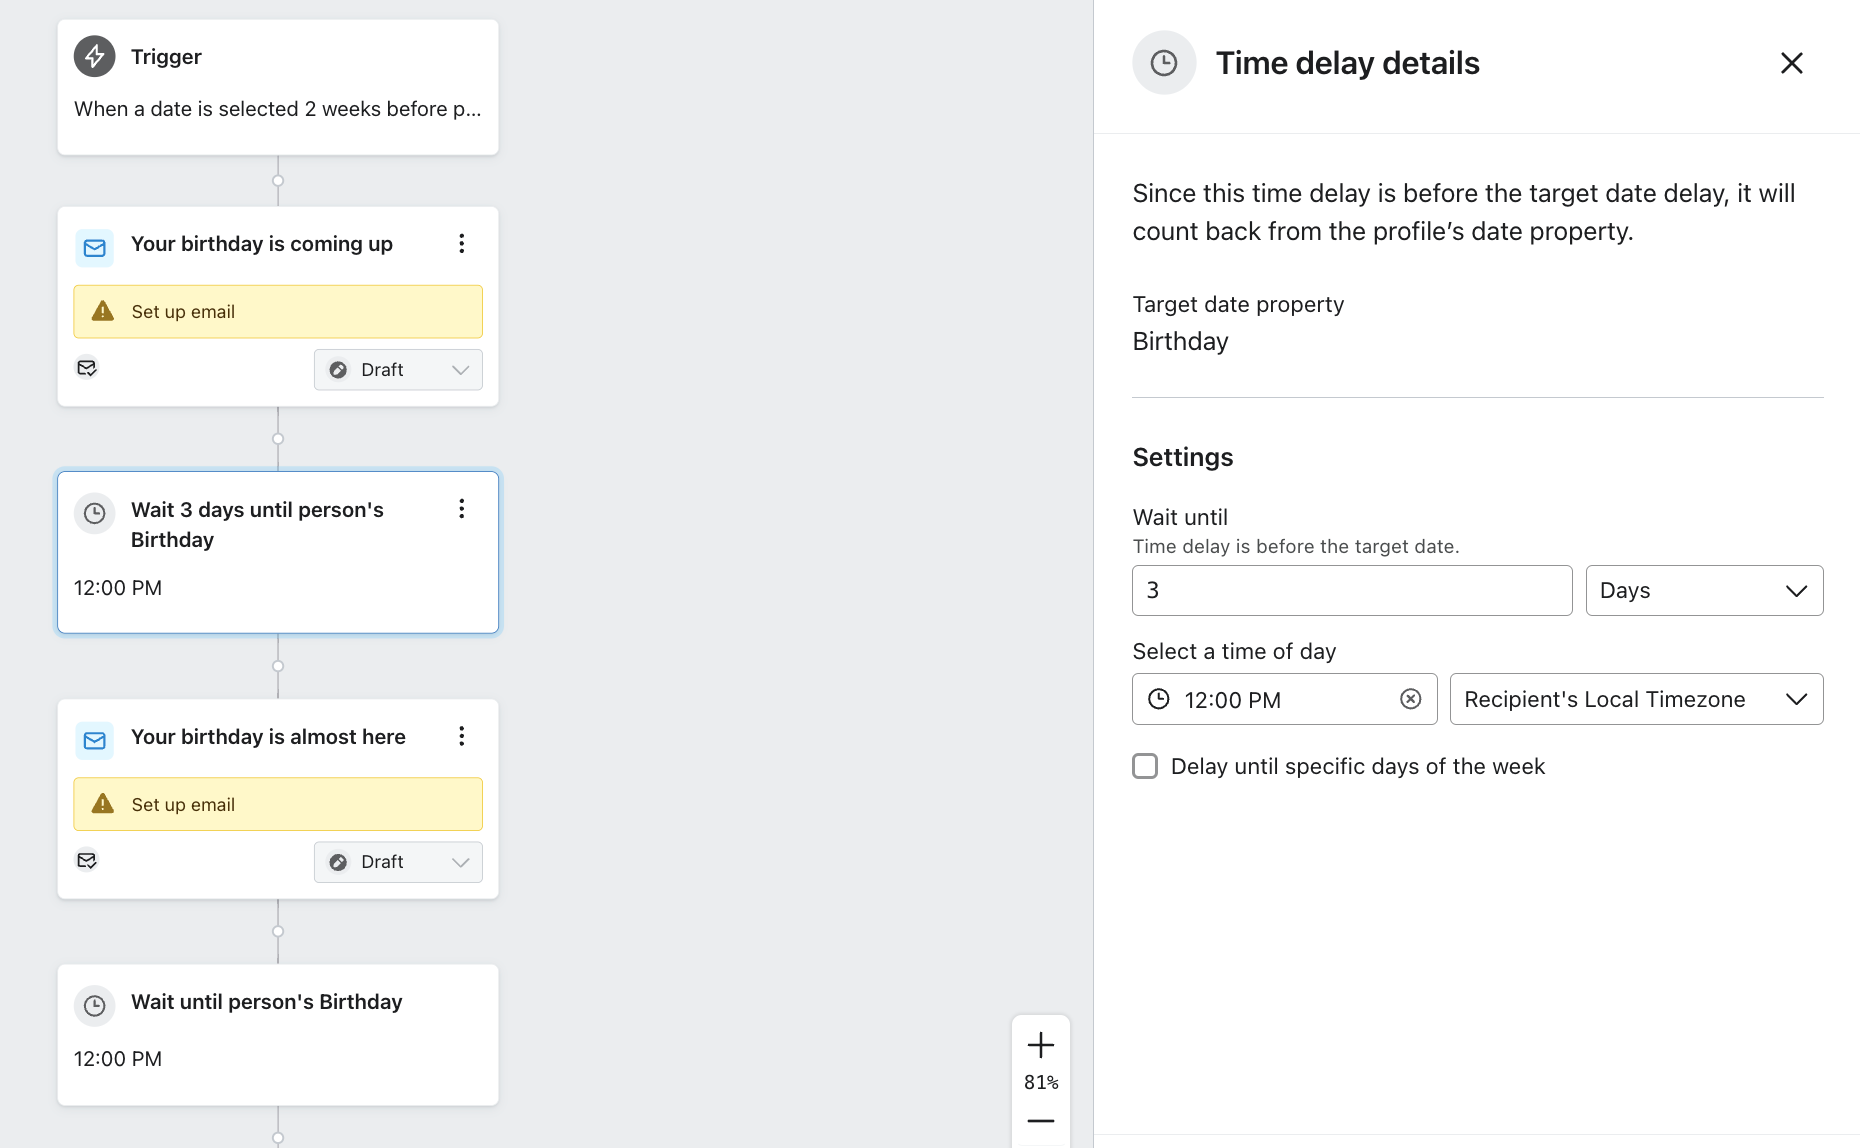
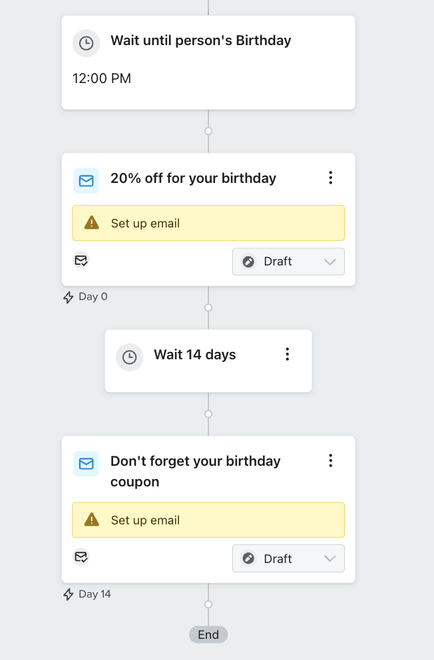
When you configure a flow to start before a specific date, a target date delay component is automatically created to serve as an anchor point within the flow. This component will have a target icon and will say Wait until person's [Date Property]. When using time delays in this type of flow, they appear different depending on whether they are used before or after the anchor point. This article goes over using time delays in date-based flows.
Time delays before the target date delay
If you drag in a time delay before the anchor point, you will see a special type of delay configuration. This configuration will prompt you to fill in Wait until ___ days/weeks/months. This allows you to easily count down to the date using a regular time delay.
Time delays after the target date delay
If you drag in a time delay after the target date delay anchor point, the setup will be the same as a regular time delay. You will be prompted to set the delay to wait a certain number of days/weeks/months after the previous step.
Additional resources
Read other articles discussing date-based flows: