Getting started with Stripe
You will learn
Learn how to integrate Stripe with Klaviyo in order to personalize and target emails based on invoice and payment data from your customers.
You'll set up the Stripe integration in 2 steps. First, you'll connect Stripe by enabling the integration in Klaviyo. Then you set up webhooks in Stripe which will enable a real-time sync of specific Stripe data into Klaviyo.
Here's an overview of the data we sync from Stripe:
- When an invoice is issued, and the items included in each invoice
- Payment information for when a user fails payment, is refunded, or successfully pays
Enable the Stripe integration in Klaviyo
- In Klaviyo, select the Integrations tab.
- Select Explore apps, search for Stripe, then click the card.
- Then, click Install.
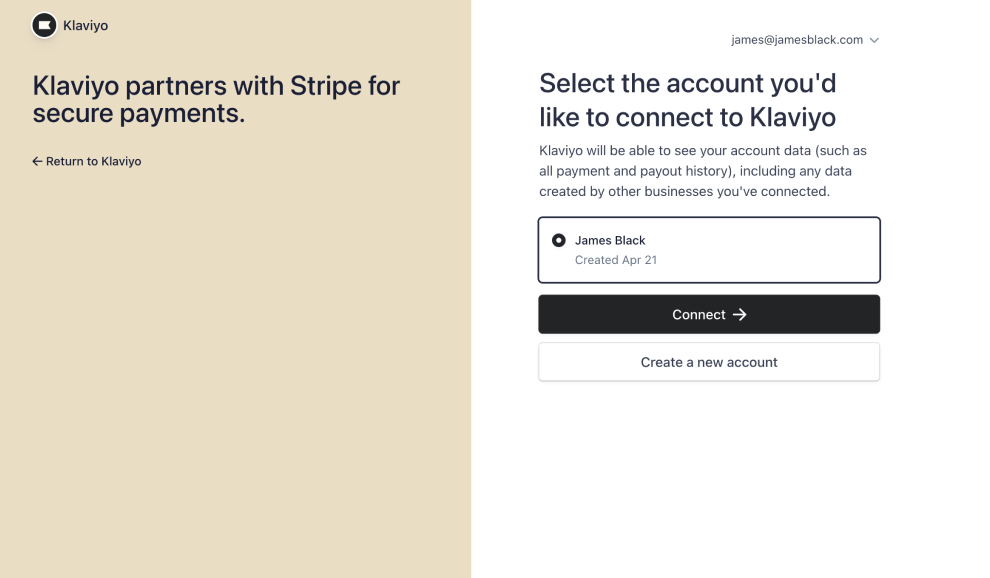
- Click Connect to Stripe. This will bring you to Stripe's website - log in if needed.
- Select the Stripe account you'd like to connect to Klaviyo and click Connect.
- Back in Klaviyo, you can choose to verify Stripe webhooks by entering your signing secret (recommended). This is found in Stripe under Developers > Webhooks and will add an extra level of security to your integration.
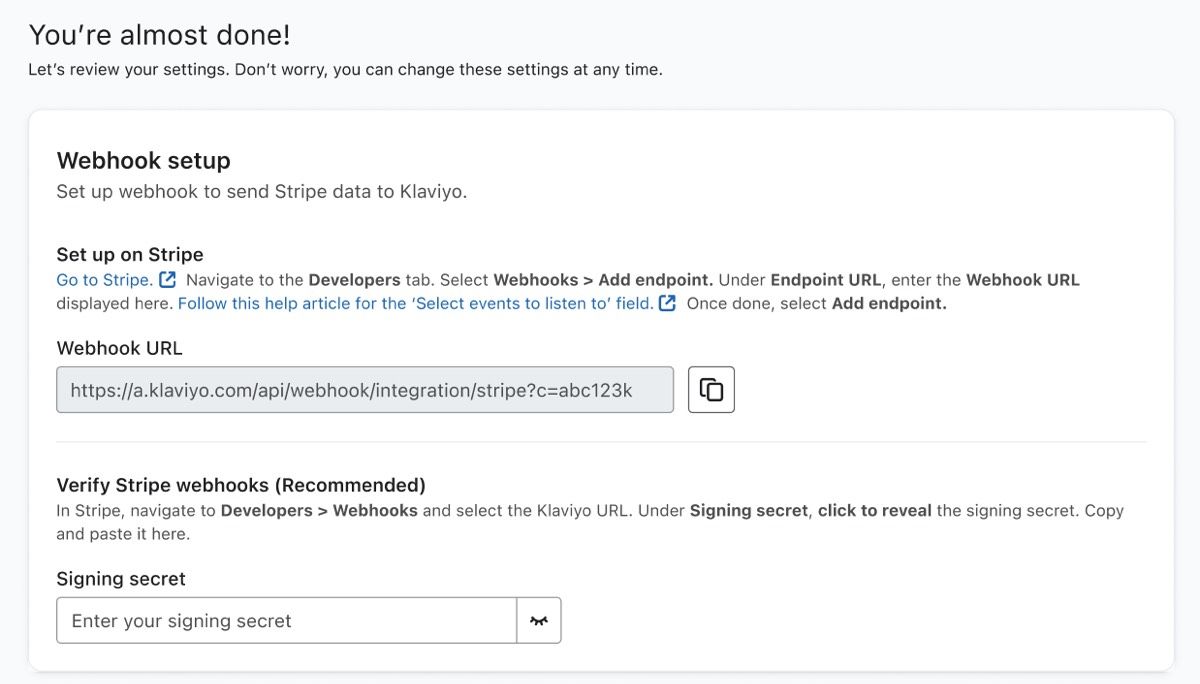
- Copy the webhook URL from this page. This will be pasted into your Stripe account in the next section.
- Click Complete setup.
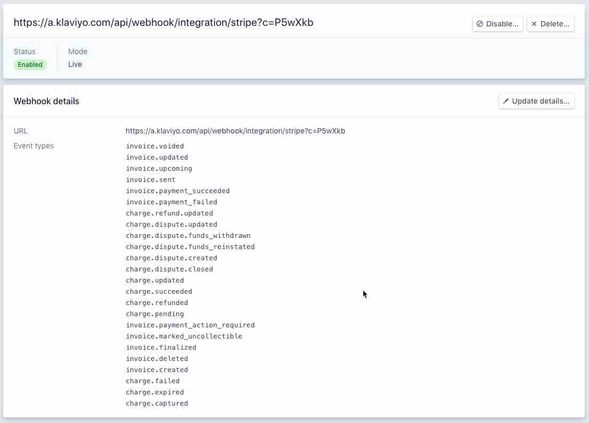
Set up Stripe webhooks
Now we'll set up your Stripe webhooks, which will enable you to sync your Stripe data in real-time.
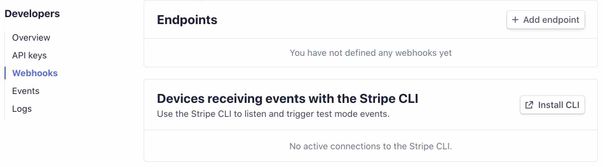
- Open Stripe in a new tab, and navigate to the Developers tab.
- Select Webhooks, and click Add endpoint.
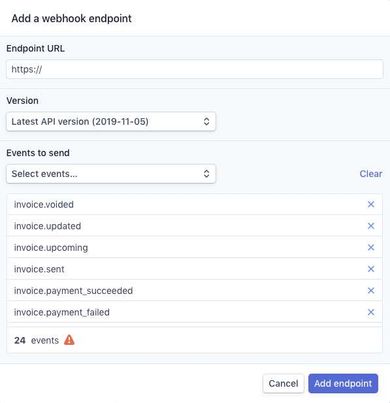
- Fill in the following fields:
- Endpoint URL
Paste the URL you just copied from Klaviyo. - Version
Select the latest API version. - Events to send
Klaviyo requires charge and invoice data points. In the Events to send dropdown, select all of the charge and invoice events. You can optionally omit all charge.dispute events. Create endpoints for all of the following events:- charge.captured
- charge.expired
- charge.failed
- charge.pending
- charge.refunded
- charge.succeeded
- charge.updated
- invoice.created
- invoice.deleted
- invoice.finalized
- invoice.marked_uncollectible
- invoice.payment_action_required
- invoice.payment_failed
- invoice.payment_succeeded
- invoice.sent
- invoice.upcoming
- invoice.updated
- invoice.voided
- Endpoint URL
- After you've selected all charge and invoice events, select Add endpoint.
- You'll receive confirmation that your webhooks are enabled.
- Your Stripe integration is now enabled.
View data synced from Stripe
To check on your enabled integration:
- Click the Analytics dropdown in Klaviyo and select Metrics.
- Find Stripe's Successfully Paid metric and click on the Activity feed icon.
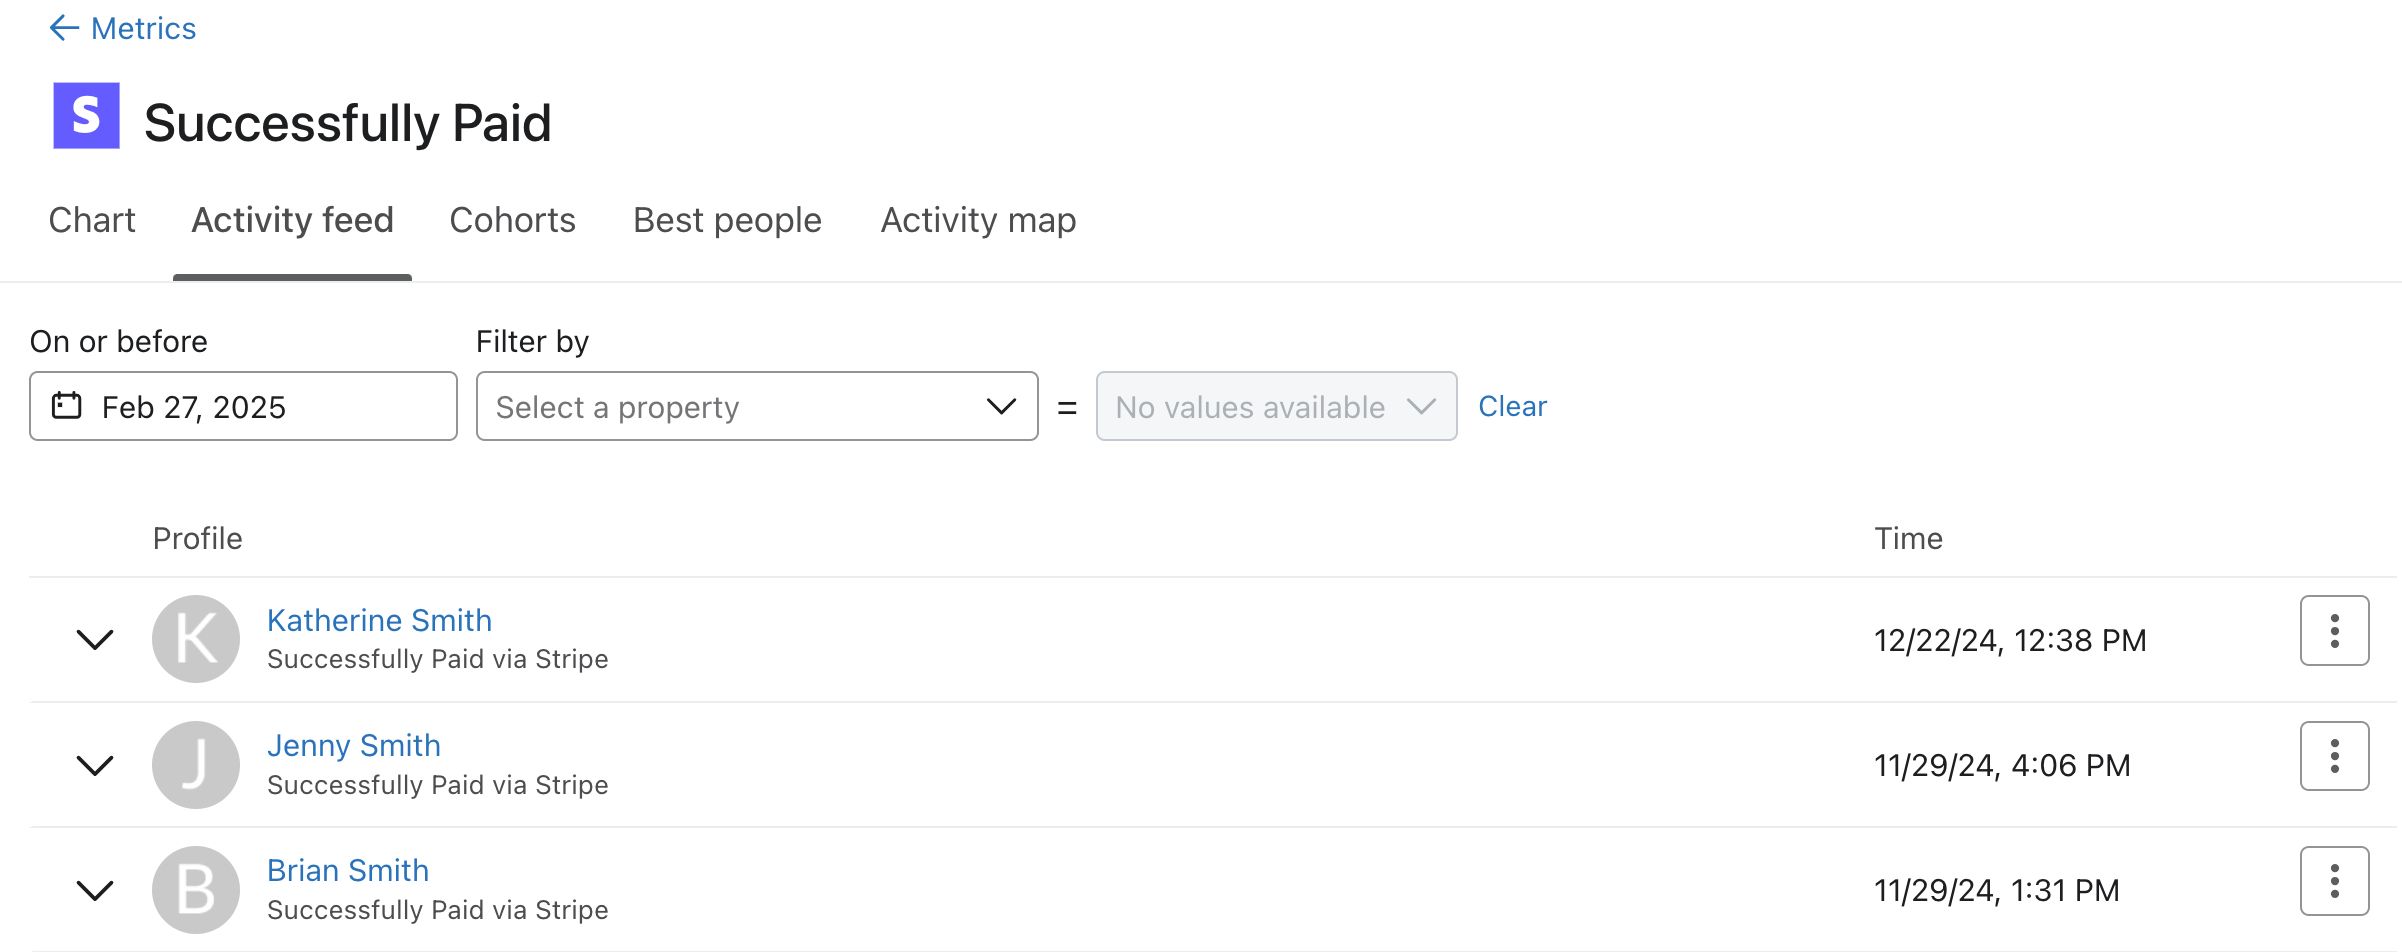
- If your integration has started syncing data, you will see invoices issued through Stripe populate here. When your integration is fully synced, the Stripe integration will show a green border next to it in your Klaviyo account. Klaviyo imports all of your Stripe data. To verify this, you can compare the number of successful payments on a particular day with what's in the Stripe interface and confirm they match.
- For instance, click the Chart heading for the Successfully Paid metric. This chart shows the last 30 days of data by default. Either mouse over yesterday's data point or look in the table of data below the chart to see how many payments you had yesterday. Compare that number to what's stored in Stripe and you should see they match exactly.
- If the data doesn’t match up, the issue is most likely that the timezone in your Klaviyo account doesn't match the timezone in your Stripe account. To check your timezone setting in Klaviyo:
- Click your account name in the lower left.
- Select then clicking Settings > Organization.
- Scroll down to Time zone.
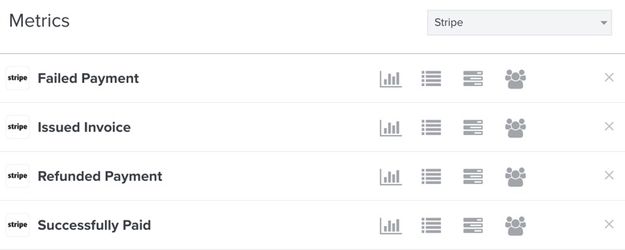
The Stripe metrics
Stripe syncs the following metrics to Klaviyo:
- Failed Payment
- Issued Invoice
- Refunded Payment
- Successfully Paid
Failed Payment
This metric is recorded every time a payment made through Stripe is marked as failed. Use this metric to target customers with failing payments to let them know they have an overdue balance. You can filter and target Failed Payment events based on the following criteria:
- AttemptCount
The number of times this invoice attempted to charge the user. - Currency
The currency of the invoice failed to be paid, e.g., USD, GBP. - Invoice
The invoice this failed payment is tied to in Stripe. - Reason
The reason in Stripe this payment failed, e.g., Your card has expired, Your card was declined.
Issued Invoice
This metric is recorded every time an invoice is issued to your customers through Stripe. Use this metric to segment on customers who have been issued an invoice, but either have not paid or had a payment fail. It can also be used to trigger segments to notify customers of an upcoming payment.
Refunded Payment
This metric records an event when you refund a payment through Stripe. You can filter and target Refunded Payment events based on the following criteria:
- Amount
The value of the payment that was refunded.
Successfully Paid
This metric is recorded each time a customer successfully pays an invoice through Stripe. These events include data about your customer, their invoice, and the products in their invoice. Use this metric to send automated invoices to customers after they pay, or in email flows to determine when a customer has been active on your website, but hasn't made payments for your products or services. You can then send those users emails offering discounts to make a purchase on your website.
You can filter and target Successfully Paid events based on the following criteria:
- Currency
The currency of the invoice paid, e.g., USD, GBP. - Invoice
The invoice this payment is tied to in Stripe.
Customer data
Klaviyo uniquely identifies each individual by their email address. If Stripe syncs over customer data with a new email address, Klaviyo will create a new profile consisting of the customer's email address and associated Stripe metrics. Credit card expiration dates are stored as a custom property in a customer's profile.
One of the Stripe events listed above must occur in order for a profile to be created in Klaviyo.
Use Stripe data in Klaviyo
Any Stripe metric or metadata can be used to trigger a flow in Klaviyo.
Automated invoices
You can send out invoice receipts to your customers automatically after they make a payment by setting up an invoice flow, triggered by Stripe's Successfully Paid metric.
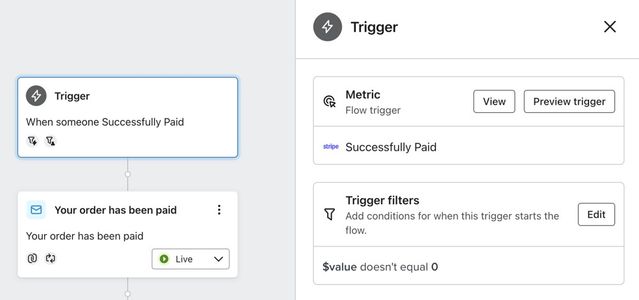
This flow can automatically populate an email that displays dynamic payment details using template tags that reference Stripe payment attributes.
For more information on embedding dynamic data into an email template, see our article on template tags and variable syntax.
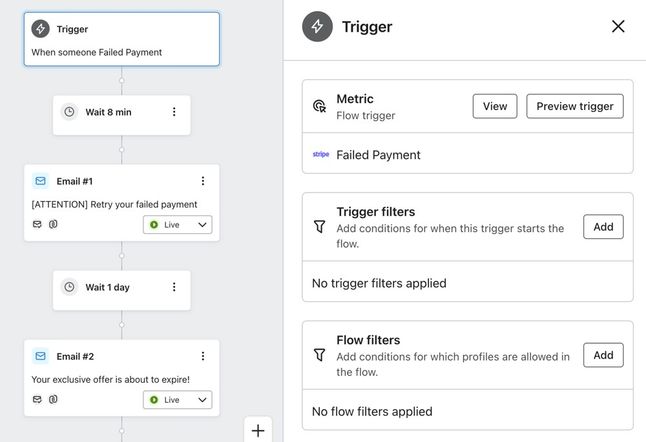
Stripe failed payments flow
Alert your customers to a failed payment with an automated flow, triggered by the Stripe Failed Payment metric.
Troubleshooting
I am not seeing all activity in Stripe sync to Klaviyo.
The most common reason why a Stripe event won't sync to Klaviyo is because there is no email address associated with the event. Because Klaviyo uses an email address to uniquely identify a person, we can’t create a profile for someone who is not associated with an email address. Likewise, Klaviyo can’t link an event to a profile if it is not associated with an email address.
Keep in mind that first and last name inputs are not necessarily consistent or unique, so we don’t create profiles based on this information alone. Doing so could lead to duplicates and inaccurate tracking.
If, even with email addresses associated, you’re still not seeing Stripe data sync to Klaviyo, reach out to our support team.
Outcome
You've now integrated Stripe with Klaviyo and learned how to use your synced data.
Additional resources
- Getting started with flows
Learn how to use flows, also known as automations or drip campaigns, in Klaviyo for personalized and automated communications to your customers, and learn how to set your first flow live.
- Getting started with segments
Learn how to create and use segments in Klaviyo, which are a powerful tool for understanding your audience and sending targeted messages.
- Understanding the types of information exchanged between Klaviyo and apps
Learn about what types of data are exchanged between Klaviyo and external apps, and where that data is found in your Klaviyo account. When you integrate a third-party application with Klaviyo, the two platforms exchange information. Most data exchange with Klaviyo is one-way; data is pulled into your Klaviyo account so you can leverage a broad scope of your customers' data within Klaviyo.