How to custom code consent pages
You will learn
Learn how to enable and use Klaviyo's hosted pages feature, which allows you custom code your own preference pages, subscribe pages, and unsubscribe pages.
This article is for developers; Klaviyo does not currently offer services to help build out custom code, nor do we provide support for custom code troubleshooting. To learn about our built-in app consent pages, head to our article on getting started with consent pages.
Before you begin
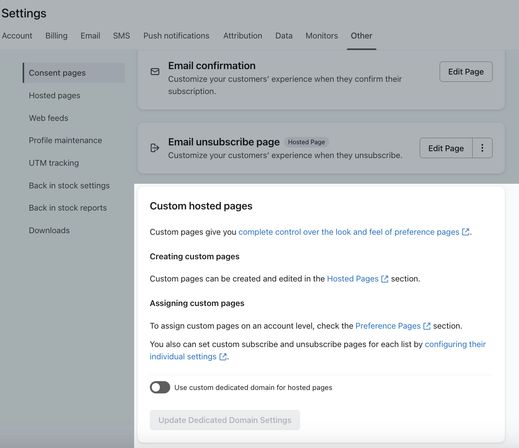
Before configuring a hosted page, enable this feature:
- Navigate to Settings > Other.
- Choose Consent pages from the dropdown.
- Under Custom hosted pages, toggle on the switch to Use custom dedicated domain for hosted pages.
Note that only accounts with a paid plan who have passed account verification have access to this setting.
Create a custom consent page
- Head to Settings > Other.
- Click Hosted pages.
- Next to Pages, click the + symbol to add a new page.
- Name this page (e.g., unsubscribe.tmpl); you will be able to use this for any of your consent pages, but you can create more than 1 page if you'd like.
Hosted page names cannot contain spaces as it will lead to an error. Avoid spaces or use underscores to break up titles.
- Design an HTML page that includes the fields and features of your choice. Example fields that can be inserted for a custom consent page include:
- Choices for email frequency:
- An option to unsubscribe
- An option to receive all emails
- Frequency options for daily, weekly, monthly, etc. newsletters
- Information that can be used to target and segment:
- A checkbox for whether or not the user wants sale announcements
- A checkbox for whether or not the user wants product announcements
- A checkbox for whether or not the user wants blog updates
- Other lists the user may want to join
- Choices for email frequency:
Example of HTML code for a consent page
You can use this code in your unsubscribe.tmpl to get a fully functional consent pages with email type and frequency preferences: