How to send test data to Zapier
You will learn
Learn how to send test data to Zapier via a POST request when creating a webhook to send email and SMS consent to Klaviyo.
This article builds off of the information in How to send consent to Klaviyo via Zapier.
Create a POST request
Before testing your trigger, you will need to send test data to your webhook via a POST request. The steps listed below explain how to make the POST request via Postman, but you’re welcome to use any program you’d like.
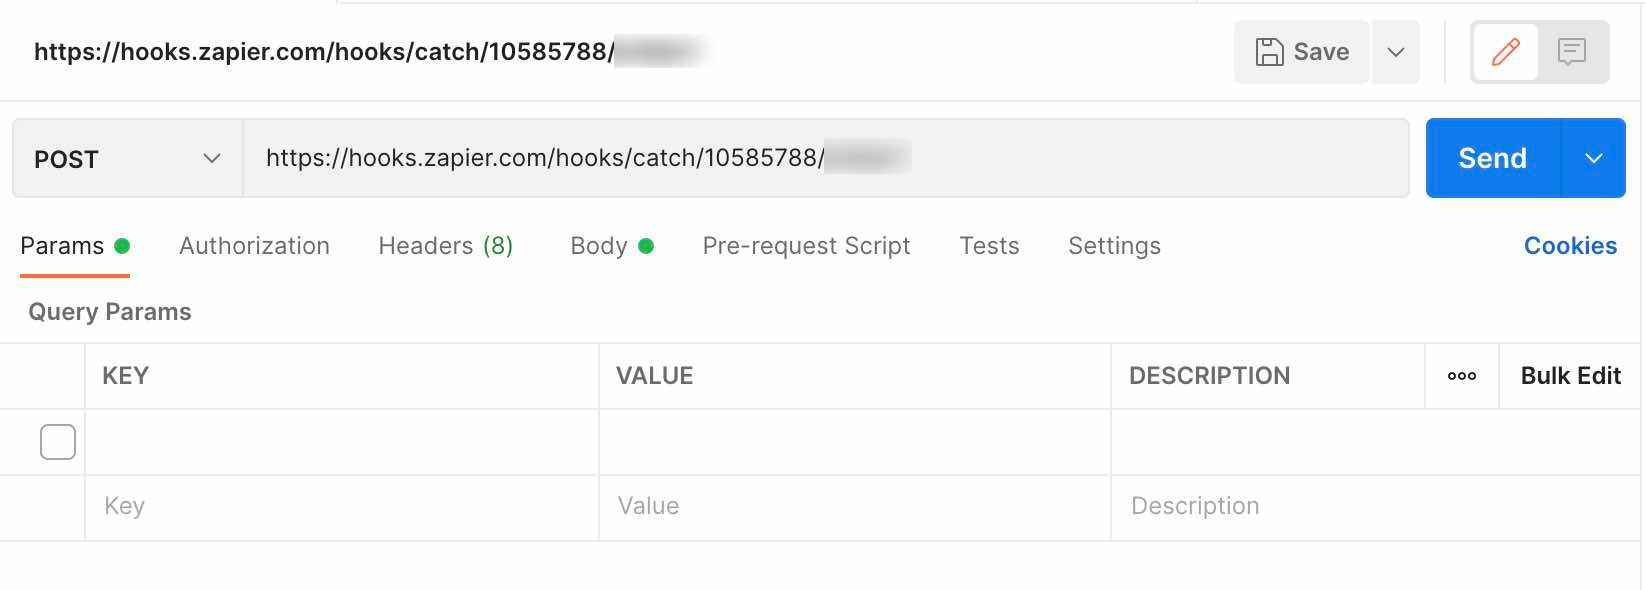
- Copy the webhook URL generated by Zapier.
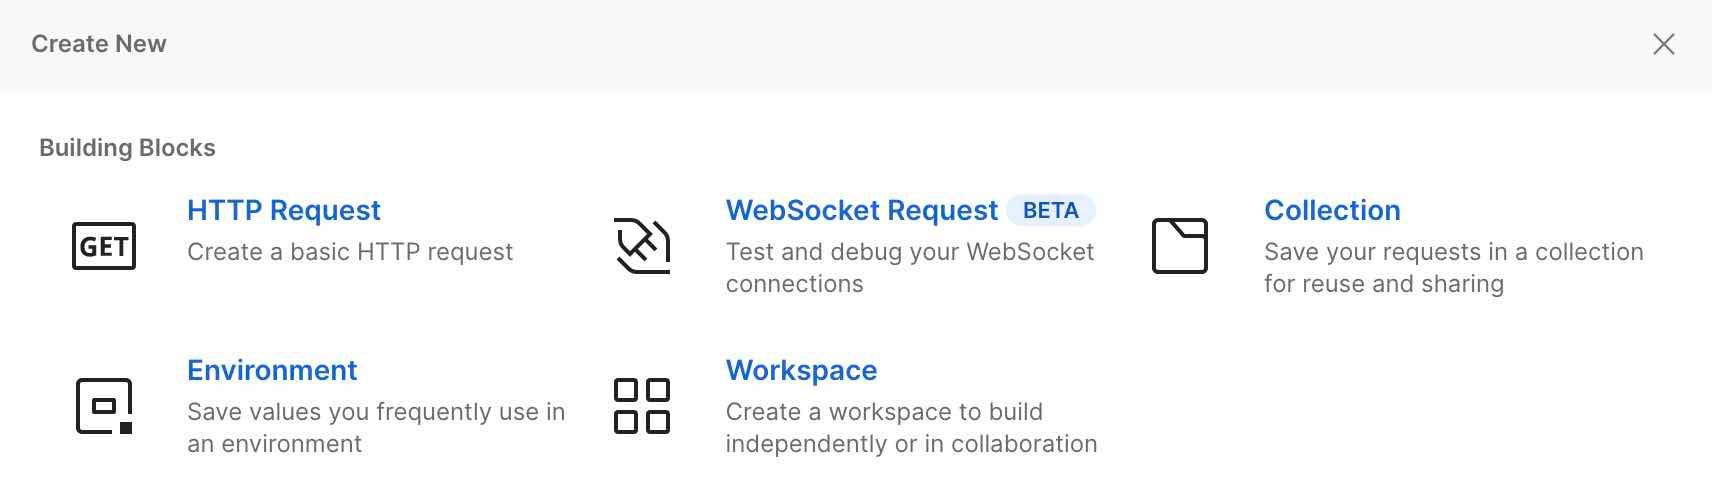
- In Postman, click New to start a new request.
- Select HTTP Request from the Create New menu.
- Paste the Zapier webhook URL you copied earlier into the URL box.
- Select POST from the dropdown to the left of the webhook URL.
- Select the Body tab, choose the form-data radio button, and then enter the keys and appropriate test data from the following table. Make sure to format phone numbers correctly. You'll need to use a real phone number when testing your webhook in order for the profile to be added to your list.
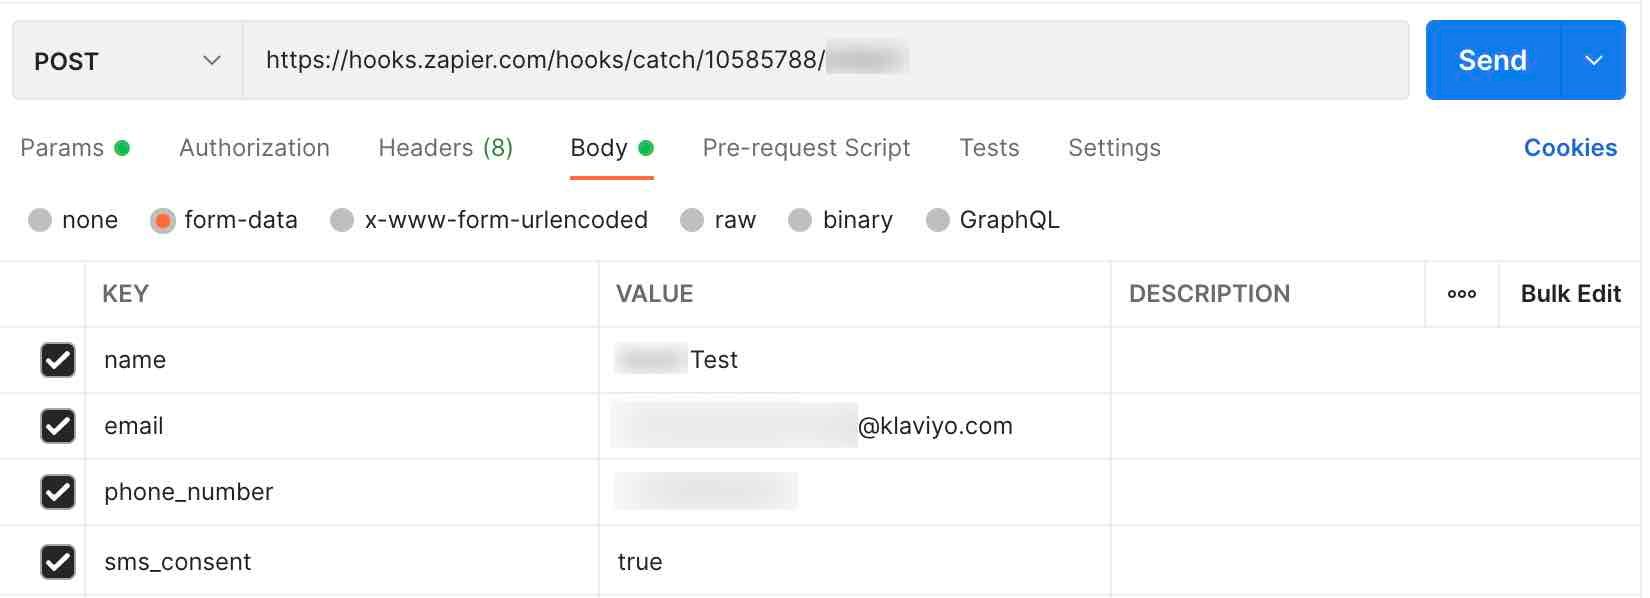
Key | Value |
| <Test name> |
| <Test email> |
| <Test phone number> |
| true |
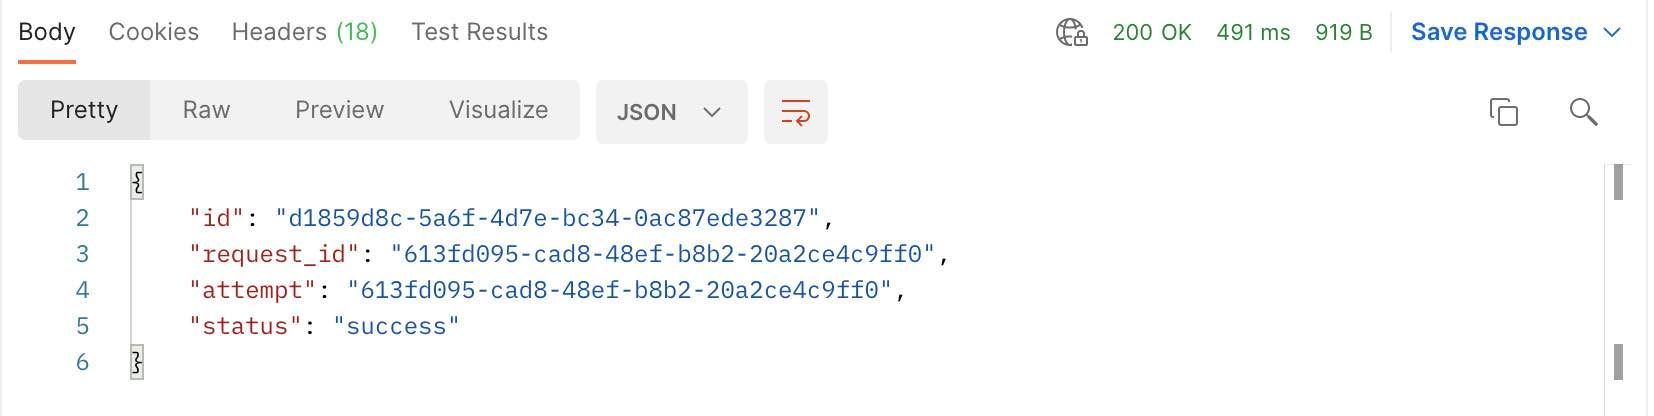
- Click Send to send the test data to Zapier.
- If the POST request is successful, you’ll see the line
"status": "success"in the response.
Now you can return to Zapier and complete the webhook setup process.
Additional resources
- Getting started with Klaviyo APIs
Get a foundational understanding of API calls and how the Klaviyo APIs can benefit your business. In this guide, you will learn about REST APIs, HTTP methods, and developer tools to prepare you for testing Klaviyo's APIs. Your first API calls can be accomplished in as little as 10 minutes from start to finish. If you are already familiar with API calls and are ready to test our APIs, follow our guide on how to use our Postman collections.
- Understanding how information is exchanged between Klaviyo and apps
Learn about how information syncs between Klaviyo and your third-party apps via an application programming interface (API). Most data exchanged via a Klaviyo integration is one-way: data is pulled into your Klaviyo account so you can leverage a broad scope of your customer's data.
- How to send consent to Klaviyo via Zapier
Learn how to create a custom Zapier webhook to send SMS consent to Klaviyo. You can easily modify the instructions in this guide to send email consent as well.