How to import geofences using a CSV upload
You will learn
Learn how to import multiple geofence locations into Klaviyo by uploading a CSV file.
Table of contents
To import geofences using a CSV upload:
Create your CSV file
Before you upload, you need a properly formatted CSV file. Each row in the file represents one geofence location. Every location requires columns for:
- Name
- Address OR Latitude and Longitude
You can also include any of the following optional columns:
- Radius — the size of the geofence area in meters
- Description
- Status — active or inactive; whether the geofence is enabled for triggering events
- Enter — true or false; whether to trigger an event when a profile enters the geofence
- Exit — true or false; whether to trigger an event when a profile exits the geofence

You can download a pre-formatted template directly from the import flow. Navigate to Audience > Geofences > Import locations and select Create your own template. In the modal that appears, choose the columns that you want to include and then select Download. Open the downloaded file in any spreadsheet tool, such as Excel or Google Sheets, and fill in your location data. Then save the file as a .csv, .text/csv, or.applications/csv.

Upload your CSV file
Once your file is ready:
- Navigate to Audience > Geofences.
- Select Import locations.
- On the Upload locations to create geofences screen, drag and drop your file into the upload area, or click Select file to browse for it.
- Once the file has been updated, select Next.
- Map your CSV columns to geofence fields in Klaviyo.
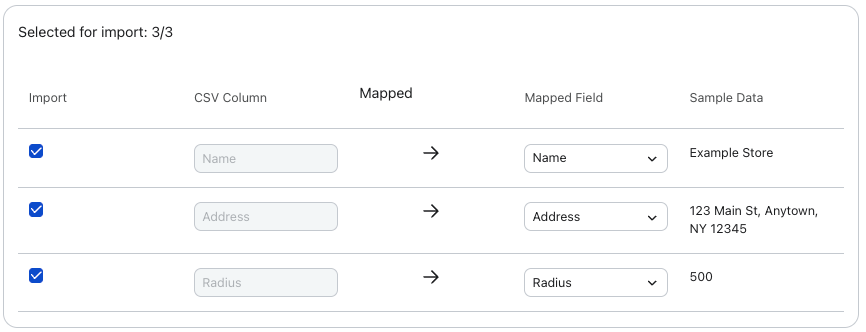
- When all mappings look correct, select Next.
- Select default values for any geofence properties that are not included in your CSV or that are blank in a given row.
- The map on the right side of the screen gives you a visual preview of the geofence radius. You can type a sample address into the search bar above the map to see approximately how large the geofence will appear in a real location.

- When your defaults are set, select Import.
Review your import history
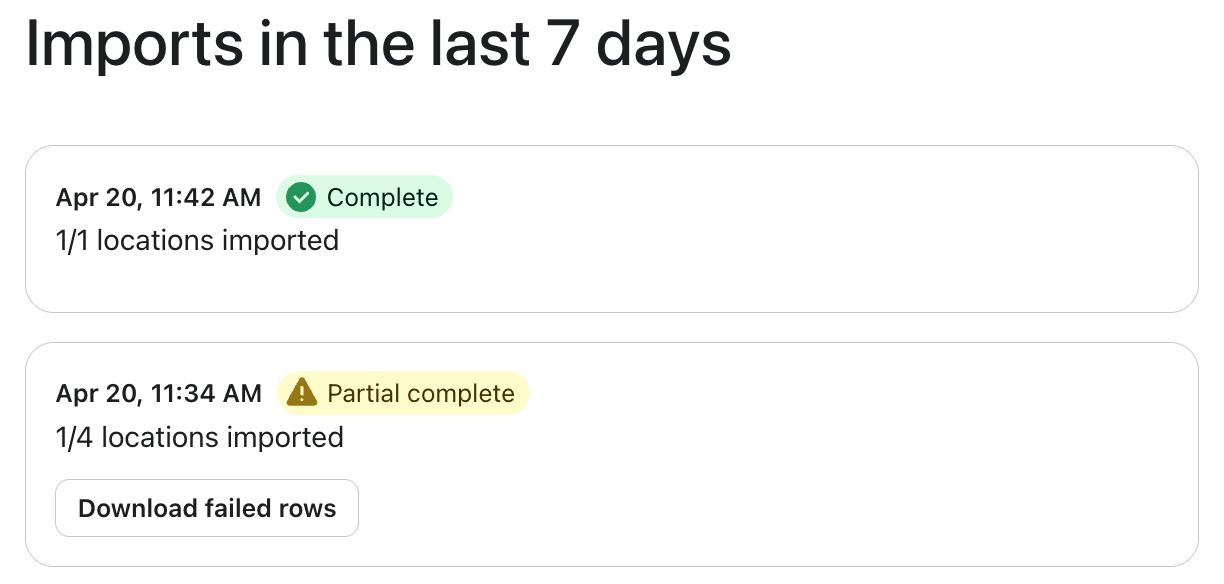
After you start an import, you can track its status in Import history. Each entry shows the date and time of the import, how many locations were imported, and the result:
- Complete — all locations imported successfully
- Partial complete — some locations imported, but others failed; select Download failed rows to get a CSV of the rows that did not import, which you can correct and re-upload
- Failed — no locations imported
Your import may take anywhere from a few seconds to a few minutes, depending on the size of your file. You can navigate away from the page, and the import will continue in the background.
Best practices
- Keep location names descriptive and consistent. Klaviyo uses the Name field as the primary identifier, so clear names make it easier to manage your geofences later.
- Use the Latitude/Longitude columns, instead of Address, when you need precise placement, such as for a specific entrance to a building or a location within a large complex.
- Start with a small test file of two or three locations before importing a large batch. This approach lets you confirm your column mapping and defaults are correct before committing to a full upload.
- Review the failed rows report after any partial import. Common issues include malformed addresses, unsupported values in the Status or Enter/Exit columns, or missing required fields.
Outcome
After a successful import, your locations appear in the Locations section of Klaviyo with the status and settings you configured. You can use these geofences in flows and segments to trigger messages based on your profiles’ locations.