Getting started with Magento 2.x (CE and EE)
You will learn
Learn how to integrate Klaviyo with your Magento 2 CE or EE store. You'll need to install the Klaviyo extension in Magento, configure the extension and set up OAuth, then enable the integration in Klaviyo. This guide covers all required integration steps, as well as how to confirm your historical data sync is successful.
Before you begin
Please note that Magento 2 versions below 2.4.0 are not supported.
To ensure that Klaviyo can make the necessary API calls for integration, your Magento 2 server must have a publicly accessible hostname. Magento 2 servers hosted locally will be unable to fully integrate with Klaviyo.
It is highly recommended to add Klaviyo IPs to your firewall provider’s allow list to minimize authentication and configuration issues. For more details, please check out How to allowlist Klaviyo integration traffic IP addresses.
Klaviyo's Magento 2 extension should be installed via Composer. Please note that installation via Composer requires an IT administrator with SSH access to the server where Magento 2 is hosted.
Install the Klaviyo extension in Magento 2
- Log in to your Magento 2 server and navigate to the root directory of your Magento app from your command line tool. This guide shows example outputs for Terminal, but these steps can be modified for any command line tool of your choice.
- Run the following command to access the latest version of the Klaviyo extension from Packagist. Packagist is a repository for PHP code libraries which allows you to easily install the latest version of the extension.
composer require klaviyo/magento2-extension - Run the following command to enable the Klaviyo extension you just downloaded:
php bin/magento module:enable Klaviyo_Reclaim --clear-static-content

- As displayed in the sample output, you must now enable any additional modules. Run the following command to enable them:
php bin/magento setup:upgrade - Scan the output for
Module 'Klaviyo_Reclaim'to confirm that the Klaviyo module is enabled and running. - To ensure that the CSS and JS on your Magento 2 store continues to work properly, you’ll need to run a static content deploy command.
php bin/magento setup:static-content:deploy -f

- You can now return to the Magento admin dashboard from your browser.
Installation via Composer is complete! Proceed to the next section for configuration instructions.
Configure the Klaviyo extension
How-to video
- In your Klaviyo account, navigate to the API keys tab.
- In a new tab, navigate to your Magento store admin.
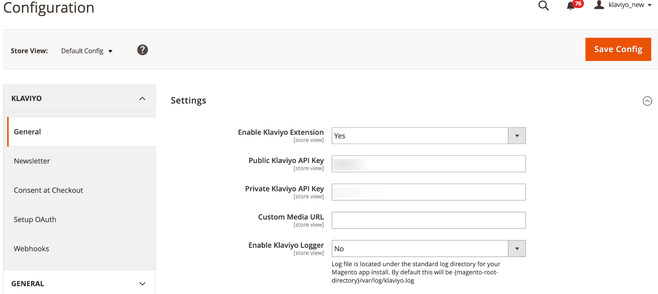
- Under Settings, click Stores > Configuration.
- From the Klaviyo dropdown, click General.
- Set Enable Klaviyo Extension to Yes.
- Copy your six-digit Klaviyo public API key from the API keys tab and paste it in the corresponding box in Magento.
- On the Klaviyo API keys tab, generate a new private key and then paste it into the corresponding box in Magento. Authenticating with your private API key will allow you to sync Newsletter subscriptions from Magento to Klaviyo.
In the next section, you'll set up OAuth, which enables other aspects of the integration.
Set up OAuth
Next, you'll enable OAuth authentication to securely connect your Klaviyo account to the Magento 2 extension.
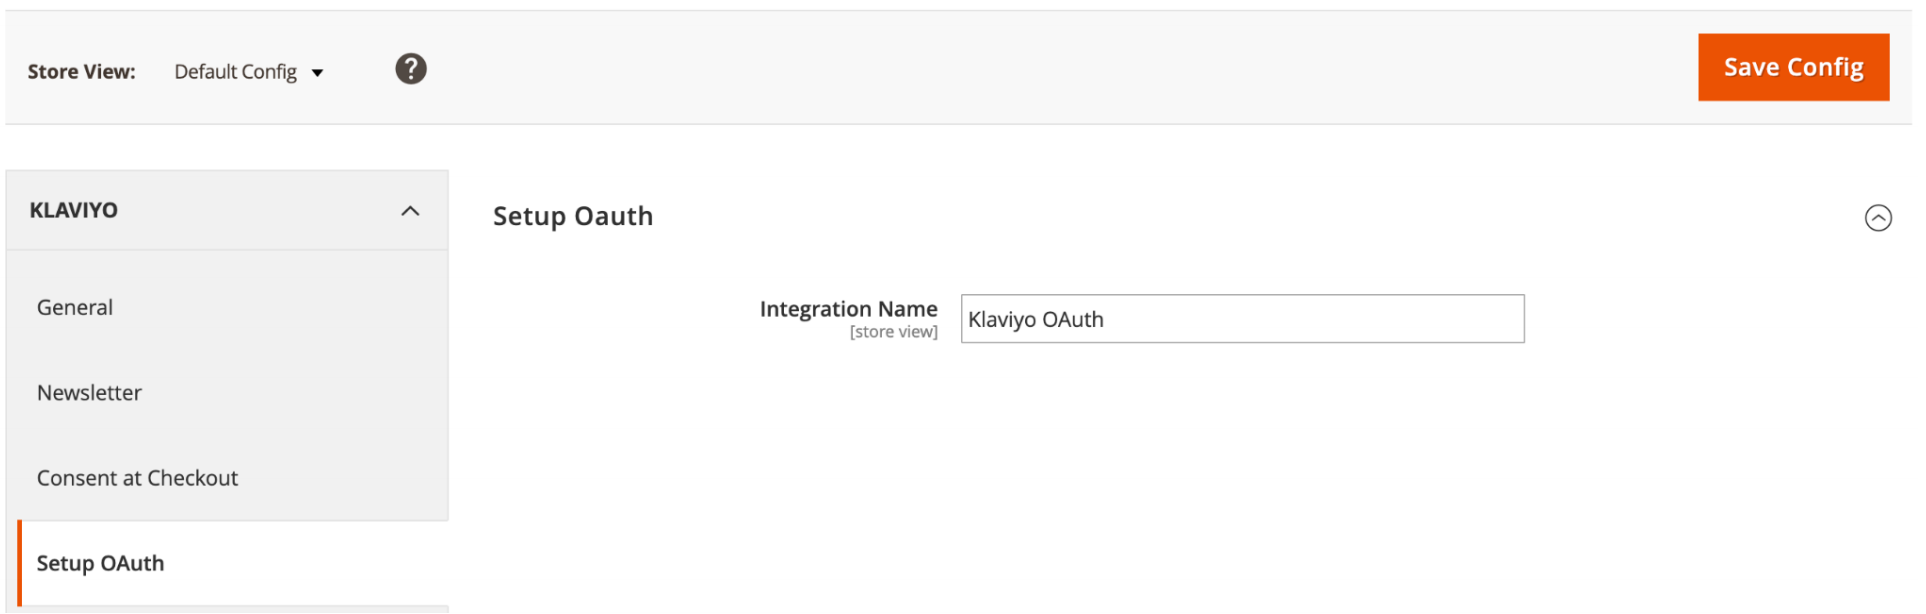
- Navigate to the Setup OAuth tab in Magento.
- Give your integration a memorable name, as you will need to locate it by this name later.
- Click Save Config to proceed.
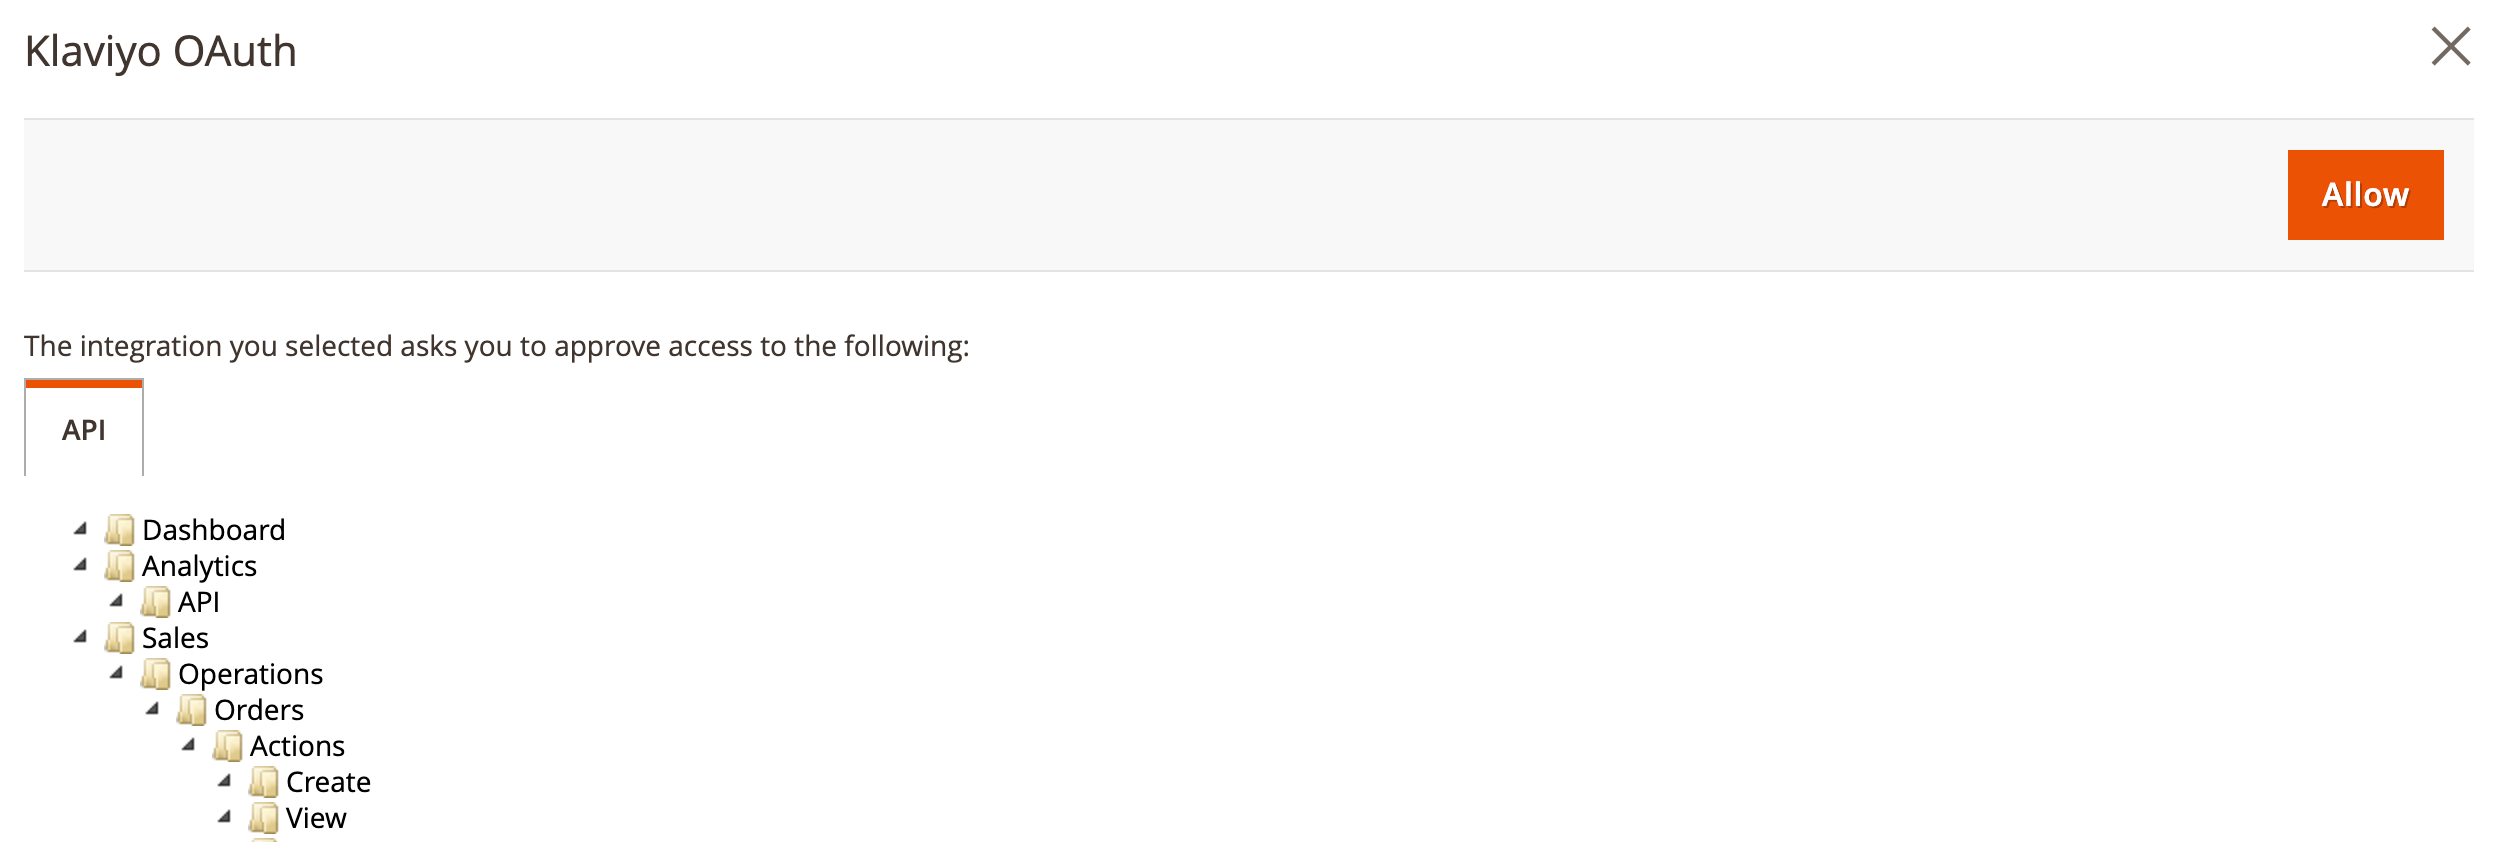
- Locate System in the left hand navigation pane and select Integrations from the System tray.
- Locate your integration name and click Activate. Activating the integration will open up a window requesting you to approve access.

- Click Allow to be redirected to Klaviyo, where you'll complete the integration setup.
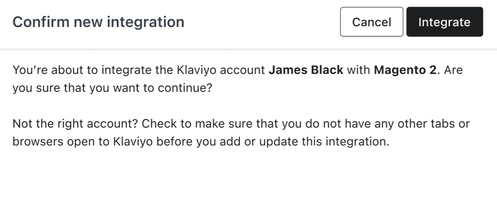
- Sign in to Klaviyo if prompted, or confirm your account name is correct and click Integrate. This will add the Magento 2 integration to the Klaviyo account associated with the API key you used for setup. If you are logged into multiple Klaviyo accounts and the correct account is not displaying, log out of any other sessions.
If the window closes automatically, the connection was successful. You can also confirm success by opening your Klaviyo account in a new browser tab or window, selecting the Integrations tab, and looking for Magento 2 on the list.
If you receive the following error instead, ensure that the API keys used in the first step correspond to the account you're currently logged in to.
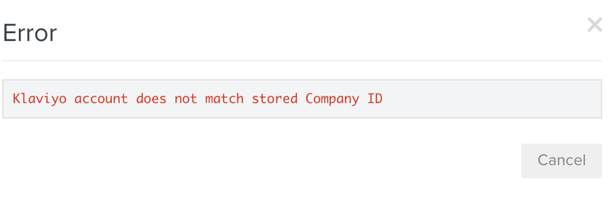
When establishing the connection between Magento and Klaviyo, if you receive a list of errors instead, you can click each error to learn more about the cause.

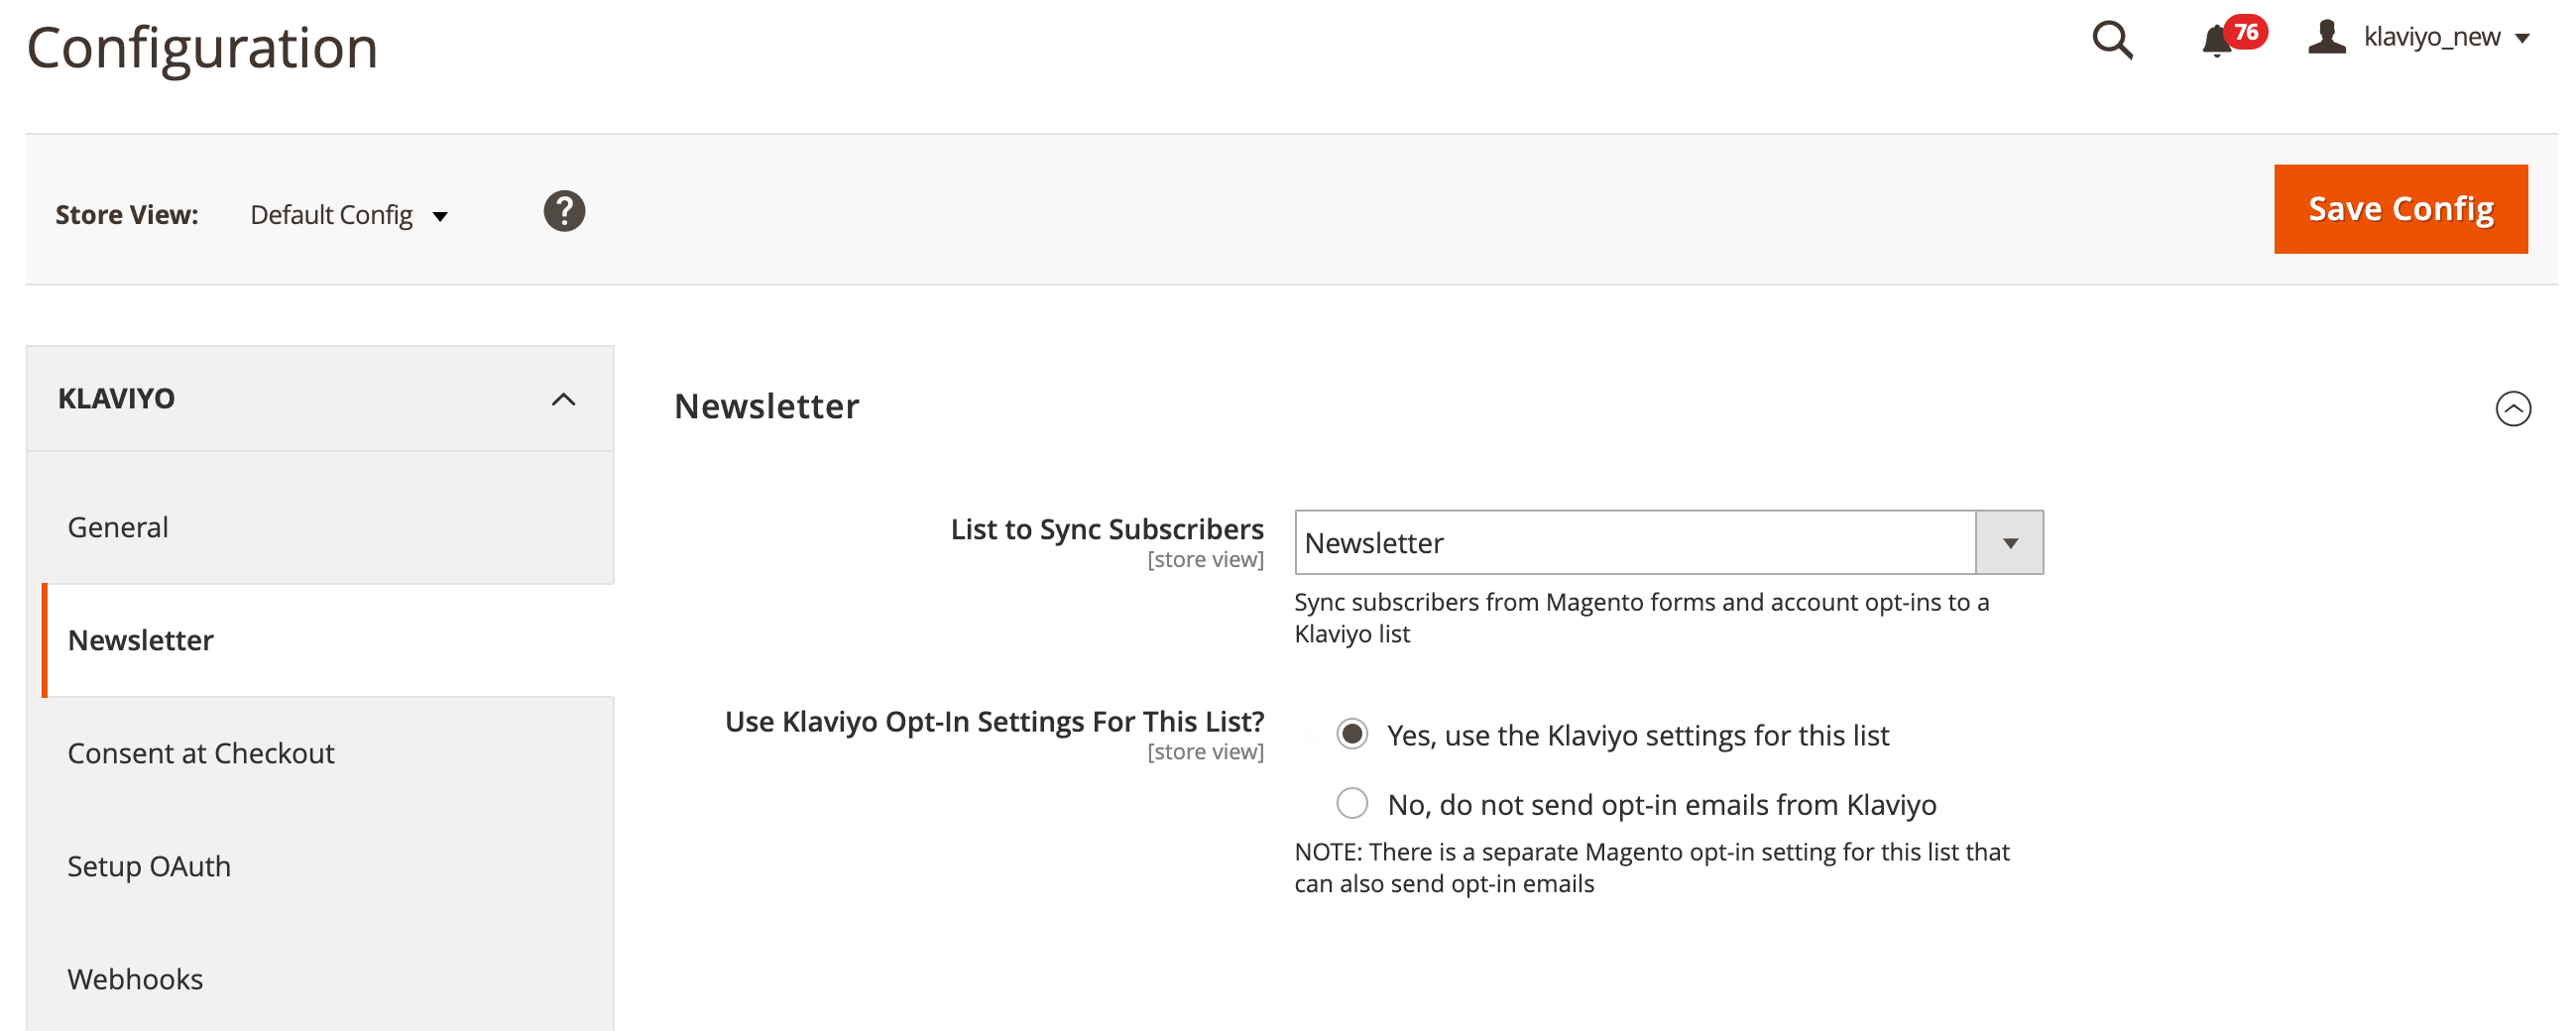
Set a newsletter list
Next, you'll select a Klaviyo list to sync your newsletter subscribers to. You also have the option of using Klaviyo opt-in settings or Magento 2 opt-in settings for your chosen list.
- In Magento, click Newsletter.
- Select the Klaviyo list you want to sync your Magento sign-up form to from the dropdown.
- Click Save Config.
Enable consent at checkout
Next, you can choose to enable consent at checkout for email and SMS.
Please note that if you enable consent at checkout, you'll also need to enable webhooks (below) in order for consent at checkout to function properly.
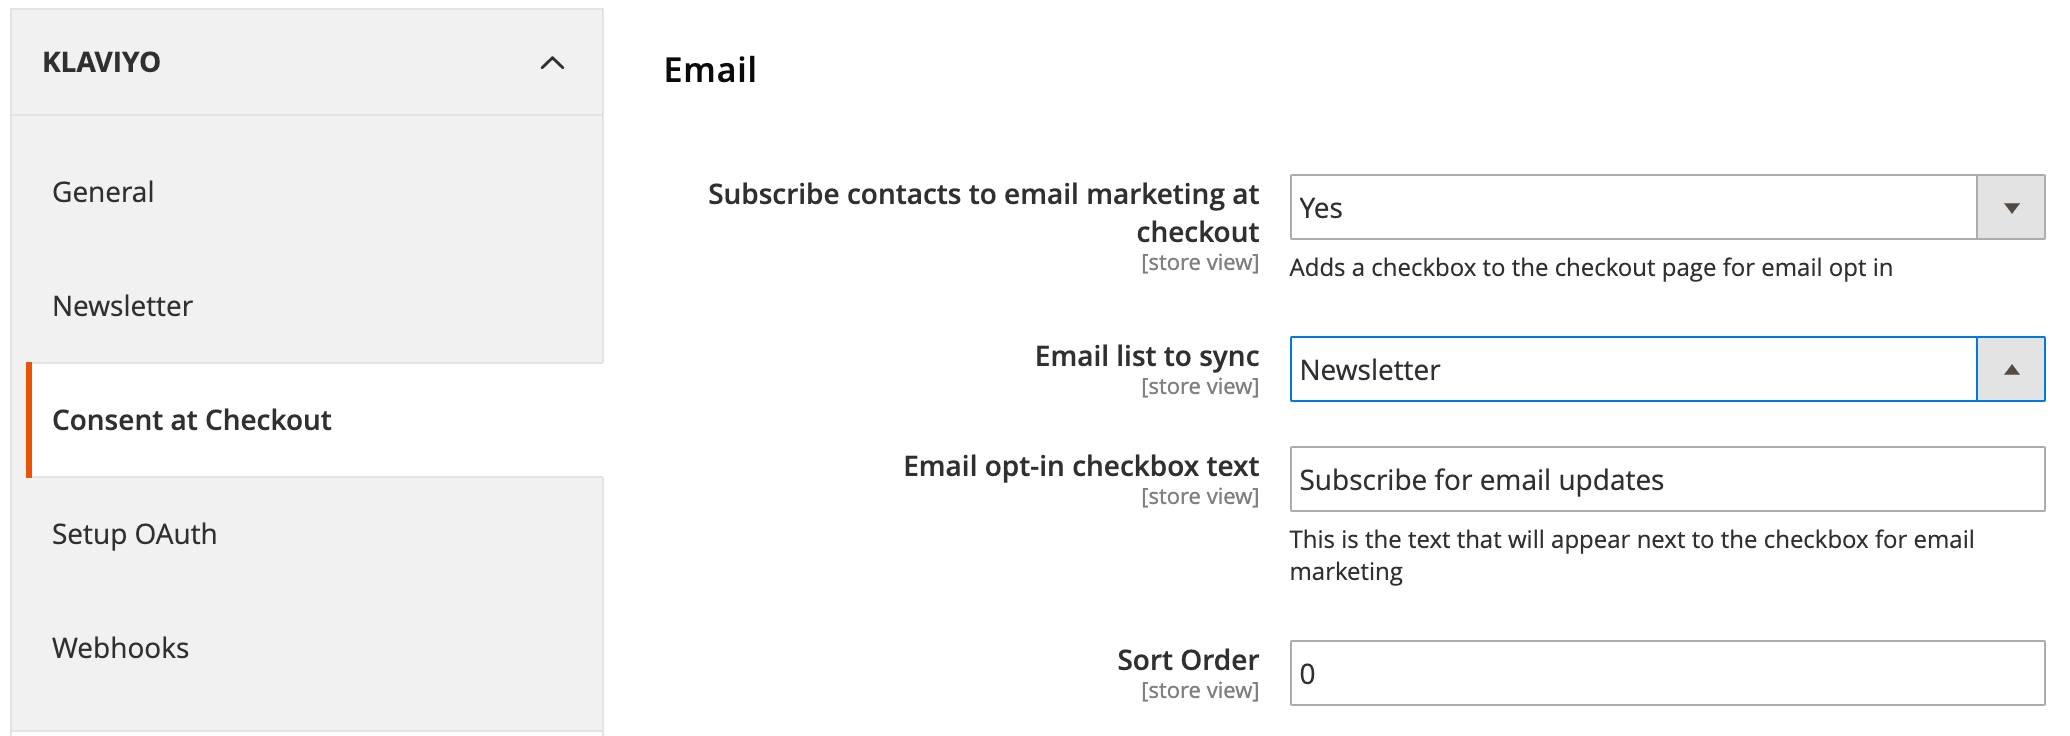
- On the Configuration page, under Klaviyo, navigate to Consent at Checkout.
- You’ll see a section for collecting email consent and mobile (SMS/WhatsApp) consent. The two are treated separately, so that you can collect just email, just SMS/WhatsApp, or both. If you gather both SMS/WhatsApp and email subscribers, choose a different list for SMS/WhatsApp than for email. This makes sure that consent will always be properly attributed to the correct channel.
- Consent will not sync (for both email and SMS/WhatsApp) until the customer finishes placing the order and, if applicable, confirms their subscription due to double opt-in.
- Note that for users already logged in to your Magento 2 store, the email consent checkbox will not appear at checkout by default.
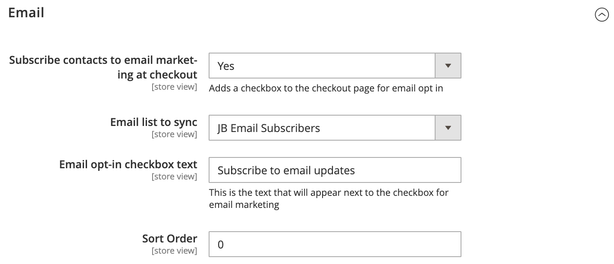
- Under Email, select Yes for Subscribe contacts to email marketing at checkout.
- Select an email list to sync subscribers to, such as a newsletter.
- Enter the email opt-in checkbox text you wish to use.
- Under Mobile, select Yes for Collect text message & WhatsApp subscribers.
- Choose the list you want your SMS/WhatsApp contacts to sync to. For additional detail regarding these settings, check out our guide to collecting SMS and/or WhatsApp consent at checkout.

- Sort order allows you to change the placement of the email and SMS consent boxes. By default, these boxes appear under the first email input and shipping phone number field, respectively. Thus, if you haven’t rearranged the checkout page, you do not need to change the sort order. If you have changed the layout, adjust the sort order accordingly.
- When you are finished, click Save Config in the upper right.
Enable webhooks
Next, you'll enable Klaviyo webhooks in your Magento 2 account. Please note that enabling webhooks is required for consent at checkout to function correctly.
- From the admin dashboard, navigate to Stores > Configuration.
- Click on Klaviyo and select the Webhooks tab.
- Create a webhook secret and enter it into the corresponding Webhook Secret field. The webhook secret is a key that Klaviyo will use for validation. This secret can be anything you choose, but we recommend creating a secure string of letters and numbers. Magento will hide your webhook secret with asterisks for security purposes, so be careful to enter it correctly.
If you are using a multi-store integration, the webhook secret in this field should be entered in your default configuration, and the same secret will be used as validation for each store configuration. The webhook secret should only be added to the default config and should not be added per store.
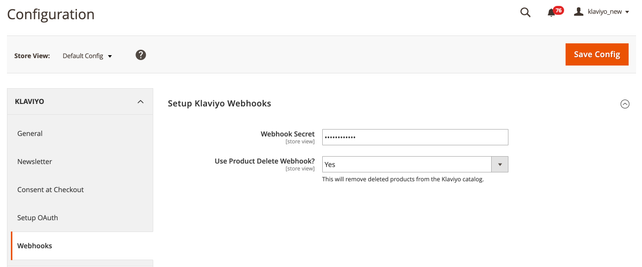
- Next to the webhooks you wish to enable, select Yes from the dropdown. To read more about the webhooks supported by Klaviyo, check out our guide to webhooks for Magento 2.
- Click Save Config.
Enable the Magento 2 integration in Klaviyo
How-to video
- Open Klaviyo, then select Integrations from the left-hand navigation. Find Magento 2 on the list and select it.
- On the next page, you'll have the option to add new Magento 2 customers to a Klaviyo list. Click the checkbox to Add new Magento 2 customers to a Klaviyo list and select a list from the dropdown. Note that checking this setting will only add customers to the selected list, but not subscribe them to marketing messages.
This setting will only sync new customers; existing customers need to be manually migrated from your Magento list to Klaviyo.
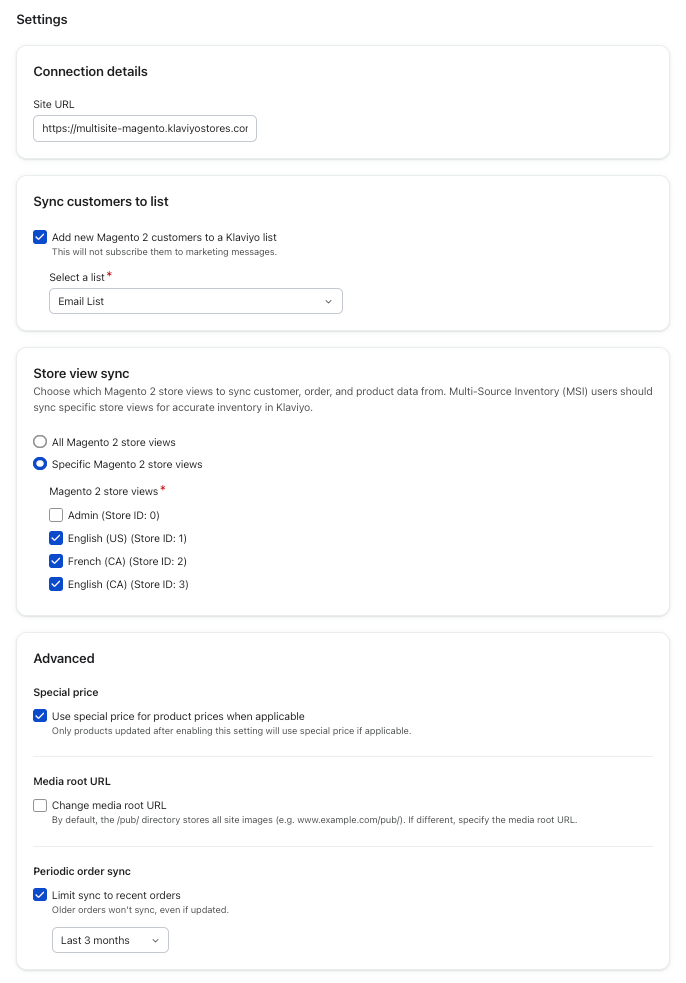
- Next, select which store views from Magento 2 you would like to sync to Klaviyo. All store views are synced to Klaviyo by default. This setting allows you to be selective about which stores you integrate with. If you’re using Multi-Source Inventory (MSI) in Magento 2, check Specific Magento 2 store views and select the stores you wish to sync in order to see your inventory properly represented in Klaviyo.
- Under Advanced, enable the following settings as needed:
- Special price settings
This setting refers to a special sale price for items that can optionally take effect in a certain date range. We highly recommend enabling this feature if you're planning to use it, as it's more difficult to enable later. When you enable Use special price for product prices when applicable, the product block will display the special price when applicable. When using a dynamic product feed, the special price will populate at send time. When manually selecting items from your catalog, the special price will populate once you select the product(s). For each product, there are 4 metadata fields that will sync:- price
(Required, float) The standard price of the item. - special_price
(Optional, float) This is a special sale price for the item. When this price is in effect, you will see this special_price next to a strikethrough of the price. - special_from_date
(Optional, date) This specifies a start date for special_price to take effect. - special_to_date
(Optional, date) This specifies an end date for special_price being in effect.
- price
- Custom Media Root URL
This setting allows you to change the default path for your site images. Enable this setting if you host your product images on a URL that is different than your website. - Limit Periodic Order Sync to recent orders
Periodic order syncs identify orders that have been updated since the previous periodic sync and include them in the next sync. This setting allows you to limit which orders are eligible for periodic order syncs based on when the order was created. When enabled, you can select a relative date range, and only updated orders created within that timeframe will be included in the next periodic order sync. This helps prevent older orders from being re-fetched during periodic syncs when non-meaningful updates occur to those orders.
- Special price settings
- Click Save.
You've now successfully enabled the Magento 2 integration! Your data will begin to sync to Klaviyo in minutes.
After the initial historical data sync is complete, the Magento 2 integration syncs every 30 minutes.
Data synced with the Magento 2 integration
Klaviyo's Magento 2 integration pulls key customer information from your Magento platform.
Here is some of the data we sync from Magento:
- Customer information including first name, last name, and location.
- Sales and order data including which items were purchased, item images, item categories, and any discounts applied.
- Fulfillment, refunded, and canceled order data.
- When people visit your website and which items they view; web tracking is handled by the extension.
To learn more, head over to our Magento 2 data reference.
Convert Magento order values into a single currency
Klaviyo supports the conversion of all foreign currencies in Magento to one primary currency in Klaviyo. Please contact support to enable this feature. This is especially helpful if you have multiple stores with transactions in different currencies.
When this feature is enabled:
- The conversion happens when Magento syncs order data into Klaviyo.
- Klaviyo will check if the order_currency_code is the same as the set global_currency_code. If not, Klaviyo will convert the order total from the order currency to the global currency specified to ensure that your financial analytics are accurate. Please note that order line items will remain in the order currency code and not be converted.
Upgrade your extension
Looking to upgrade your Klaviyo Magento 2 extension? Follow the instructions detailed in the Install section above and run the command to install the latest version. This will overwrite your current version and your update will be complete - there’s no need to re-configure the extension or re-enable the integration in Klaviyo.
Re-sync your catalog
You can prompt a full historical re-sync of your Magento 2 catalog at any time. Re-syncing your catalog can help you take advantage of Klaviyo updates to inventory and variant-related features.
To re-sync your catalog:
- In Klaviyo, select the Integrations tab.
- Select your Magento 2 integration from the list.
- Click the Data tab.
- Under Sync catalog data, click Re-sync.

Additional resources
- Magento 2 data reference
Learn what data Klaviyo imports from your Magento 2 store when you integrate the two platforms. Klaviyo's integration with Magento 2 pulls in all of the historical data in your Magento 2 store with the initial historic sync. Once enabled the integration will also begin to sync order and customer data every 30 minutes. Examples of this data include the information associated with past placed orders, fulfilled orders, etc.
- Klaviyo Community: Magento 2 "Ask Me Anything" Question and Answer Video