Zapier에 테스트 데이터를 보내는 방법
학습 내용
Klaviyo에 이메일 및 SMS 동의를 전송하는 웹후크를 만들 때 POST 요청을 통해 테스트 데이터를 Zapier로 보내는 방법을 알아보세요.
이 문서는 Zapier를 통해 동의를 Klaviyo로 보내는 방법의 정보를 바탕으로 작성되었습니다.
POST 요청을 만드세요.
트리거를 테스트하기 전에 POST 요청을 통해 웹후크로 테스트 데이터를 보내야 해요. 아래 단계에서는 Postman을 통해 POST 요청을 보내는 방법을 설명하지만, 원하는 어떤 프로그램이든 사용하셔도 좋아요.
- Zapier에서 생성된 웹후크 URL을 복사해 주세요.
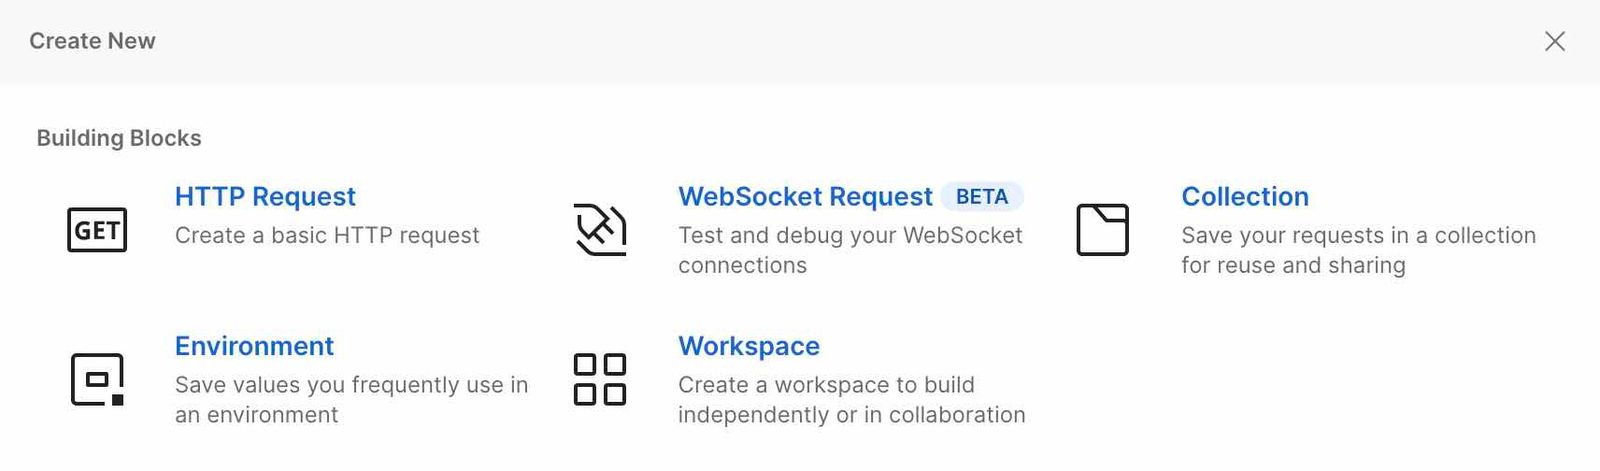
- Postman에서 New를 클릭해 새 요청을 시작하세요.
- 새로 만들기 메뉴에서 HTTP 요청 을 선택하세요.
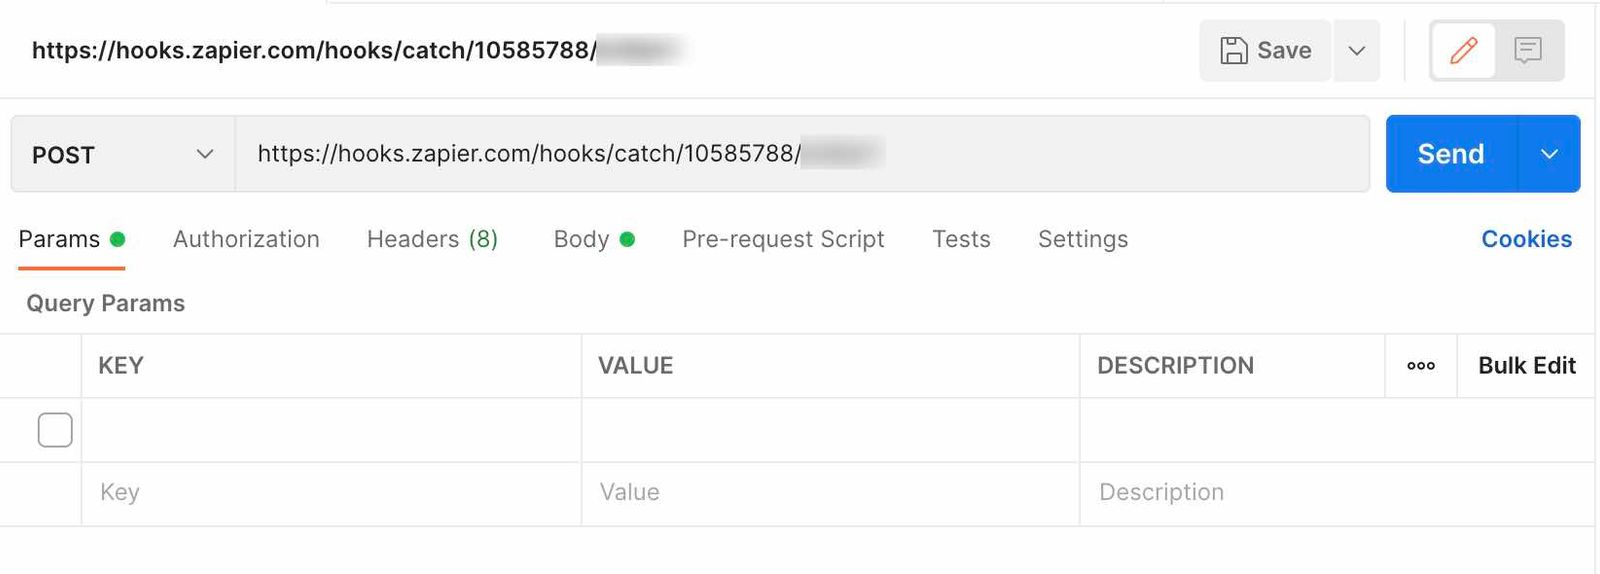
- 이전에 복사한 Zapier 웹후크 URL을 URL 상자에 붙여넣으세요.
- 웹후크 URL 왼쪽의 드롭다운에서 POST를 선택하세요.
- Body 탭을 선택하고 form-data 라디오 버튼을 선택한 다음, 다음 표에서 키와 적절한 테스트 데이터를 입력하세요. 전화번호가 올바르게 형식 지정되었는지 확인해 주세요. 프로필이 리스트에 추가되려면 웹후크를 테스트할 때 실제 전화번호를 사용해야 해요.
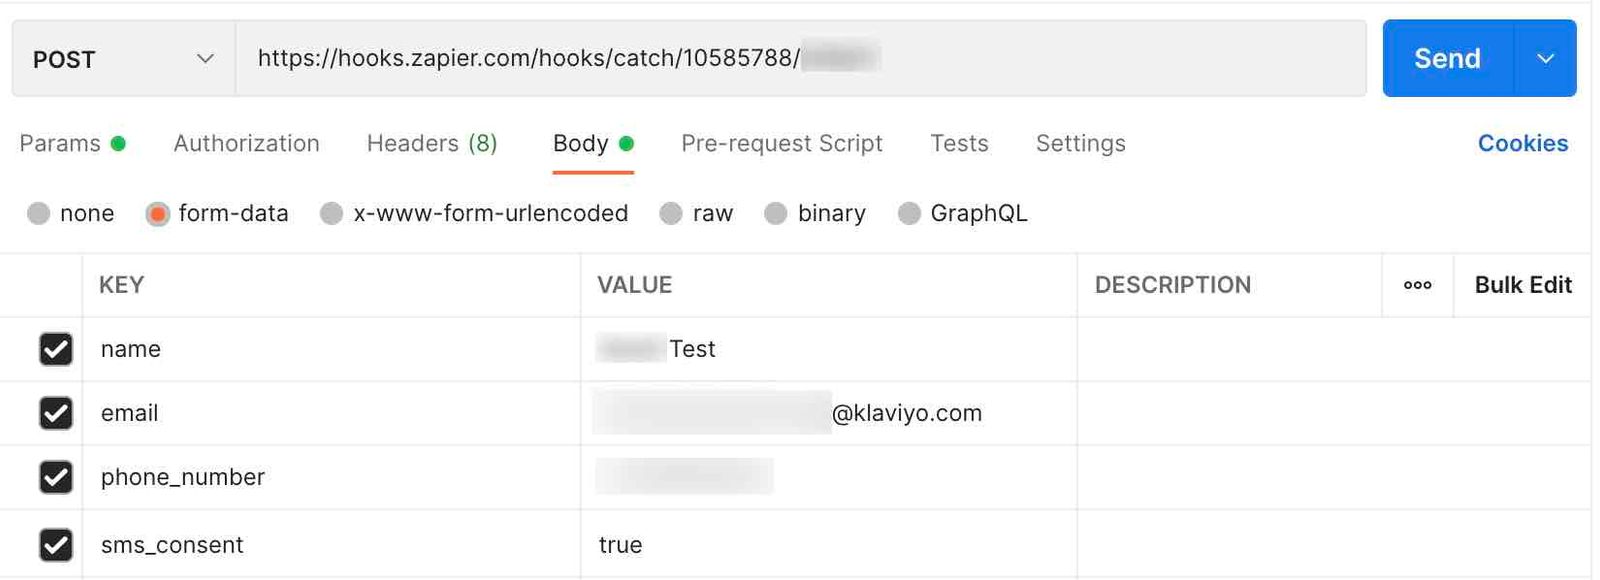
키 | 값 |
| <Test name> |
| <Test email> |
| <Test phone number> |
| 참 |
- 보내기를 클릭해 Zapier로 테스트 데이터를 전송해 주세요.
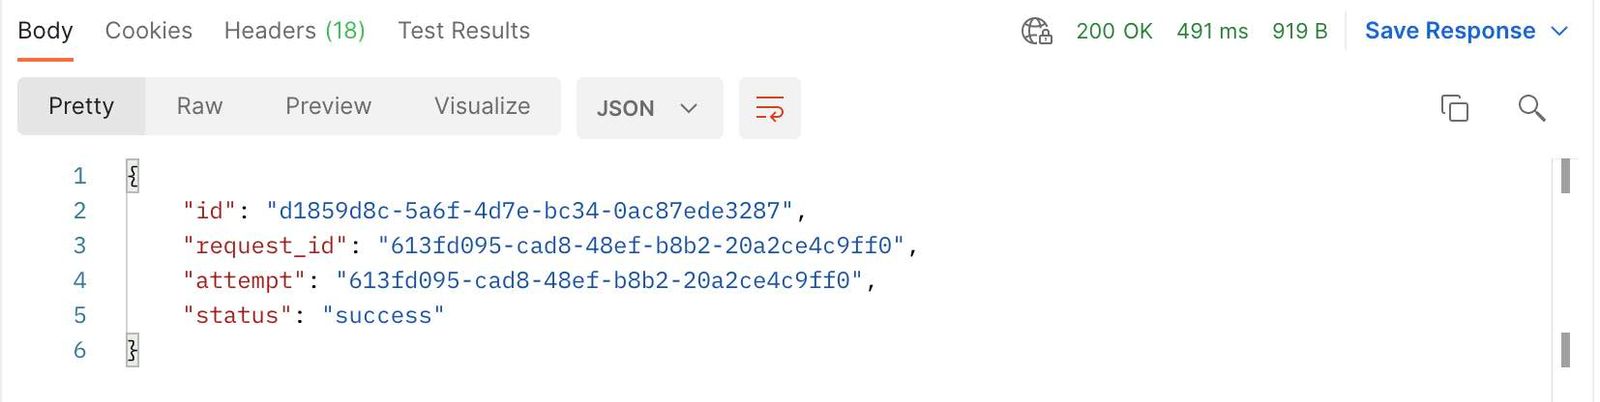
- POST 요청이 성공하면 응답에서
"status": "success"줄이 표시돼요.
이제 Zapier로 돌아가 웹후크 설정 프로세스를 완료할 수 있어요.
추가 자료
- Klaviyo API 시작하기
API 호출과 Klaviyo API가 비즈니스에 어떤 도움이 되는지에 대한 기본을 알아보세요. 이 가이드에서는 REST API, HTTP 메서드, 개발자 도구를 알아보고 Klaviyo API를 테스트할 수 있도록 준비해요. 첫 API 호출은 처음부터 끝까지 10분이면 완료할 수 있어요. 이미 API 호출에 익숙하고 API를 테스트할 준비가 되었다면, Postman 컬렉션을 사용하는 방법에 대한 가이드를 따라 해 보세요.
- Klaviyo 및 앱 간에 정보가 교환되는 방식 이해
API(애플리케이션 프로그래밍 인터페이스)를 통해 Klaviyo와 타사 앱 간에 정보가 동기화되는 방식에 대해 알아보세요. Klaviyo 연동을 통해 교환되는 대부분의 데이터는 단방향이에요. 즉, 데이터를 Klaviyo 계정으로 가져와 고객 데이터의 폭넓은 범위를 활용할 수 있어요.
- Zapier를 통해 Klaviyo로 동의를 전송하는 방법
SMS 동의를 Klaviyo로 전송하기 위한 맞춤 Zapier 웹후크를 만드는 방법을 알아보세요. 이 가이드의 지침을 간단히 수정해 이메일 수신 동의도 함께 보낼 수 있어요.