Google タグ マネージャーを使用して Klaviyo のオンサイトトラッキングを追加する方法
このページで学べること
Klaviyo のオンサイト トラッキング スニペットを、Google タグ マネージャーを使用してサイトに追加する方法をご覧ください。一部のサイト所有者は、サイトに追加する必要があるすべてのサードパーティのウェブ スニペットを管理する単一の窓口として Google タグ マネージャーを使用しています。Klaviyo のオンサイト トラッキングはこのカテゴリに該当し、Google タグ マネージャーを通じて追加および管理できます。
始める前に
Google タグ マネージャーと Shopify を使用して Klaviyo のオンサイト トラッキング スニペットをインストールする場合は、Shopify で Google タグ マネージャーを使用する方法をご覧ください。
Google Tag Manager の設定
すでに Google Tag マネージャー アカウントを作成している場合は、これらの手順をスキップして、タグを作成するセクションに進むことができます。
1. Google Tag マネージャー アカウントを作成します。
2. インストール スクリプトをサイトに追加します。
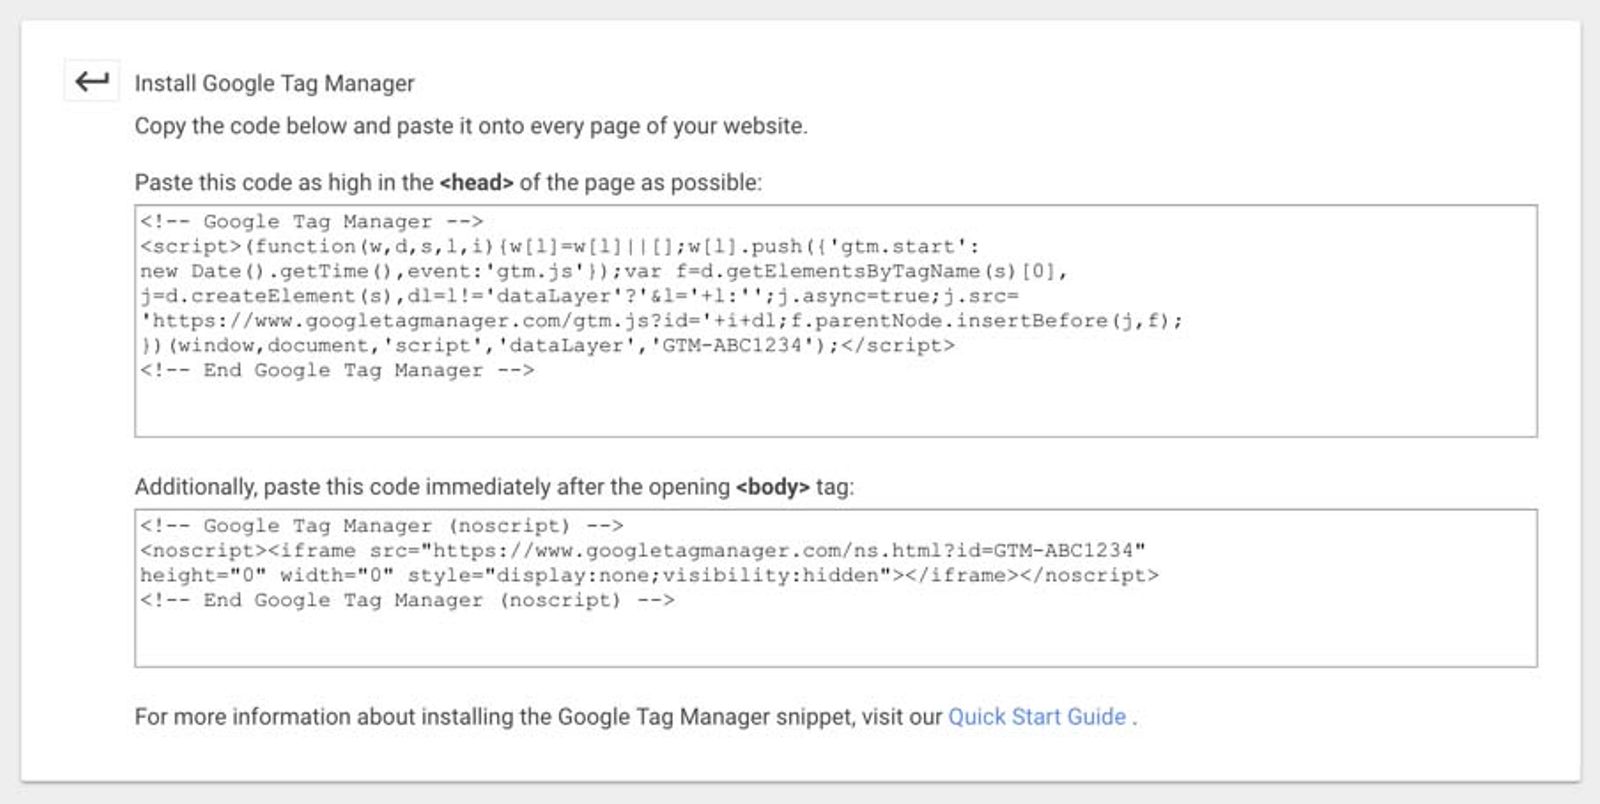
Google Tag マネージャーを初めて使用する場合は、アカウントの設定とインストールスクリプトをサイトに追加する方法について、ドキュメントをご覧ください。
タグを新規作成
1. サイトのワークスペース内で、Klaviyo の サイト上でアクティブ トラッキング用の新しいトリガーを作成します。サイト上でアクティブ トラッキングと 商品閲覧 トラッキングには、それぞれ別のトリガーを作成することをおすすめします。これは、商品閲覧 トラッキングは商品ページでのみトリガーされる一方で、サイト上でアクティブ トラッキングはサイトのすべてのページでトリガーされる必要があるためです。
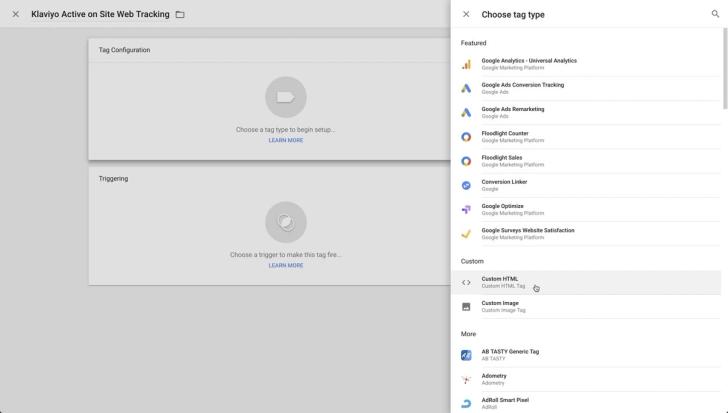
2. タグの種類として カスタム HTML を選択します。
3. Klaviyo で Active on Site スニペットを見つけるには、アカウントメニューをクリックし、[外部連携]
を選択します。4. ここから、右上の [ウェブトラッキングを設定] ボタンをクリックします。

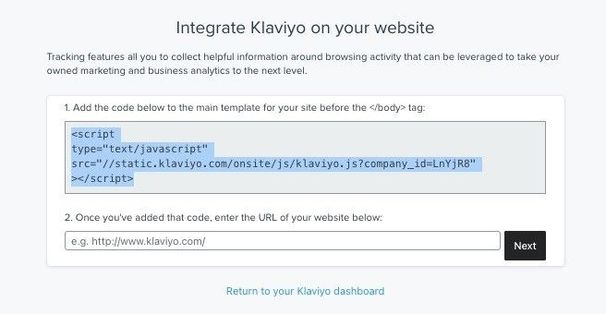
6. Google タグ マネージャーで、Klaviyo の 「サイトでアクティブ」 スニペットを HTML ボックスに貼り付けます。
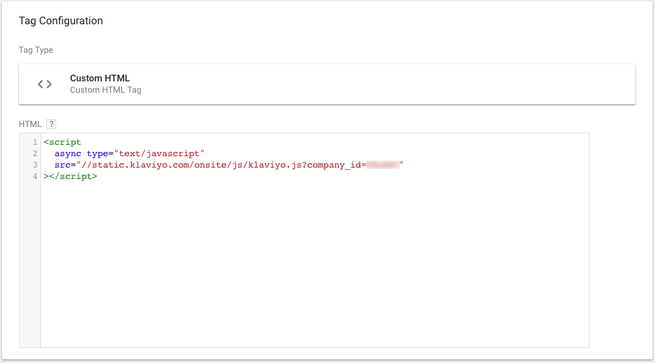
7. すべてのページのページビューでトリガーが発火するように設定します。これにより、お客様がサイト上のページを閲覧するたびに、Active on Site スニペットが発火します。
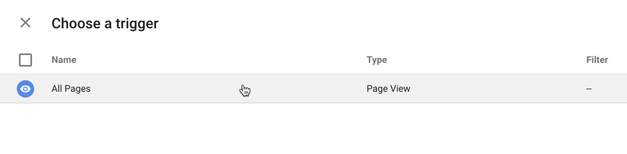
8. 新しいタグを保存します。これで、Google タグ マネージャーを使用して Active on Site トラッキング スニペットを追加する作業は完了です。
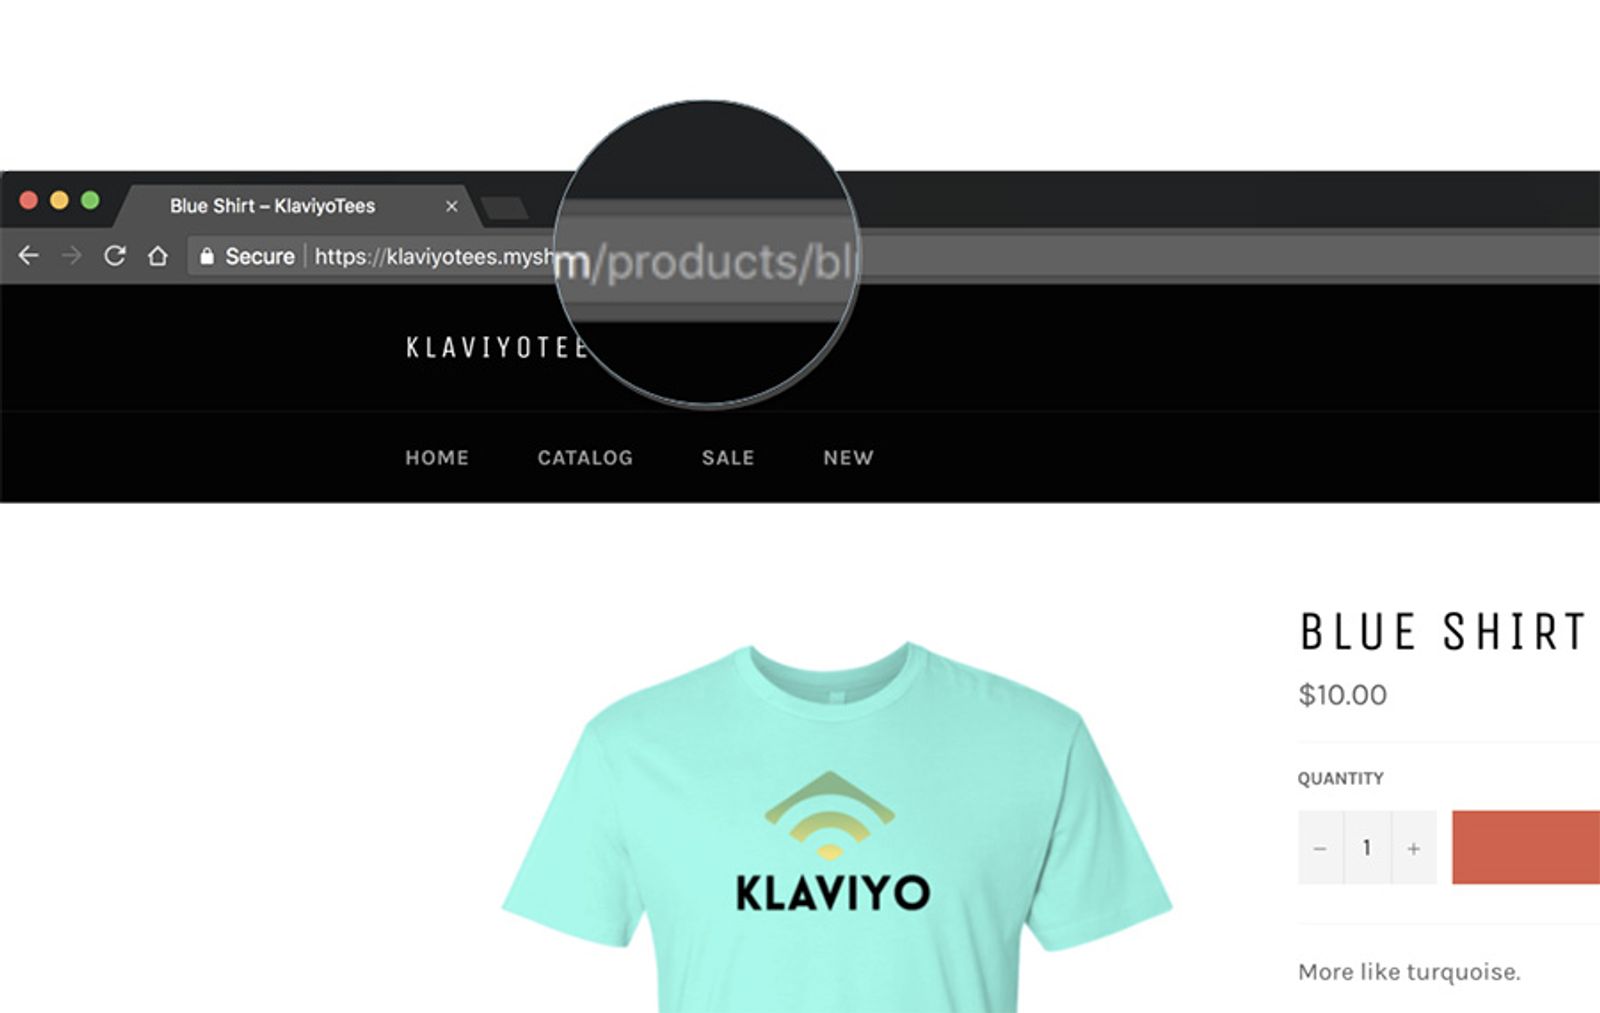
同じ方法で 「商品の閲覧」スニペットを追加できます。商品が含まれるページでのみ作動するようにトリガーを変更してください。一部のサイトでは、URL に「product」という単語が含まれるページでのみトリガーが作動するように制限することで、これを実現できます。
オンサイトトラッキングをテストする
1. ウェブサイトに移動します。
2. URL の末尾に次を追加します:
?utm_email=klaviyogreen@gmail.com
「klaviyogreen@gmail.com」を、ご自身のメールアドレスに置き換えることができます。Enter キーを押してページを再読み込みしてください。
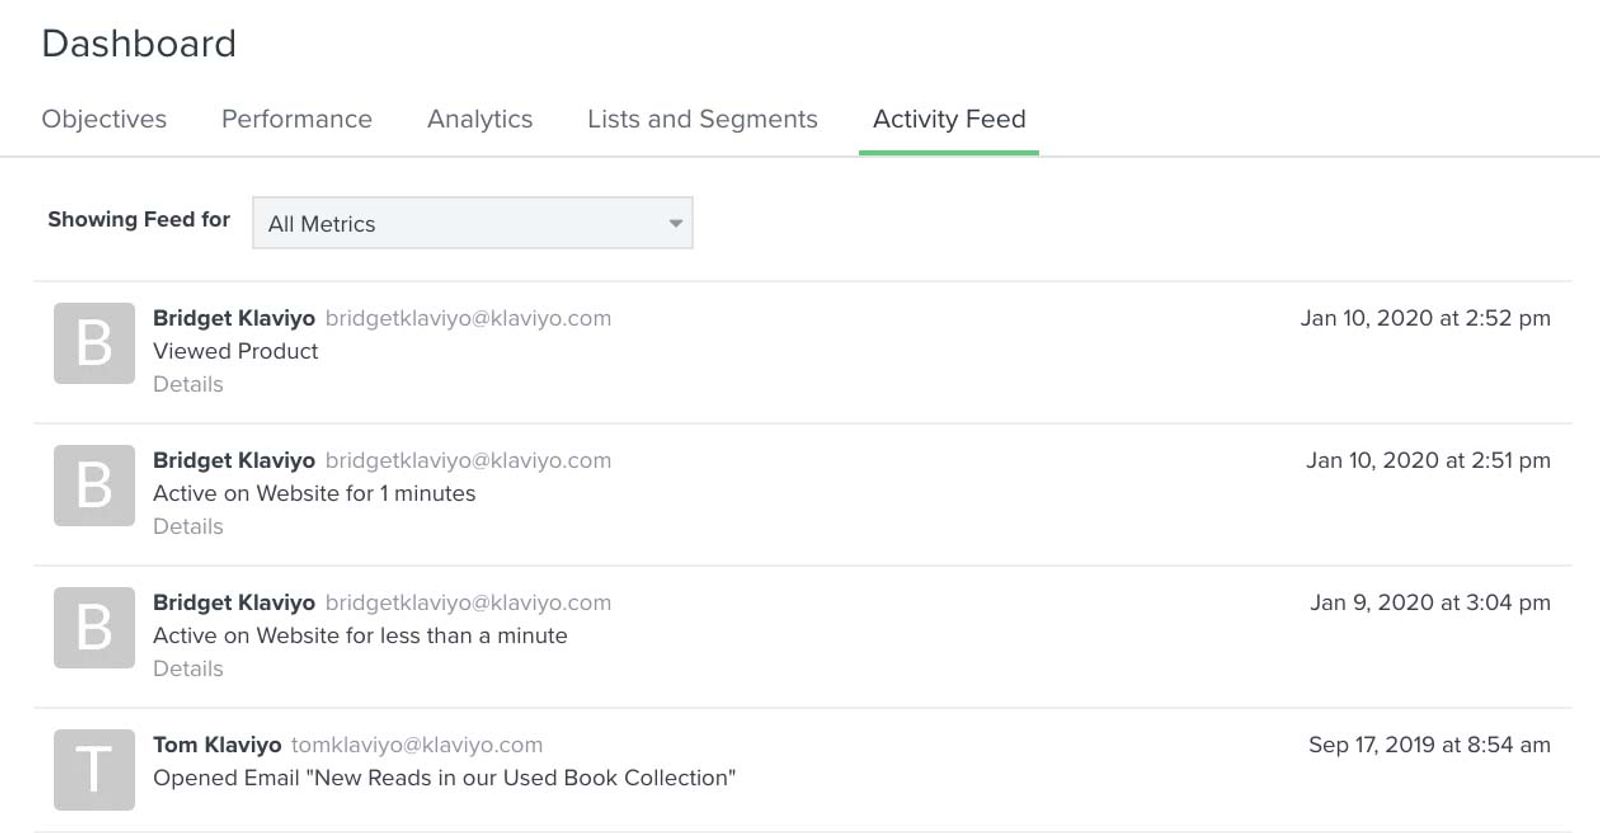
3.次に、Klaviyo アカウントで [ダッシュボード] > [アクティビティ フィード] に移動します。オンサイト トラッキングが正しくインストールされている場合、上記の URL パラメータに入力したメールからの新しい「サイト上でアクティブ」イベントが、アクティビティ フィードの上部に表示されます。
Viewed Product イベントが発火しない場合は、タグが特定の順序で発火するように設定されていることを確認してください。常に Active on Site スニペットが Viewed Product スニペットより先に発火するようにしてください。
Google Tag Manager でいずれかのトラッキングスニペットを保存しようとしてエラーが発生した場合は、スニペットを直接ウェブサイトに貼り付ける必要があります。
Shopify で Google タグマネージャーを使用する
Shopify では、Google Tag Manager を使用する代わりに、Shopify の Klaviyo アプリ埋め込みを通じて Klaviyo オンサイト トラッキングを有効にすることをおすすめします。アプリ埋め込みをオンにし、外部連携の設定ページで Viewed Product 設定にチェックを入れると、Active on Site と Viewed Product のトラッキングの両方が有効になります。Shopify 外部連携では、Track behavioral events 設定を通じて Submitted Search、Viewed Collection、Added to Cart も有効になります。
代わりに Google Tag Manager を介してオンサイト トラッキングを追加する場合は、まずアプリの埋め込みをオフに切り替えてください。次に、以下のスニペットを使用します。
"Collections" は Shopify の AJAX API では利用できないため、代わりに Shopify 商品タグ(Tags)が、以下のスニペットで取得されます。
<script type="text/javascript">
//Initialize the Klaviyo object on page load
!function(){if(!window.klaviyo){window._klOnsite=window._klOnsite||[];try{window.klaviyo=new Proxy({},{get:function(n,i){return"push"===i?function(){var n;(n=window._klOnsite).push.apply(n,arguments)}:function(){for(var n=arguments.length,o=new Array(n),w=0;w<n;w++)o[w]=arguments[w];var t="function"==typeof o[o.length-1]?o.pop():void 0,e=new Promise((function(n){window._klOnsite.push([i].concat(o,[function(i){t&&t(i),n(i)}]))}));return e}}})}catch(n){window.klaviyo=window.klaviyo||[],window.klaviyo.push=function(){var n;(n=window._klOnsite).push.apply(n,arguments)}}}}(); </script>
<script type="text/javascript">
//Viewed Product
var klaviyo = window.klaviyo || [];
product_handle = location.href.split( '/' ).pop().split( '?' )[0];
fetch('/products/'+product_handle+'.js').then(function(response){return response.json()})
.then(function(product){
  var item = {
    Name: product.title,
    ProductID: product.id,
    Tags: product.tags,
    ImageURL: "https:"+product.featured_image,
    URL: location.href.split( '/' )[0] + '//' + location.href.split( '/' )[2]+product.url,
    Brand: product.vendor,
    Price: product.price/100,
    CompareAtPrice: product.compare_at_price_max/100
  };
  klaviyo.track("Viewed Product", item);
  klaviyo.trackViewedItem({
    Title: item.Name,
    ItemId: item.ProductID,
    Tags: item.Categories,
    ImageUrl: item.ImageURL,
    Url: item.URL,
    Metadata: {
      Brand: item.Brand,
      Price: item.Price,
      CompareAtPrice: item.CompareAtPrice
    }
  });
// If you would like to add the Added to Cart snippet as well, place that here without its script tags
})
.catch(function(e){
  console.log('Klaviyo could not track Viewed Product. Please contact Klaviyo Support for assistance.')
});
</script>
EU、EEA、英国、スイスにあるストアの訪問者については、お客様が Shopify で設定した顧客情報保護方針に基づき、サイト訪問者の同意がない場合、Klaviyo はオンサイトイベントをトラッキングしない可能性があります。
その他のリソース
- Getting started with Klaviyo onsite tracking
Learn about the different ways that Klaviyo can support onsite tracking on your ecommerce site. There are 2 key types of onsite tracking:
- Understanding message conversion tracking
Learn how conversion tracking works for email, SMS, and mobile push messaging and how to edit these settings. For each campaign and flow sent, Klaviyo automatically tracks conversions. This allows you to analyze the performance of your marketing channels and their individual success.
- How to create a browse abandonment flow
Learn how to create a browse abandonment flow to show shoppers products they viewed but didn’t purchase.