How to use custom CSS in sign-up forms
Custom CSS is an advanced feature intended for users comfortable writing CSS. If you're not familiar with CSS, the standard styling options in the forms editor cover all necessary customization needs.
Learn how to use custom CSS to style your Klaviyo sign-up forms beyond what's available in the forms editor. Custom CSS gives you fine-grained control over properties like line height, letter spacing, and element spacing, so your forms can match your brand exactly.

Before you begin
Note the following before using custom CSS:
- Custom CSS is available on paid Klaviyo plans only. This feature is rolling out gradually, so you may not see it in your account yet.
- Klaviyo Support cannot troubleshoot custom code. Issues caused by custom CSS (e.g., broken layouts, hidden fields, rendering problems) are your responsibility to debug and fix. If a form with custom CSS isn't displaying or behaving correctly, disable custom CSS first to check whether your code is the cause.
- Custom CSS applies styling only. You cannot add or edit the HTML of your form or its blocks through this feature.
- Test before you publish. Custom CSS can affect form usability (e.g., accidentally hiding a required field can prevent signups). Always preview and test your form before publishing.
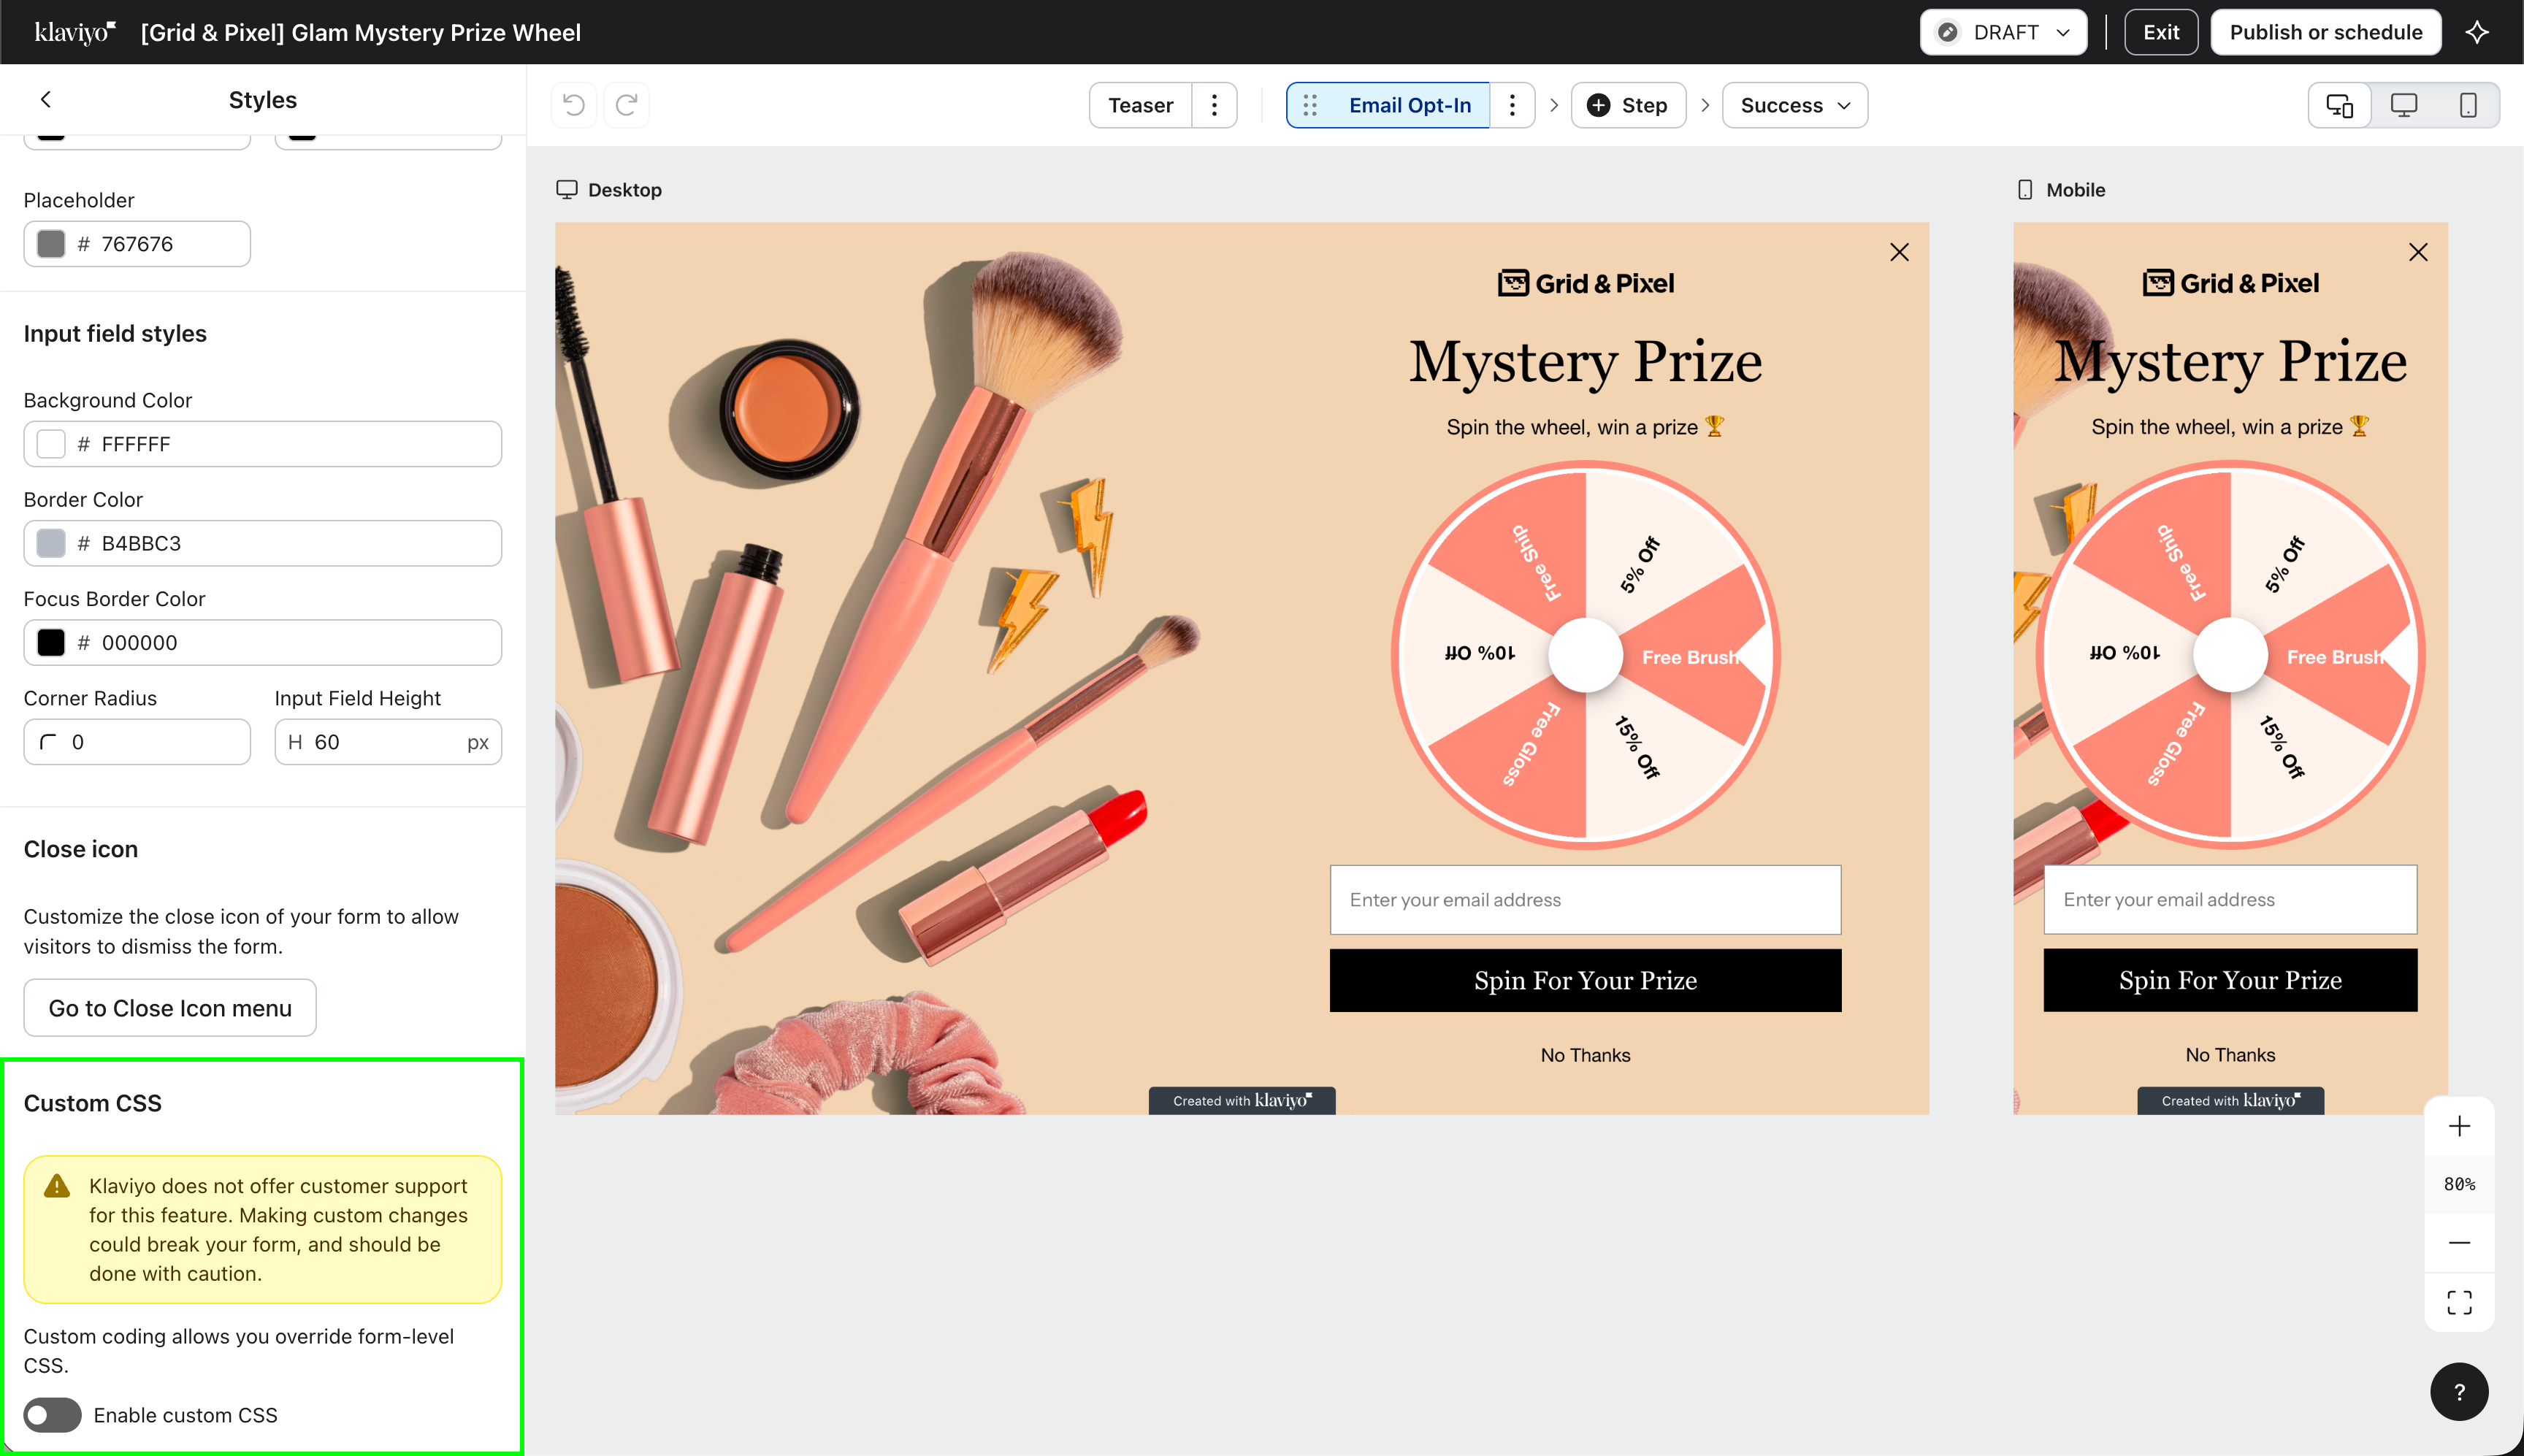
Enable custom CSS
To enable custom CSS on a form:
- Navigate to Sign-up forms and open your form in the editor.
- Select the Styles tab.
- Scroll to the Custom CSS section at the bottom of the panel.
- Toggle custom CSS on.
- Review the warning message. By enabling custom CSS, you acknowledge that Klaviyo Support cannot assist with issues caused by your custom code.
Once enabled, a CSS editor appears where you can write custom CSS for your form. Custom CSS is enabled per form; toggling it on for one form does not affect your other forms.
Set class names on form components
When custom CSS is enabled, each component in your form gets a CSS class field, visible at the bottom of the component's sidebar when you select it. The class name defaults to the component's name, and you can override it with your own for easier access.
Use these class names as selectors in your CSS. Setting your own class names is the most reliable way to target form elements, because they stay stable and readable.
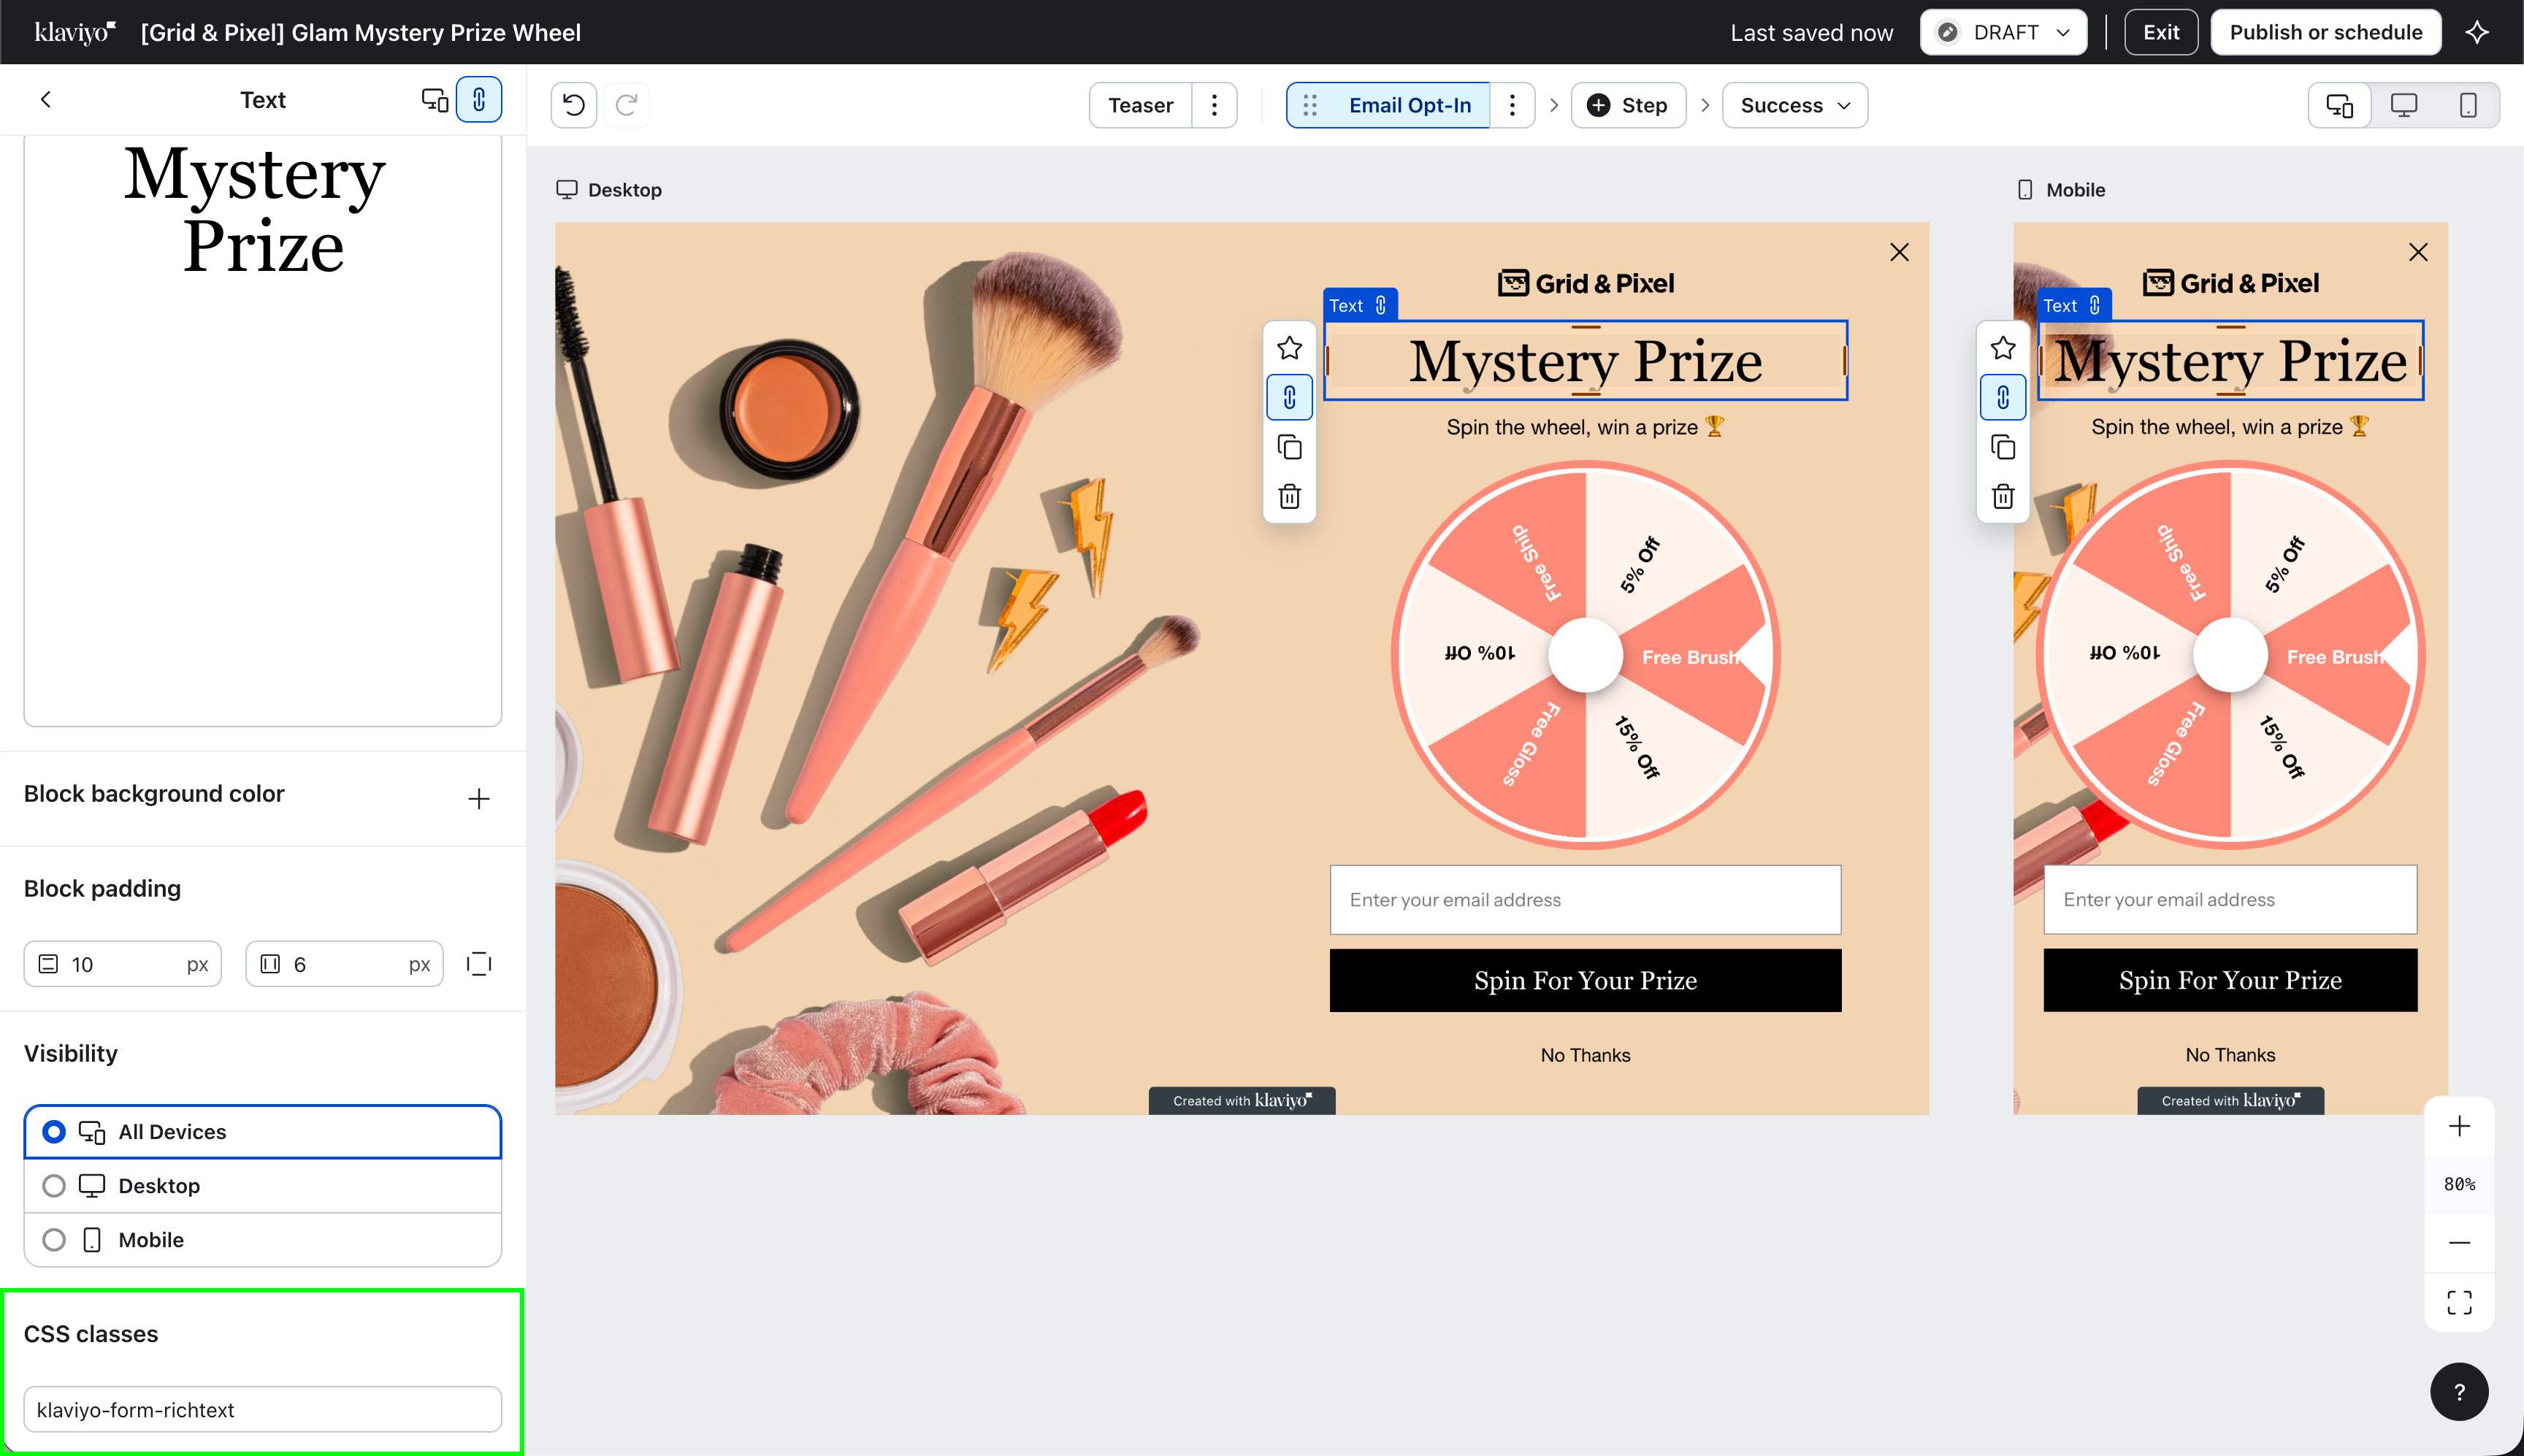
If you later disable custom CSS, your class names are kept and will reappear if you re-enable it.
Write your CSS
The CSS editor starts empty — it does not show your form's current styles, because those are generated when the form renders on your site. To target elements, use either of these approaches:
- Use your class names. Reference the class names you've set on your form components (recommended).
- Inspect your live form. Open your published form on your website, then use your browser's developer tools (right-click > Inspect) to identify the selectors you want to target.
Avoid targeting Klaviyo's auto-generated class names. These are internal, may include hashed values, and can change without notice — which would silently break your CSS. Use your own class names instead.
Example
Suppose you set the class name form-headline on your headline block and email-input on your email input block:
.form-headline {
  line-height: 1.2;
  letter-spacing: 0.5px;
}

.email-input {
  margin-bottom: 12px;
}
Custom CSS also unlocks styling that isn't available in the editor, such as right-to-left text:
.form-headline {
  direction: rtl;
  text-align: right;
}
Preview and publish
After writing your CSS:
- Use the editor preview to check your form's appearance.
- Verify your form on both desktop and mobile, since custom CSS can affect each differently.
- Publish your form on a non-public facing page to validate how it shows up onsite.
- Submit a test signup on your published form to confirm all inputs and buttons still work.
- Publish your form publicly.
Disable custom CSS
To remove custom styling, toggle custom CSS off in the Styles tab. Your form immediately returns to its standard editor styling. This is also the fastest way to check whether a display issue is caused by your custom code. Your previous CSS code will be saved for if you choose to turn custom CSS back on.
Troubleshooting
- Klaviyo Support cannot troubleshoot custom code. Issues caused by custom CSS (e.g., broken layouts, hidden fields, rendering problems) are your responsibility to debug and fix. If a form with custom CSS isn't displaying or behaving correctly, disable custom CSS first to check whether your code is the cause.
My CSS isn't applying.
Confirm that custom CSS is toggled on, your selectors match the class names set on your components, and you've published the latest version of the form. Styles on your website can also conflict with or override form styles; use your browser's developer tools to check which rules are winning.
My form looks broken or stopped collecting signups.
Disable custom CSS to confirm the cause, then review your code. Check especially for rules that hide or reposition inputs and buttons.
I don't see the Custom CSS section.
Custom CSS is only available on paid plans and is rolling out gradually. If you're on a paid plan and don't see it yet, check back soon.
Typography styles on a custom class aren’t applying.
If layout styles like margin work but text styles like letter-spacing or line-height do not, the custom class is likely attached to the outer wrapper while the visible text is rendered in a nested child element. In that case, target the child elements too, for example: .form-headline, .form-headline * { ... }.
Frequently asked questions
Can I add custom HTML to my form?
No. You can't add HTML elements to a form or edit the HTML of existing blocks. Custom CSS only changes the styling of your form's existing components.
Does custom CSS work on all my forms?
Custom CSS is enabled per form, for forms displayed on your website. Enable it individually on each form you want to customize.
Will Klaviyo Support help me write or fix my CSS?
No. Klaviyo Support can't write, review, or troubleshoot custom code. If a form with custom CSS has an issue, you'll be asked to disable custom CSS to rule it out before Support can investigate further.
What happens to my CSS if I disable the feature?
Your form reverts to standard styling. Your component class names are saved and restored if you re-enable custom CSS.